DAY 9
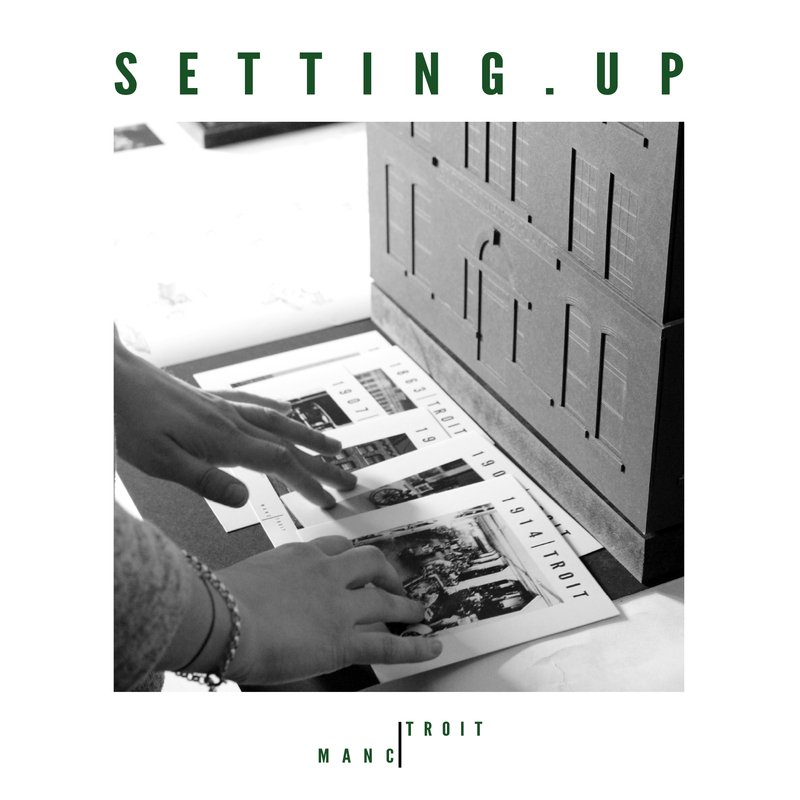
Today we met to organise the last steps to finalise our output. We first printed out the materials prepared during this workshop to show our idea of integrating information within a physical model. Once we got the prints, we brought the timeline and the 10 postcards to B.15 to finally combine them with the architectural maquettes. As established, our final output is going to be a combination of different type of information in order to deepen the stories that our models are telling about the Ford Factories as the main industrial connection between Manchester and Detroit.
Posted 4 Apr 2019 14:57
Moving on from yesterday's discussion panels, all students will have answers to most of their questions. The page layout follows the format like how we discussed yesterday on the type of information that builds up into asking a certain question. Answers from the panel is noted down and analysed to give our own opinion backed up by the information/ statistics we found on journals/ publication or reports.
Posted 4 Apr 2019 14:52

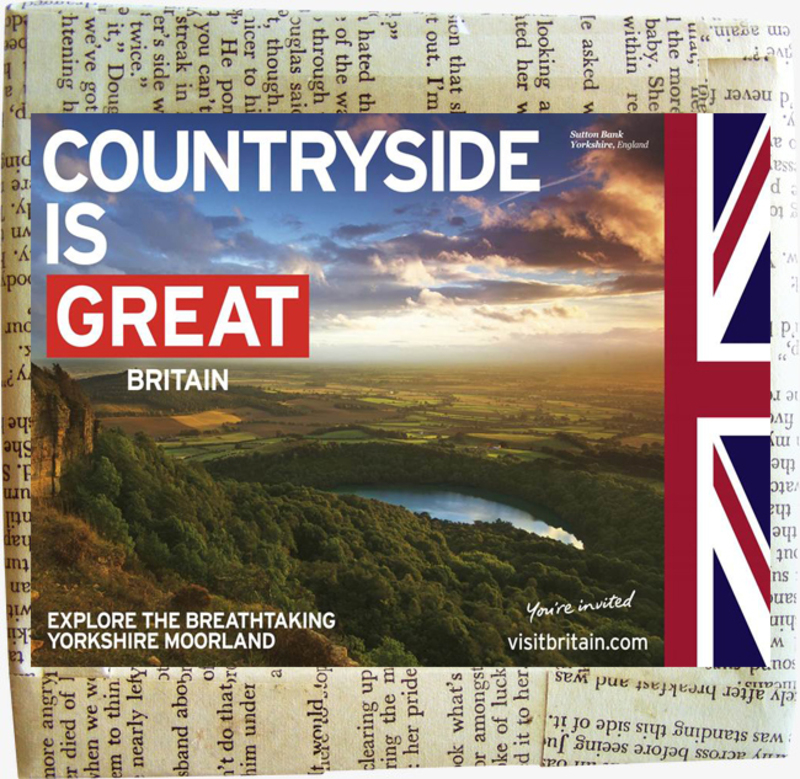
"Countryside is Great"
In the The End of Urbansim Symposium 2017, there was a presentation on Hyper-rural: Rethinking Space.
In the archive article of the presentation, it talked
about rural area as a new tourist place to visit in opposite to the city and it raised the issue of place-making in the rural area and how that led to the management of rural tourism. The management of rural tourism then entails another discussion on arts in the rural area, the spectatorship and passivity approach are discouraging the artists' experience and creative vision. Key words of action such as “understand”, “share”, “make connections”, “communicate”, “knit together”, “define”, “reconnect”, “record”, “protect” and “promote” are useful in the discussion and they are use in the Arts Council England policy document Arts in the protected landscape (Arts Council England, 2008) to explore how to record and interpret art. Please click in the link below for the article.
http://ruralrecreation.org.uk/hyper-rural-rethinking-place/?fbclid=IwAR3Ngu8U630oQuf2W1_L-m05Harm8pv16syzLbbO35N8N5ueuF2khMNj2zgPosted 4 Apr 2019 14:46
Day 7 + 8_ Modelling
Two more days onto model making week. The B.15 model making team continued with additional laser cutting, along with production more pillars for elevations using band saw and sanding. Small details are also added to the elevation, such as plinth details etc. On the other hand, the remaining team in studio experimented the proposal design with a variety of materials, testing out the elevation and massing.
Posted 4 Apr 2019 14:29
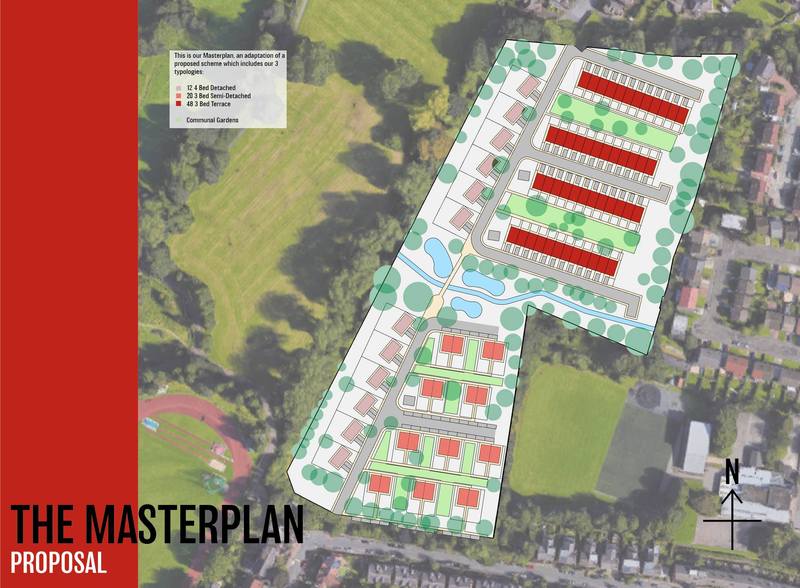
Based on their finalised designs the masterplan has been rearranged and the detail increased. They have re orientated their houses to maximise daylighting within their houses and to their gardens. We have ensured there's allocation of communal garden space spread throughout the semi-detached and terrace plots. We have also reduced space for cars, instead increasing bike stores and electric car charging points.
Posted 4 Apr 2019 14:16
DAY 8
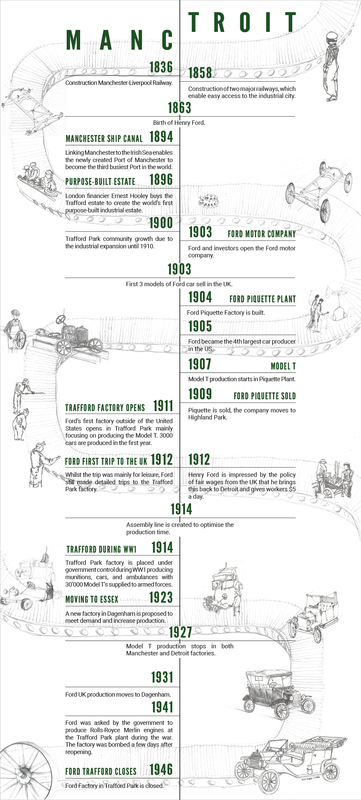
This morning the MANC|TROIT group finished the timeline of Ford Factory in both cities. Using InDesign we combined all the significant dates to represent Henry Ford and his company journey by comparing the events in our cities. Moreover, we integrated in the layout the concept of the assembly line production, that Ford introduced in his factories in 1914. In fact, the background of the timeline is showing different steps of the Model T production through some sketches made by all participants.
Posted 4 Apr 2019 14:08
This is how excited we were to be printing..
[Credit to Zohra for great facial expressions]
Posted 4 Apr 2019 12:58
The riso printer in action!
The printer can produce 150 pages a minute, meaning 2.5 prints every second!!! The speed can also be increased and decreased depending on your preference.
As the publication is two sided, we were advised to print the less heavy side first to prevent ghost printing. We ran a number of test prints to ensure the colour was at the right standard for the final prints. Once one side was printed, we tested to see if they was dry enough to print on the reverse side. luckily this was possible as we printed the lighter side first!!!
The prints must be left to dry for a minimum of 90 minutes before any folding can commence...
Posted 4 Apr 2019 12:35
After tweaking the interior design on archicad, the terracded housing group reuploaded the model into BIMx to run the VR simulation. A quick pan through to see how the layout of the furniture works inside the rooms. As you can see, the proposal encourage a open style living space with a connected kitchen with large glazed panels as a south facing element to maximise the solar gain for space heating and daylighting. The next step would be to apply realistic materials to the render and populating it with human activity to visualise the space in use.
Posted 4 Apr 2019 12:31
All smiling faces as we were finally ready to print after a busy week of formatting!
The team donned our yellow aprons in preparation for printing and took it turns to set up and run the prints. We controlled the position of the masters to make sure everything is aligned correctly, and after that it was all go!
Posted 4 Apr 2019 12:27
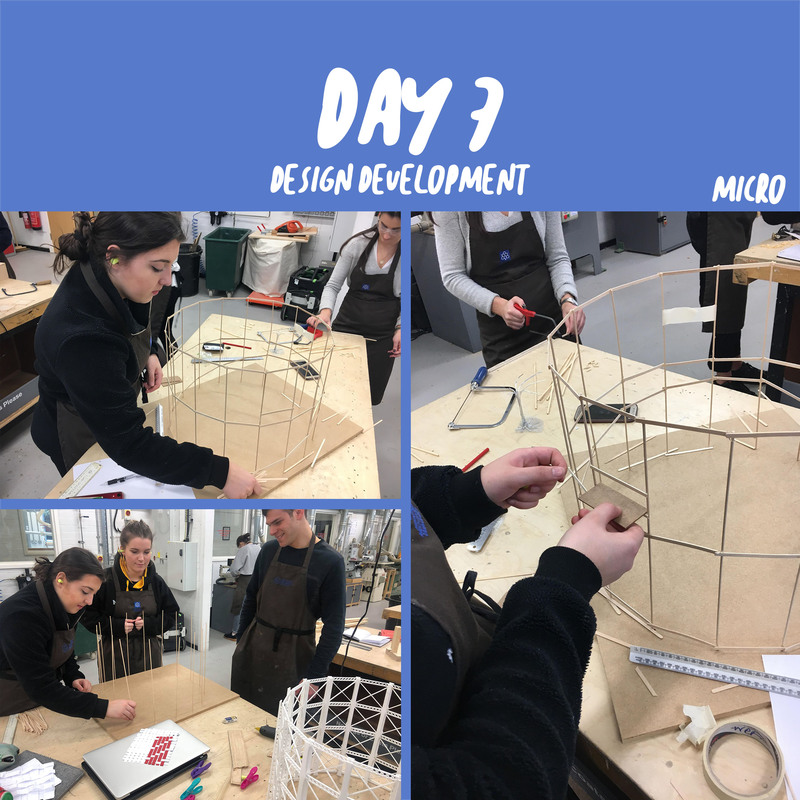
Northlight // Day 7
//Micro
The group, based in the Benzie workshop, began by sourcing materials that would allow them to make a lightweight frame over the existing gas tower, they went for wooden dowels and coffee stirrers. Taking a template of the gas tower they then formed a base out of MDF which we then drilled holes into using the pillar drill. They then used the dowels for the vertical element and coffee stirs for the horizontal structure. Along side creating the structure they wanted to weave a facade through the openings in the structure that represents a textile, to reference back to the textile mills that are situated on the site of the masterplan.
Posted 4 Apr 2019 12:21
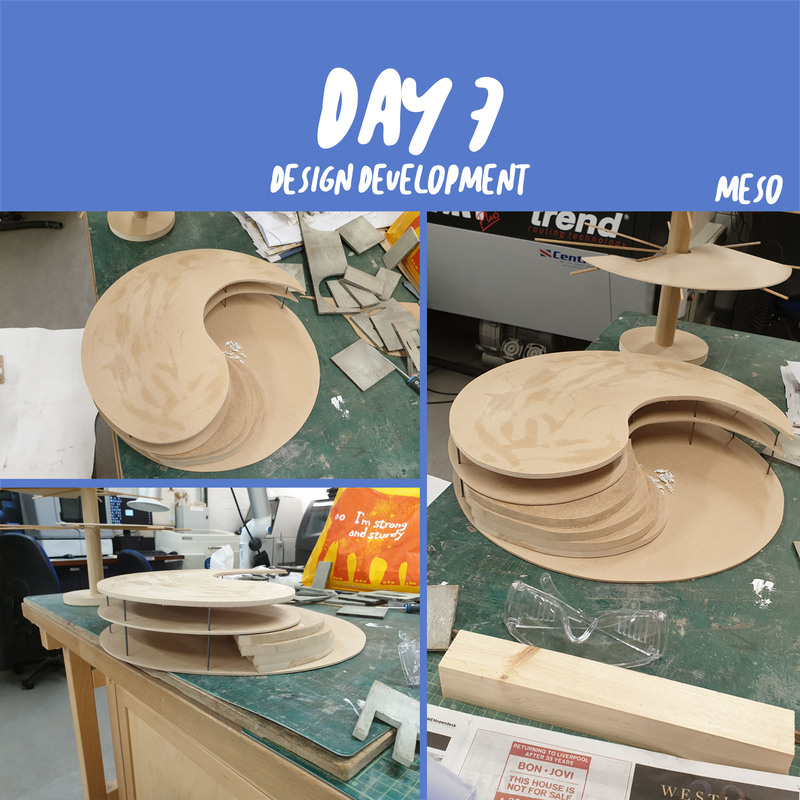
Northlight // Day 7
//Meso
The group, based in B.15’s workshop, started by working out the best way to represent their organic curved design was to use different types of wood. They began by cutting out the form of their ground-level curved body from thin MDF, using metal poles to separate the ground and roof to represent the glazed external wall of the building. They also used thicker MDF to represent the scalloped seating area that goes down to the theatre space below ground level.
Posted 4 Apr 2019 12:20
Before sending to the riso printer all graphics must be separated onto layers according to colour and then converted to black and white as this is how the printer reads it. The different opacities can be all on one layer as they count as one colour, which is good as it means there are less masters required.
One lesson learnt from this process: it takes longer than you think!
Posted 4 Apr 2019 12:18
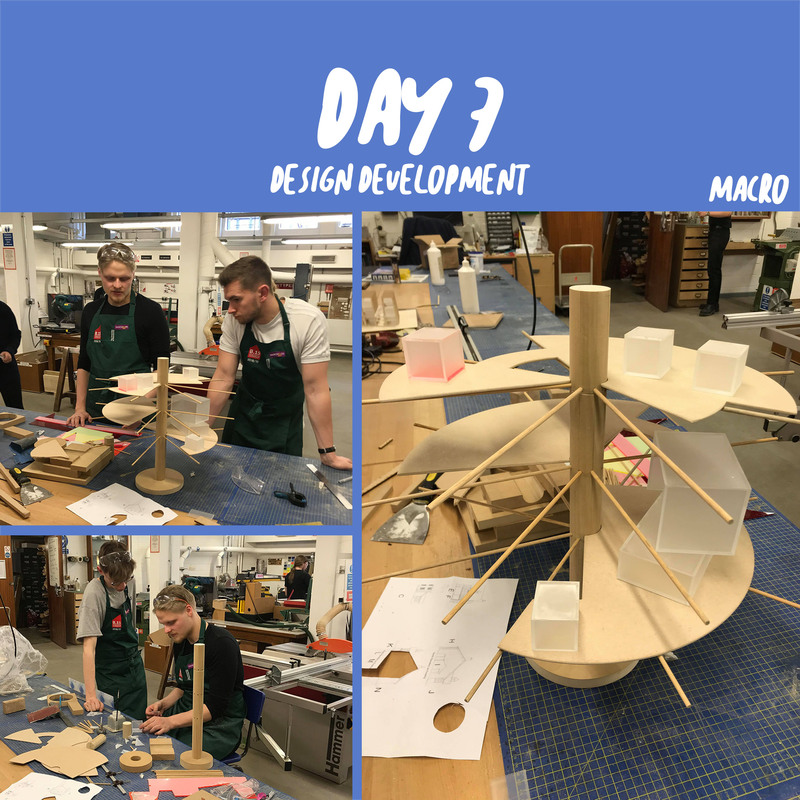
Northlight // Day 7
//Macro
Today we had the three groups develop their concept models for Micro, Meso and Macro. The 1:100 gas tower model was finished today and the podiums for both site models were also completed.
The group, also based in B.15, decided to use different coloured acrylic and wood to represent their concept model. They began by using a wooden post to represent the circular core in their proposal, MDF panels to represent the floor levels and wooden dowels to represent the structure of the levels. The modular elements are represented by acrylic boxes with different colour floors, the colours are to represent the change in use of the module.
Posted 4 Apr 2019 12:09

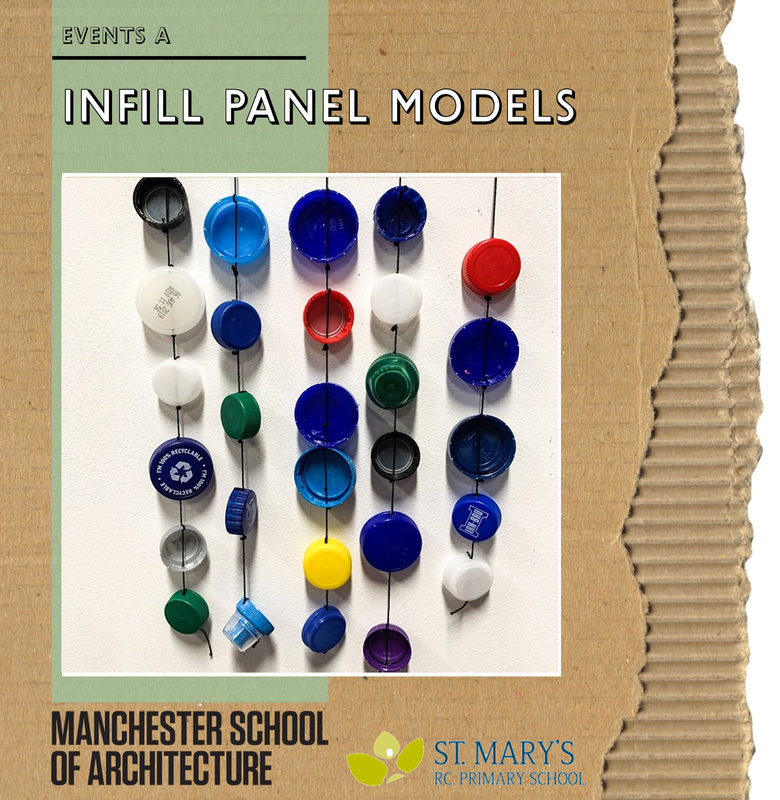
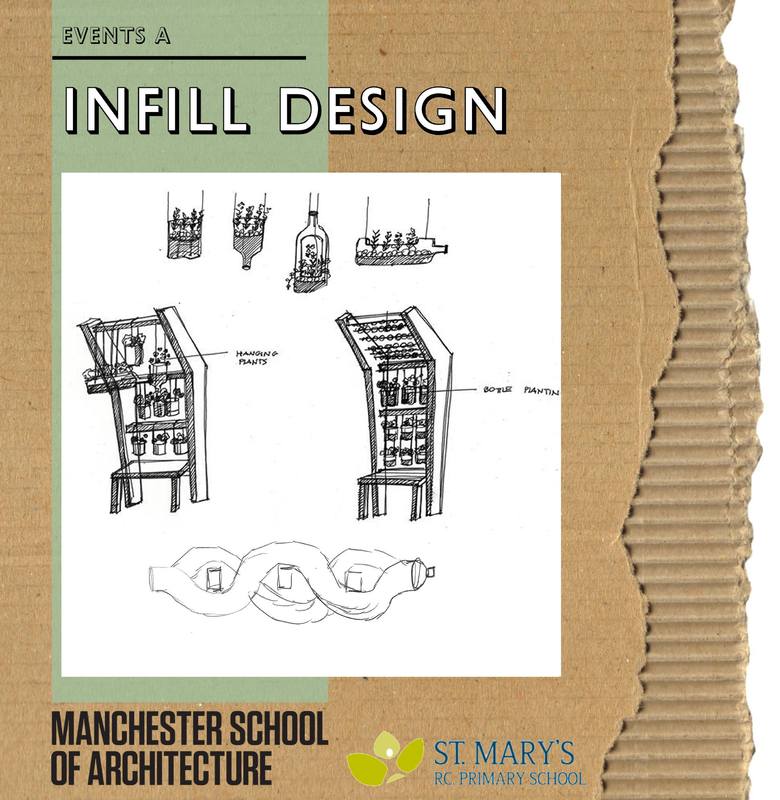
Yesterday our undergraduates started to design the infill panels for our sustainable structure. It is important that our structure has an educational element to its design, so the undergraduates reflected on their initial brainstorming ideas from last week about sustainability.
One of the main ideas that was very popular during our workshops with the children was reusing bottle caps, as they cannot currently be recycled in the UK. We looked at many ways of reusing them, but by focusing on the elements of play, the entrance to the structure and the idea of the children helping to make elements, the undergraduates started to design and model 1:1 ideas using actually recycled bottles.
The above image shows one of these 1:1 models, reusing bottle caps. The resulting model is amazing, it person when it swings around it makes a very charming sound, which we feel the school children will love, especially as Manchester can be very windy! We can’t wait to show the children these models later on this afternoon during our final presentation!
Posted 4 Apr 2019 12:03

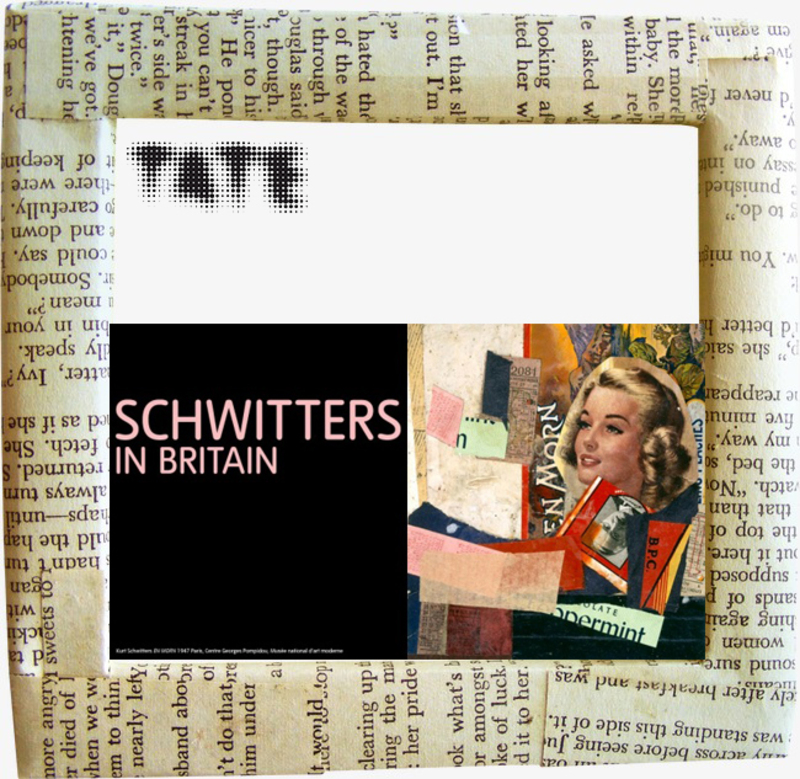
"TATE BRITAIN EXHIBITION: SCHWITTERS IN BRITAIN"
Schwitters in Britain is the first major exhibition to examine the late work of Kurt Schwitters, one of the major artists of European
Modernism. The exhibition focuses on his British period, from his arrival in Britain as a refugee in 1940 until his death in Cumbria in 1948. Schwitters was forced to flee Germany when his work was condemned as ‘degenerate’ by Germany’s Nazi government and the show traces the impact of exile on his work. It includes over 150 collages, assemblages and sculptures many shown in the UK for the first time in over 30 years.
Schwitters was a significant figure in European Dadaism who invented the concept of Merz – ‘the combination, for artistic purposes of all conceivable materials'. Whether those materials were string, cotton wool or a pram wheel, Schwitters considered them to be equal with paint. He is best known for his pioneering use of found objects and everyday materials in abstract collage, installation, poetry and performance. Schwitters’s time in Britain was quite extraordinary and continues to reverberate today, with the influence he has exerted over artists such as Richard Hamilton, Eduardo Paolozzi and Damien Hirst.
Please click the link below for the information of the exhibition and a video about Merz barn.
https://www.tate.org.uk/whats-on/tate-britain/exhibition/schwitters-britain?fbclid=IwAR2Ka1d3ZH--6smWyL3jayT6T1jWW9qP-cceUI84NJQWO1YbjJ8Z8OiTXB8Posted 4 Apr 2019 11:37
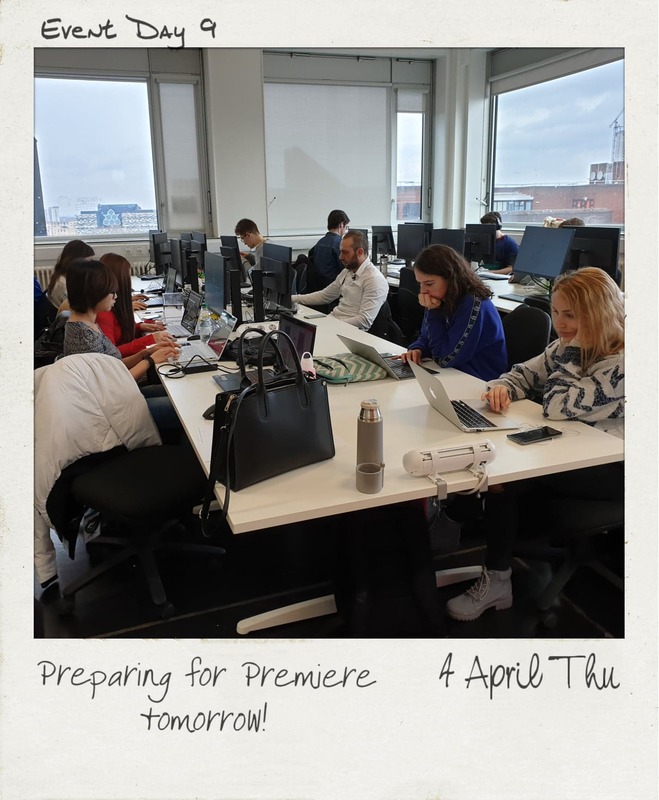
Day 9 Preparing for the premiere tomorrow!
Today we continue working on editing the movie. After the preview yesterday, we had a discussion on the clips: on the speed, the sound effect and we decided to have some rearrangement on the movie so it flows smoothly. Therefore, we are working on the revision of the movie clip from yesterday and are continuing to add more footage into the movie. We are also working on the script for the voice over to give information on the findings we have got during the 2 weeks event.
On the other hand, our master students team also answer questions raised by the bachelor students on software usage, design project and portfolio as we reckon skills sharing is also a key element during the Event weeks.
Posted 4 Apr 2019 11:30
Northlight // Drone Footage
Through the use of a drone we were able to observe the gas tower from a bird’s eye view within the context of Brierfield and the rest of the Northlight masterplan, highlighting the Brierfield Mill right next to it which is at the heart of the masterplan.
This footage also highlights the true scale of the gas tower and how it stands out as a major landmark within Brierfield, providing the micro group with an insight to locating the main vistas from the gas tower so they could locate where to position their viewing platforms.
Posted 4 Apr 2019 11:22
The riso printer has two slots for ink cartridges available which means you can print two colours at the same time. When printing you send separate pdfs to each cartridge, each with only the content for that specific colour showing. The cartridge then creates a master from this, acting as a stencil for the ink. If you want more than two colours you have to wait for the ink to dry before sending it through the printer again - usually about 90 minutes!
Another thing to be aware of is that where the masters overlap you will get a third colour, for us a green where the orange and teal merge. We wanted to keep the pages graphically clean with just our two main colours, so had to mask where we needed there to be only one colour showing, and used different opacities to create variance.
Posted 4 Apr 2019 11:15
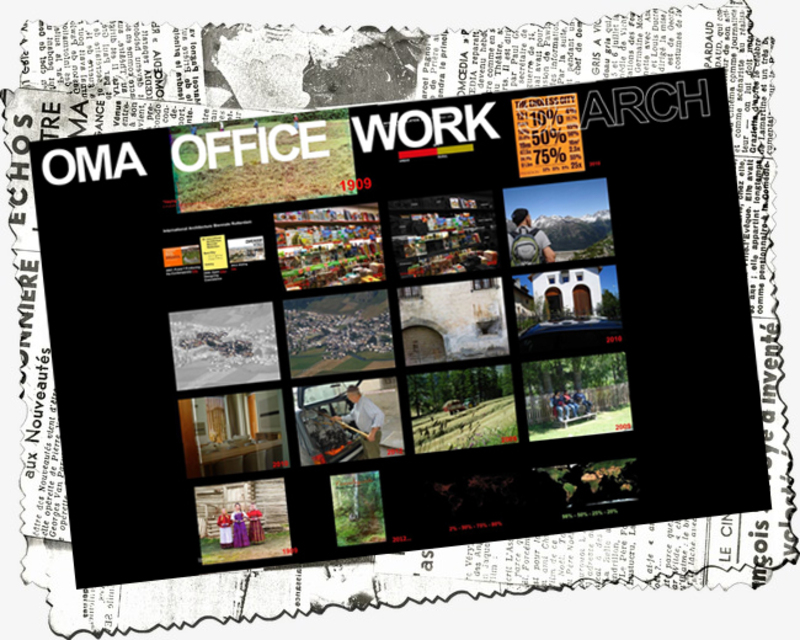
"OMA Lecture: Countryside"
In 2012, Rem Koolhaas gave a lecture on "Countryside" in Stedelijk Museum Amsterdam where he presented his manifesto on the countryside. In fact, during
our trip to Merz Barn we were told by Ian, our collaborator from Littoral Trust that Koolhaas made calls to the Merz Barn and expressed his interest in designing a museum in the barn site. And in few years, there will be a museum dedicated to Kurt Schwitters and other refugees artists and architects that fled to the UK and the US and how they played a role in the modernism of art and architecture.
Rem Koolhaas has kept his thoughts and photos of rural issue throughout the years on a blog on the OMA website, which through the blog we can have a glimpse of the architect's notions on the importance of the issue. Please click in the link below for the blog.
https://oma.eu/lectures/countryside?fbclid=IwAR3_qNvuJNEN4jVMUhlXt2HrkFIk9A0XZvaNNhe2U8SbXA5Aa5Lh9ZUy8qYPosted 4 Apr 2019 10:55
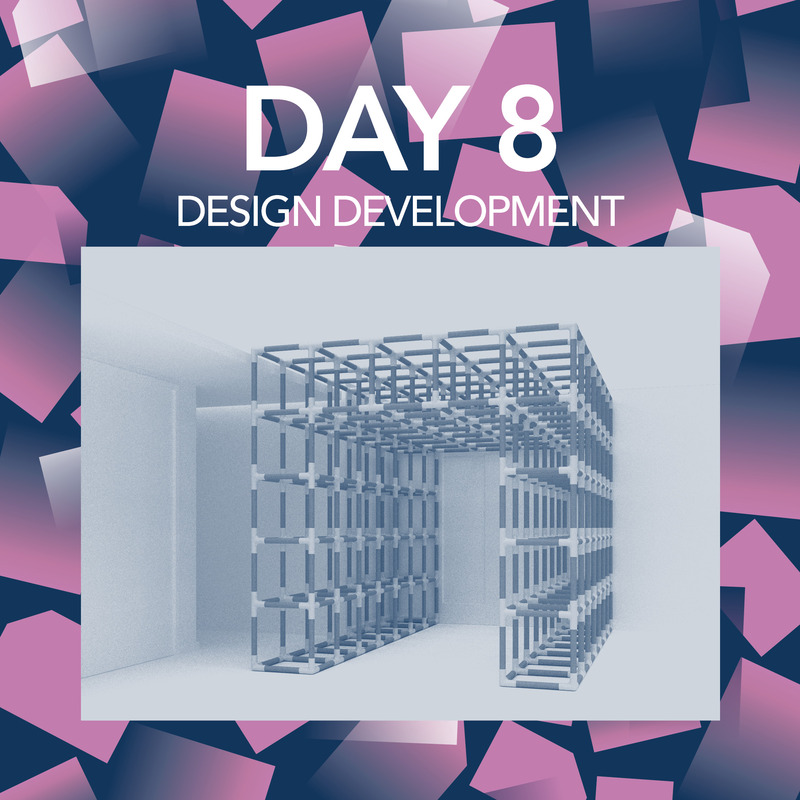
DAY 8 - MODELLING PROPOSALS
A productive day building on Tuesday's development of concepts and designs ahead of the final presentation with our collaborator. Groups have begun modelling their designs through a range of mediums and programmes, aided by design and software tutorials throughout the day.
Posted 4 Apr 2019 10:39
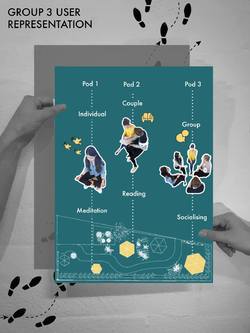
Group 3 User Representation:
Focussing on user entered design, group 3 wanted to provide different sensory environments for the different needs the residents may have.
Something this group picked up on from the resident feedback was a calm and tranquil space to relax as well as more of a social area. For this reason, this group created 3 different environments of different sizes.
Pod 1 is intended for an individual experience such as meditation. The pod is designed to be dark and ambient, allowing the residents to reflect. The pod is only large enough for one person to ensure an individual experience.
Pod 2 is medium size, intended for 2 people. Activities such as reading can the place in this pod, as well as ensuring an intimate experience for couples as well as friends. Private conversations can take place in these pods with little distraction from others.
Pod 3 is the biggest pod, intended for a group of people to socialise inside. The social aspect is important for the residents, however it isn’t as important as the other individual experiences therefore only one of these group pods is provided.
Posted 4 Apr 2019 10:28
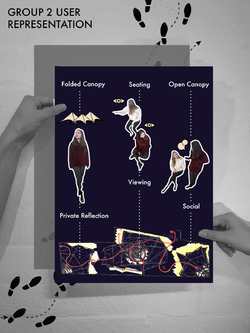
Group 2 User Representation:
Group 2 decided to focus on the canopy structure creating different experiences for the user underneath it. Group 2 have a vision to create a mix of private and social experiences within the pavilion.
The folded canopy roof membrane folds up and down to create these different settings. Where the roof folds down, the resident can spend time alone within the confines of the structure. With light still being able to penetrate through the membrane, this gives the resident an ambient experience.
The incorporated seating underneath the tree canopies is designed into the structure. This stepped seating creates a theatre type atmosphere with residents able to chat in a group or a couple or purely sit on their own and resonate with the environment.
The open areas of the folded canopy allow for residents to physically act more openly, encouraging more social interactions. The penetration of light in between the canopies allows for light to cast brilliant shadows on the open areas.
Posted 4 Apr 2019 10:27

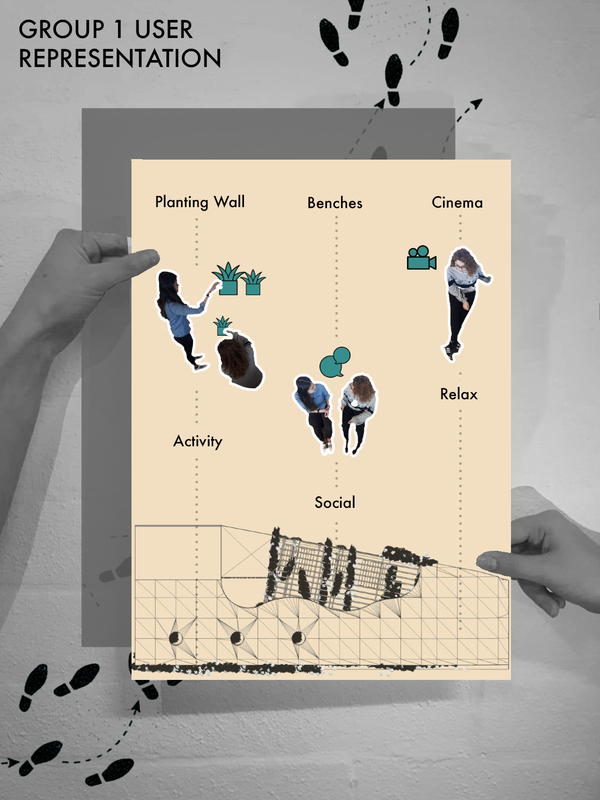
Group 1 User Representation:
With this project being all about the end user, the group acted out what they envisioned the user doing in each area of their pavilion.
The focus of their project is about creating a mix of social and individual spaces. For this reason they came up with 3 different areas allowing for different activities.
The planting wall can be seen as a group of individual activity, allowing residents to have their own pot and plant and maintain anything they want in them. This is an activity for the whole family, keeping their mind’s at ease and allowing them to forget about the hospital environment. This was an important part of the resident’s feedback therefore this group wanted to really push this idea.
Benches are provided for more of a social experience. These can be used for eating or chatting between families and residents. The benches also allow for informal chats to take place between families and staff at the hospital.
The cinema area is a cosy, relaxing area for residents to go and unwind at any point in the day. This cinema area can be used in the day time or the evening due to the enclosed canopy above. This area tends to be more of an individual experience due to the quiet atmosphere, allowing residents to reflect and relax.
Posted 4 Apr 2019 10:20
Group 1: KJ, Beena, Jasper & Yasmine
Assembling of final presentation model at scale 1:50 which included canopy, landscape, urban furniture and vertical planting.
Urban furniture and roof canopy were added at the side of the canopy that overviews the existing garden to provide a pleasant environment for users to have breakfast and socialize while overlooking their children playing at the playground on ground floor. A dynamic canopy will also be added to half of the terrace to provide shading from the rain and control of sunlight for users that are sunlight sensitive.
Posted 4 Apr 2019 09:49
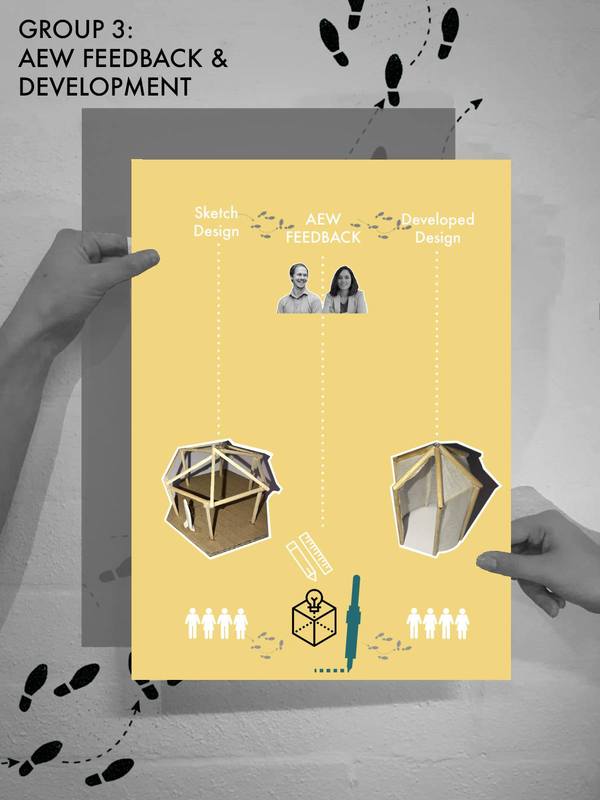
Group 3
Kilian, Nina, Brandon & Drilon proposed to have multiple pods that were scattered around the terrace to create different spaces.
The question regarding the flexibility of the pods were raised during the feedback by AEW and 5th years. The students were suggested to improve the flexibility of the design through the play of sizes, materiality and function of the pods. Pods of different sizes could be designed to provide different function where smaller pods will be more suitable for couples and larger pods will be more suitable for groups. The materaility of the pods were also a topic of discussion where students were suggested to play with both semi-translucent and completely covered materials. This will ensure different privacy level within each pods.
Last but not least, students were also asked to look into the positions of the pods within the site as well as play with the boundary lines between soft and hardscape to enhance the circulation through the terrace.
Posted 4 Apr 2019 08:39
GHS // DAY 8
CONTROL ROOM
We developed both the affordable proposal and ideal proposal in parallel. Basically, the distinction between these two proposals is based on the material use. In the ideal one, the walls are surfaced by absorption panels shaped in checkboard patterns. While the affordable one, the walls are surfaced by tissue fabric with insulation behind shaped in free patterns. They both would achieve good acoustic performance.
Posted 4 Apr 2019 07:32
Did you know its the last WOAH Wednesday?
We wanted to make sure you were all aware about The Big Change. The Big Change is a collaboration of several homelessness charities, grassroots
groups, businesses and individuals as part of the Manchester Homelessness Charter, They are coming together in an effort to end homelessness in Manchester, along side Manchester City Council.
You can help either by donating or volunteering with any of the groups involved. To find out more go to https://streetsupport.net/manchester/bigchangemcr/ .
#AreYouAware?
#WOAHWednesday
Posted 3 Apr 2019 23:11
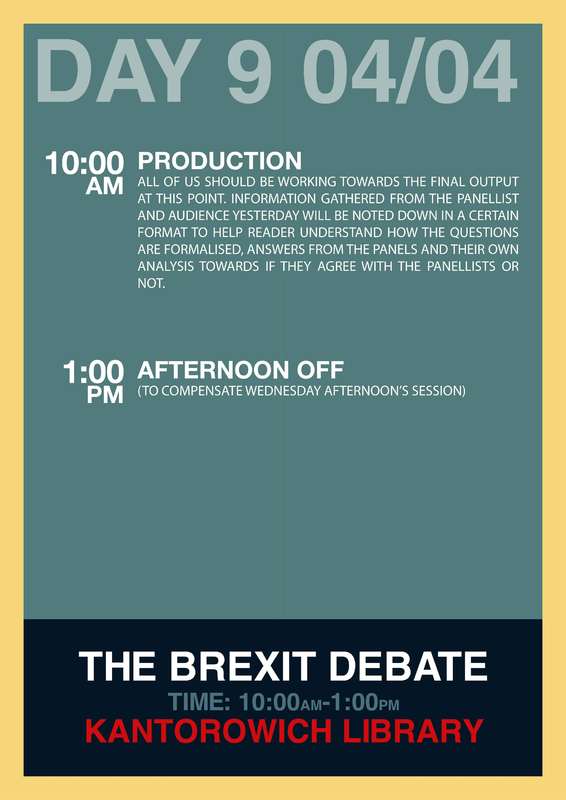
Day 9 is production production and production day! Information gathered from the afternoon discussion panel session will be put down into paper for the final publication. Afternoon will be off to compensate Wednesday afternoon's event.
Posted 3 Apr 2019 22:44
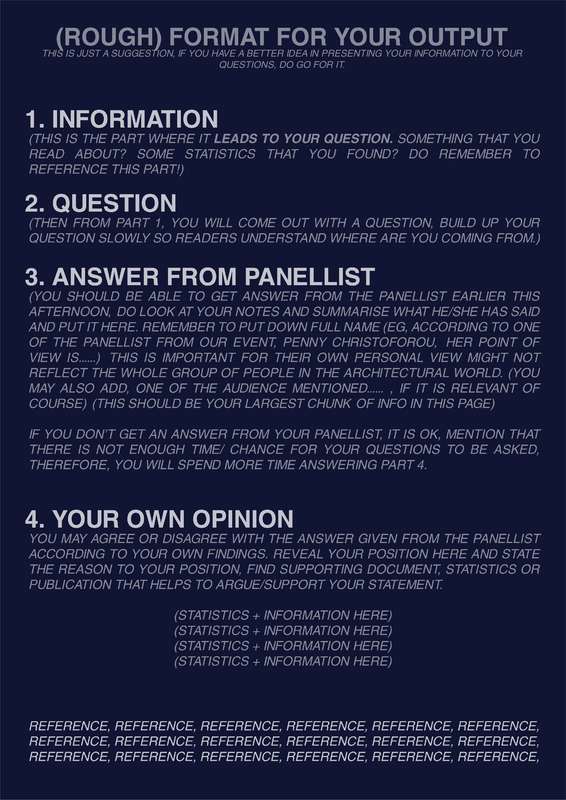
Answers from the panelists earlier this afternoon will be reviewed and put down on paper for the final publication. This is a rough guide on how students are able to analyse the answers and have their own opinion supported by the documents they have read throughout these two weeks.
Posted 3 Apr 2019 22:43
We invited Mark Percival (architect), Graham Smith (architect), Dr Angela Connelly (academiia), Penny Christoforou (6th year student) and Aaron Underhill (5th year student) to be on our panel for our event today. It ran smoothly with complications with the microphones but overall the discussion is organic while everyone have new inputs on viewing BREXIT towards the architecture field . Discussion ranges from what would happen if the EU research funding is cut off in the academic field to how woulde BREXIT affect the chances of employment towards the EU students.
Posted 3 Apr 2019 22:41
// DAY 08_PRODUCTION OF GRAPHICS
We are progressing with the compilation of our design guide by producing graphics and illustrations for each of the factors we are addressing.
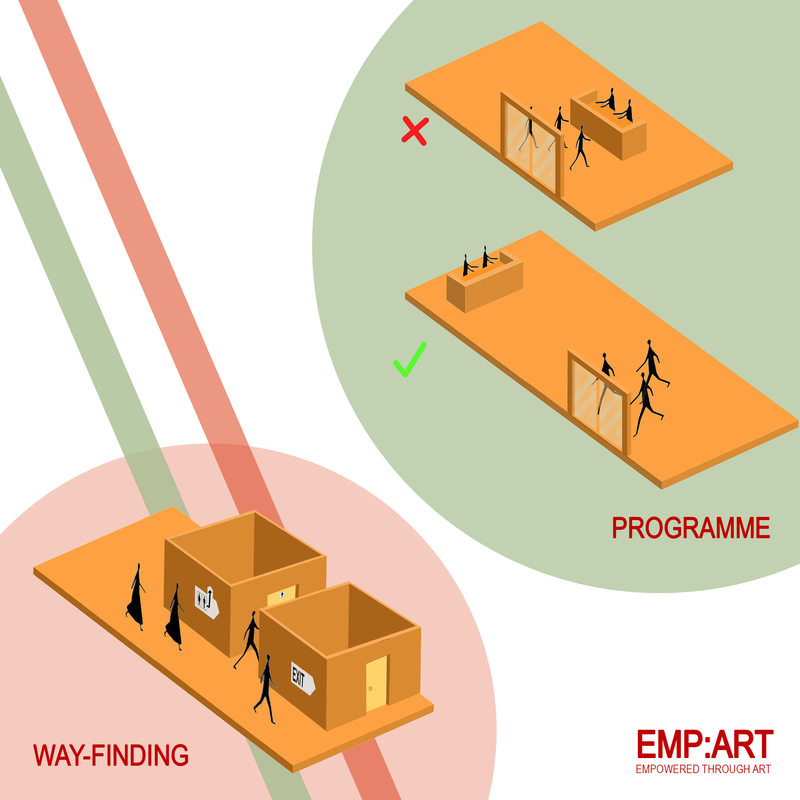
4. Way-Finding
Legibility is necessary to help people find out where they are and identify where they’re going. Creating different routes and experiences towards and into the building can create a welcoming atmosphere. Subtle signage with creative alternatives to physical signs can be used such as variations in paving, plants, lighting, etc.
5. Programme
Thinking about the programme for the public space around the building and it’s uses for the public allows for the space to be designed with activities for everyone in mind. Positioning the reception and any front of house communication in front of the entrance may seem ideal but can be intimidating for people who are unsure of whether they belong there.
Posted 3 Apr 2019 20:45
// DAY 08_PRODUCTION OF GRAPHICS
We are progressing with the compilation of our design guide by producing graphics and illustrations for each of the factors we are addressing.
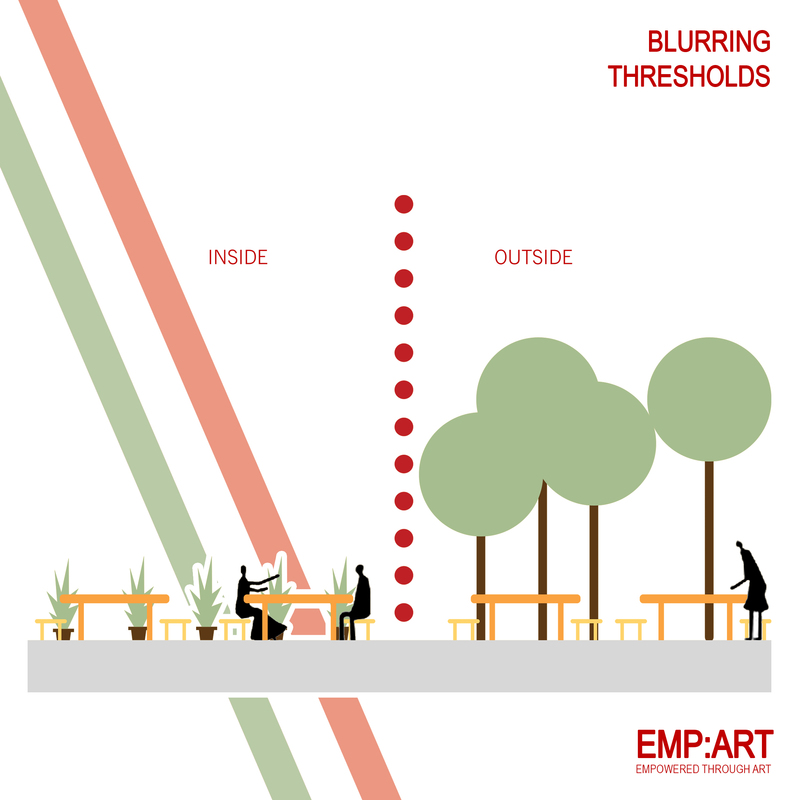
3. Blurring Thresholds
Greenery has a great impact in making a space appear more welcome, acting a break from the urbanisation we live in today. Blurring the divide between the inside and the outside, especially with landscaping maintains a continuity, giving people a chance to leave the confinement of the built form while still being "inside" it.
Posted 3 Apr 2019 20:42
Tomorrow will be the last day working on our exhibition outputs. So far the BA students have done a great job, so keep it up for the last day!
Now that the model is complete, we will work on finalising the 3 A1 sheets showing the past, present and future of Clayton Hall. During the past days we have started the sheets so it will be mainly putting all our work together and checking what we have left to do. Mainly to explain our narrative clearly. During the morning we will have some peer review to check on what needs improving or changing. We will then continue to work on the exhibition display considering the groups feedback and aiming to finish all sheets by the end of the day! To end the day we will have a final informal presentation ready for talking to the collaborators on the last day.
Posted 3 Apr 2019 20:42
// DAY 08_PRODUCTION OF GRAPHICS
We are progressing with the compilation of our design guide by producing graphics and illustrations for each of the factors we are addressing.
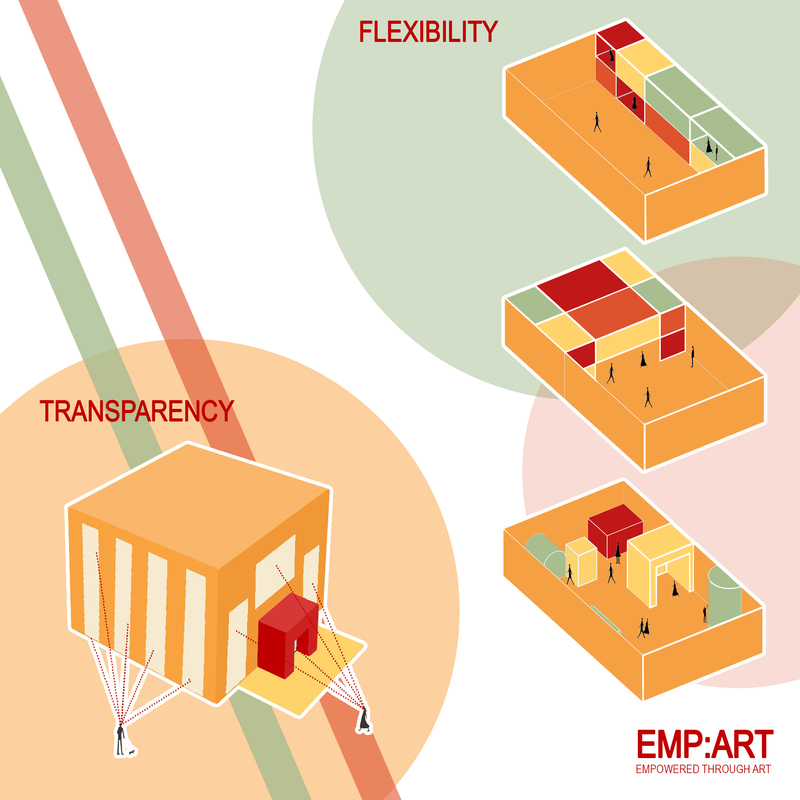
1. Transparency
Making sure that it is possible to see into and from inside the building, not only gives a glimpse of what the building has to offer but also reduces the sense of confinement that can make people reluctant to enter the space.
2. Flexibility
It is necessary to ensure that cultural spaces are suitable to host a range of activities that encourage public participation. Flexibility is key in enabling people to personalise these spaces and use them as they wish. Such activity is bound to draw attention, increasing the building’s footfall in the process.
Posted 3 Apr 2019 20:38
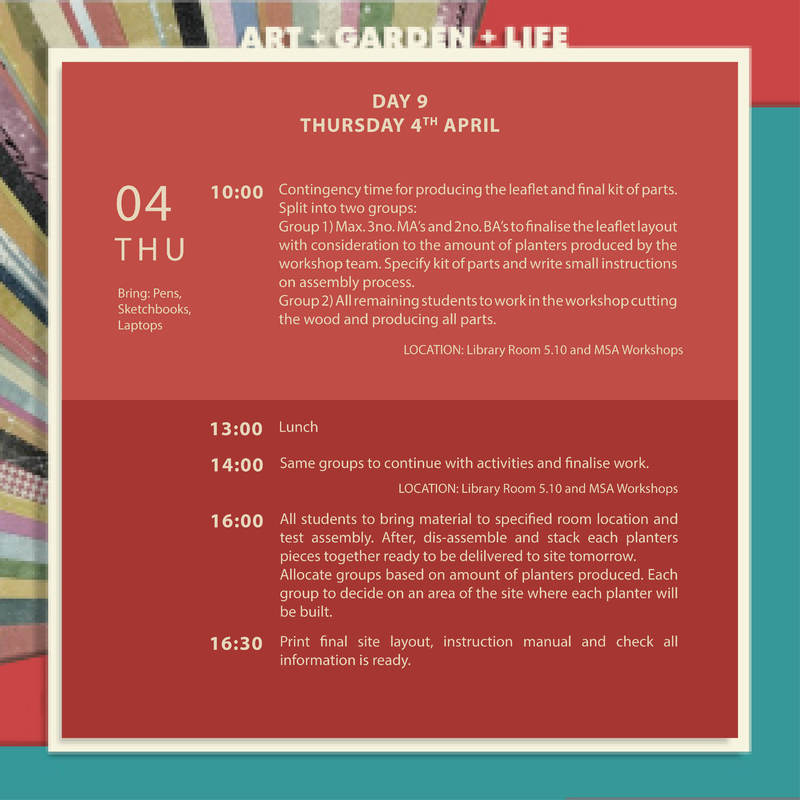
DAY 9 SCHEDULED ACTIVITIES (4th April)
In preparation for tomorrow's last session working on project development, Group AI Master Students met in the afternoon to discuss the final activities and work to be produced. Having scheduled for contingency time, this proved to be useful as we require this time to finish off and detail our final work before printing.
We reviewed all the work that had been produced over the two weeks and to our success, this was all completed on time and to a good standard. As a result, we are able to send more students to the workshop and create more planters in the time available.
Posted 3 Apr 2019 20:15
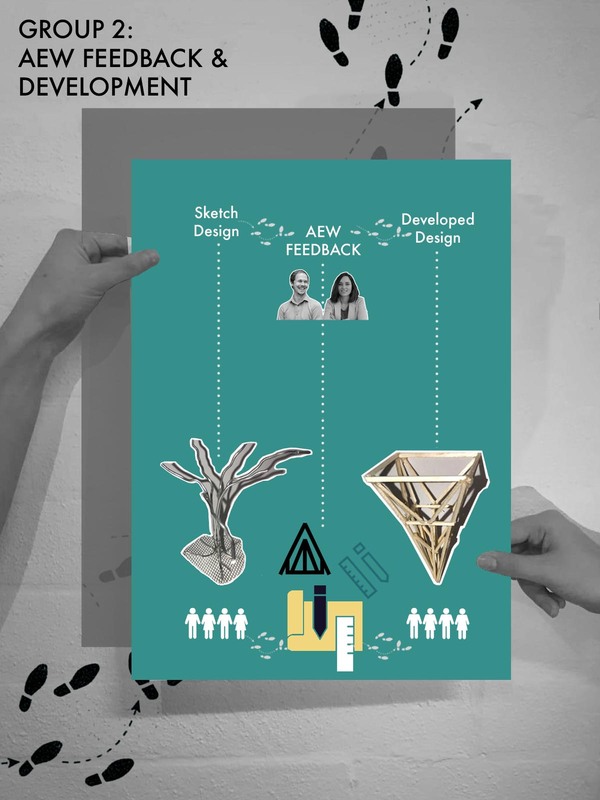
Group 2: Yumian, Alice & Roxandra
Group 2 wanted to create sheltered outdoor spaces using overhanging canopies which are inspired by trees. The artificial structures would provide a natural form without the weight, soil and maintenance of real trees.
Alex and Emma from AEW Architects really liked the concept, however suggested the group begin to look at how the technical feasibility. Using this feedback, Group 2 developed the design creating uniform structures which still reflect the tree form with through timber materiality.
Posted 3 Apr 2019 19:46
DAY 8
FUTURE
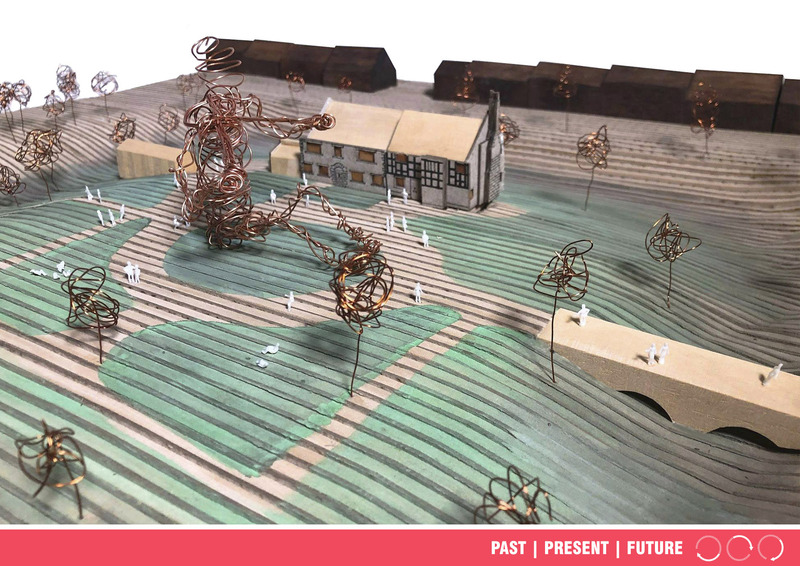
For the future proposals we added the models of the sculpture onto the context to show ideas of how these could be integrated with the context. The image above shows a sculpture of Humphrey Cheham playing the violin. Our idea is to spill out the historical narrative of the living history museum onto the park so it is not only an indoor activity, rather it becomes a nice attraction for families or visitors to spend the day at the park.
Posted 3 Apr 2019 19:42
DAY 8
PRESENT
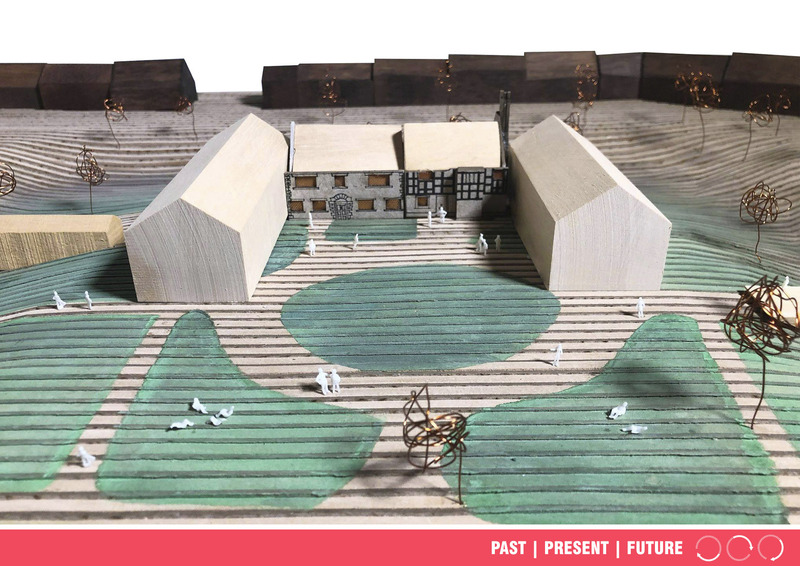
The above model shows the site with its current characteristics. We have decided to model the bridge which is the main access to the island where Clayton Hall sits. We modelled Clayton hall itself with detailed handrawn and laser cut facade using grey board, acetate and timber blocks for the massing. Additionally, we modelled the victorian terraces which are situated opposite the park. Trees where modelled in copper wire and we decided to watercolour the green areas and the moat to enhance the island.
Posted 3 Apr 2019 19:41

DAY 8
PAST
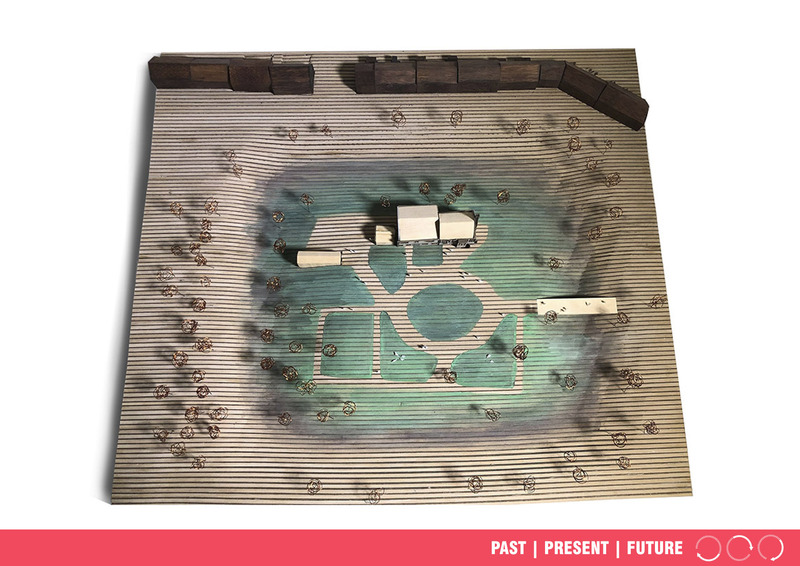
With the help of our historical analysis, today we modelled the massing of past buildings on the site. This shows the historical buildings surrounding Clayton Hall in 1745. It used to form a courtyard as shown on the image above but they where later on demolished.
Clayton Hall is a rare example of a moated manor house that dates back to 1130. Clayton Hall is believed to have been a gift from King John to one of his loyal supporters. For more than 700 years the hall was passed down from family to family before being taken over by the Manchester Corporation in 1897. The building currently consists of two sections, the northern brick section built in 15th century and was altered during the post medieval period and the southern timber framed section built in the late medieval. The only access to Clayton Hall is via a 17th century masonry bridge over the moat. The bridge is made out of coursed square stone over two segmental stone arches.
In August 2004, a small group of dedicated volunteers were formed with a view to restoring this Ancient building. In 2009, the hall received a grant which enable the “Friends of Clayton Hall Park” and the Manchester Leisure staff to start on the restoration.
Posted 3 Apr 2019 19:41
Wednesday 03/04/2019
10:00
This Wednesday commenced with model making. The model-making team gathered all the necessary material and pieces, planned the making of the model, assigned jobs to everyone involved, and started building! Come Thursday(04/04/2019) the model will be finalized and photographed.
Posted 3 Apr 2019 19:10
After finalising our documents yesterday, today brought the start of production here at Events Q!
We spent our morning doing test prints in the workshop, making sure the colours and alignment were working to our liking. The riso printer works with two colours at a time and often needs a little alignment adjustment and colour sampling to ensure the best quality. This process also allowed us to try out out paper choice before creating the final pieces. After several tests, tweaks and group discussions we found the best set up and programmed the machines ready to produce our document!
More to follow....
Posted 3 Apr 2019 19:09

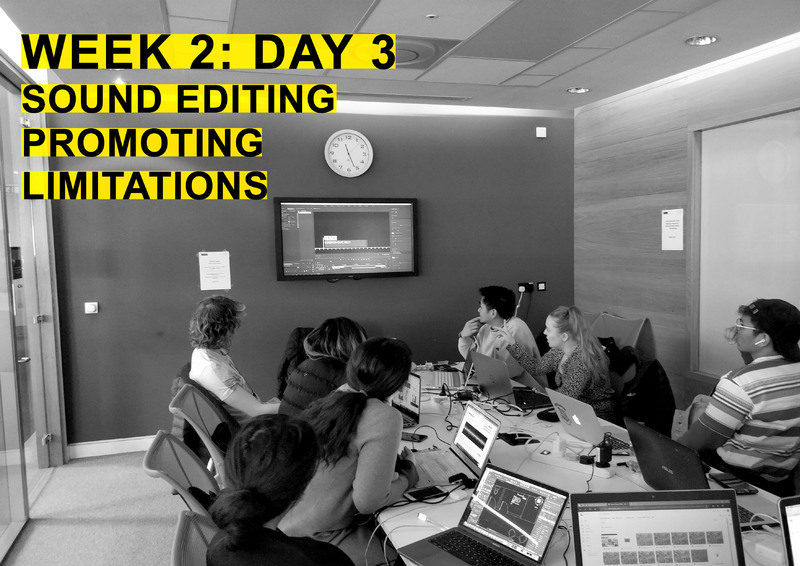
Week 2 - Day 03
This morning, we continued to finalise the edits required for the transition between existing and new footage for the film. Some members of the team returned to the town hall to record additional footage which was required for the film, to compliment the footage from the Archive.
The 1st and 2nd years began searching for sounds which could be overlaid and embedded within the footage, to provide alternative emotional responses. Adding sounds to the footage was the final stage of the editing process and for the overall film production.
Throughout the production and editing of the film, we have come across some issues regarding the transferring of footage, data and processing power required to edit footage.
• During the event, not everyone had access to high-powered laptops, which hindered our decision on which tasks should be given to the first and second years.
• The low processing power of laptops affected even the high-powered laptops owned by master’s students. They started to become less responsive and began to crash due to file sizes becoming too large.
• Backward compatibility was also an issue, this was because some students had access to Adobe Premiere Pro CC 2019 and other used Adobe Premiere Pro CC 2018. This created problems when we began to transfer files of the edited footage to the person-in-charge of the Master file.
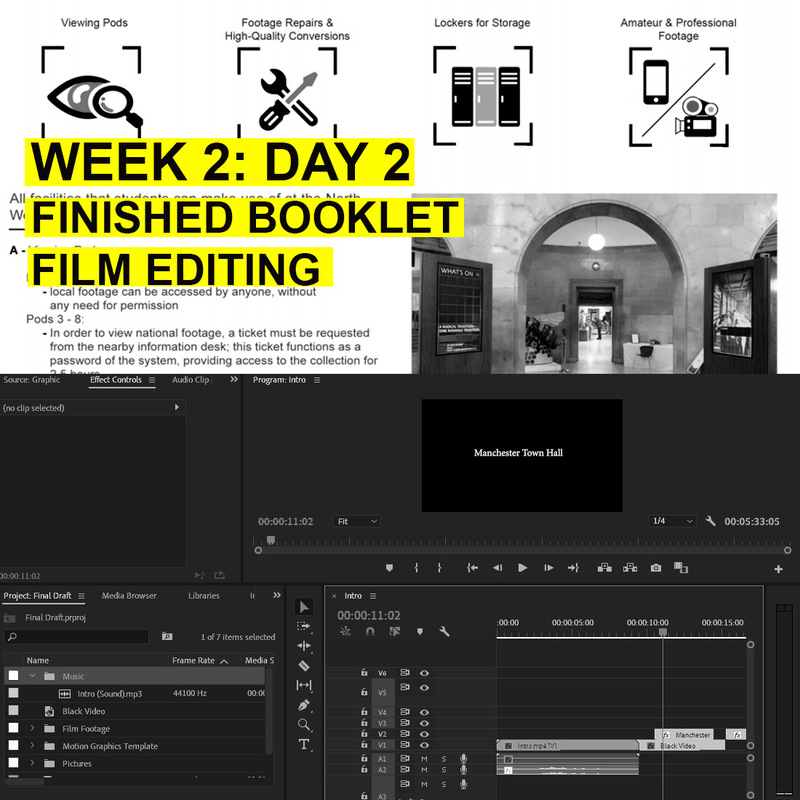
The ‘How to use the North West Film Archive’ booklet has been completed and we will be sending it tomorrow morning to Geoff Senior at the North West Film Archive for final amendments and to be signed off. Over the past 2 weeks of the events, we have also been able to create 3 videos alongside the booklet which have been implemented into the booklet using QR codes. These can be viewed by students if they require further assistance on how to use the Archive.
Students have also printed out posters, which have been placed around the Manchester School of Arts building to advertise the Film Premiere at the Cornerhouse Theatre on Oxford Road – 05/04/2019.
Tomorrow, we will be sending the Final booklet to Geoff Senior and we will be testing the Film at the Cornerhouse Theatre before it is shown on Friday. This will allow us to make any final sound or footage resolution adjustment before the Premiere on Friday.
Posted 3 Apr 2019 19:01
Wednesday 03/04/2019
13:00
Public Experiment
Taking our experimentation to another level, we pinned up another long piece of paper with some initial doodling on it, in order to see how people outside our team would interact with it. This GIF shows the interaction of the people over the course of 3 days.
Posted 3 Apr 2019 18:53
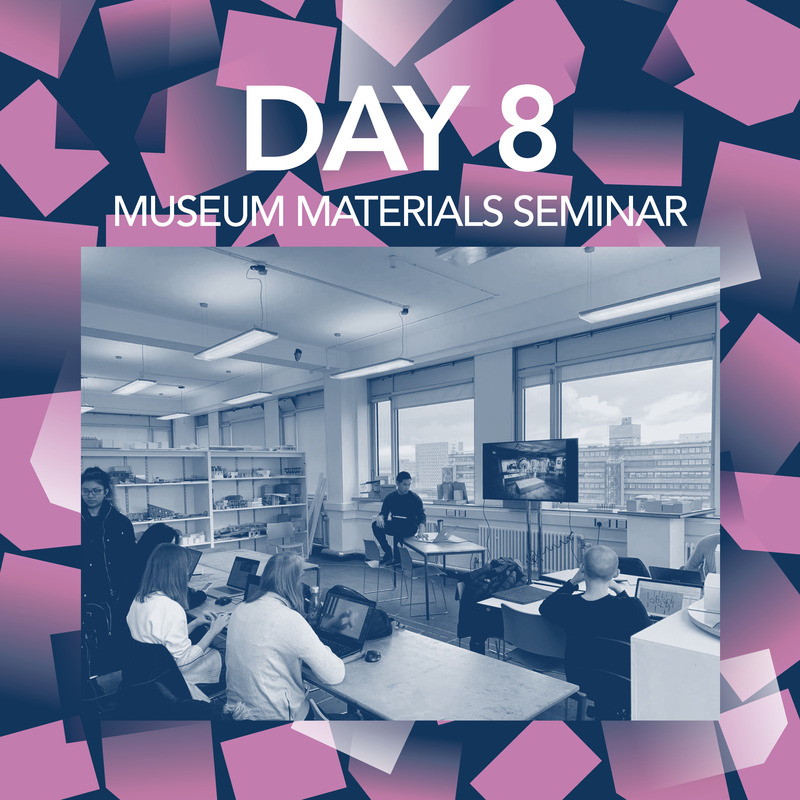
Today we focused on refining the three concepts and we made decisions about the materials and details that we will present to the special collections. The three groups are in constant communication to make sure we have 3 distinguishable ideas, but that all the ideas tackle the design challenges set to us by our special collections collaborators. Ziwen's seminar about museum grade materials really helped with making decisions because some of our ideas were instantly ruled out. Tomorrow we will work on making the final presentation and drawing package to present to Janneke on Friday.
Posted 3 Apr 2019 18:26
Another group has developed a framing system which would create a flexible and salable system for the special collections curators to use. The nodes would be 3D printed and the poles would be made out of solid timber. These minimal materials have been chose because they're robust and have a soft visual impact compared to the graphics of the posters. The next thing for this team to develop is how the posters are going to be mounted on to the frame as to be able to display different size posters at different times. But that is for tomorrow....
Posted 3 Apr 2019 18:23
One of our three groups is working on a box module concept. The idea is strong in tackling the issue of storage and preservation of the posters. The design is also interesting because it creates views and angles at which visitors can see the posters. The team is detailing how the posters will be taken in and out, which will be done with a series of draws which visitors can interact with to view the posters.
Posted 3 Apr 2019 18:20
Due to the problems that arose on monday, Ziwen provided an in depth seminar on museum grade materials and how to construct with museum grade standards. The seminar covered air circulation/sealing, UV protection materials and security techniques. These are the features that we need to include in our designs so it was great to get some insight into the industry standards. One of our biggest issues is going to be keeping the posters rigid and in air tight enclosures.
Posted 3 Apr 2019 18:16
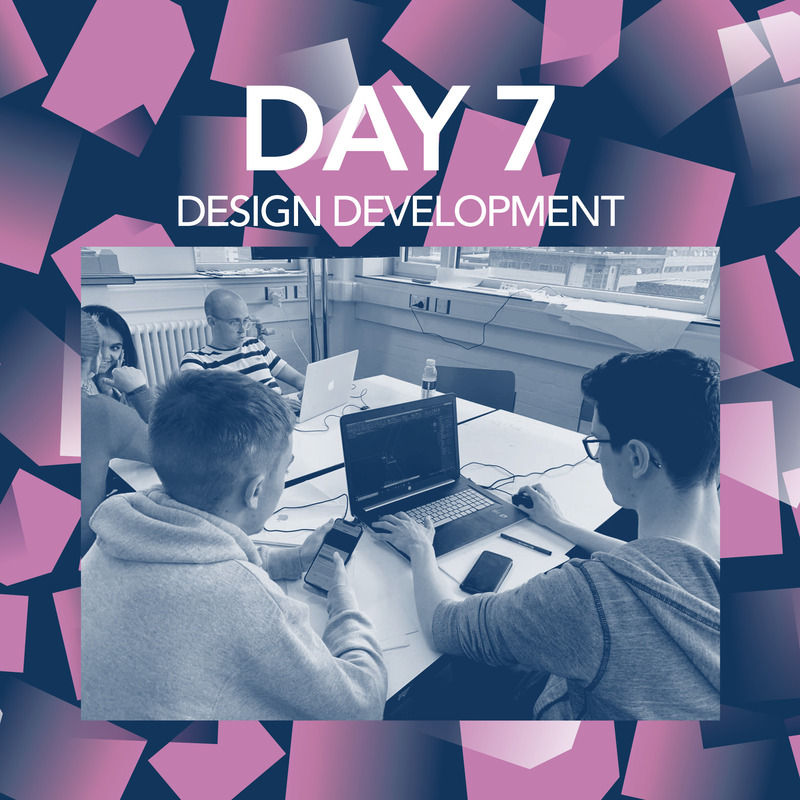
Day 7 is over! Today we learned about the adobe design package. Which was really helpful for the afternoon when continued developing our designs. A few problems with our designs have arisen today which we're going to try and solve together tomorrow!
Posted 3 Apr 2019 17:50
We're refining our designs down to detail considerations. Last Friday Janneke and Stephanie said that we needed to pay special attention to how the posters were encased, and how accessible they were when they needed to be changed. We want to propose feasible proposals to the special collections so we're really trying to focus on the detail. We've realised that changing the posters might be a bit of a problem so tomorrow we're going to work together to propose a few different methods.
Posted 3 Apr 2019 17:47
We split into our three groups and resumed our design development. We are all now working on finalizing our designs and delegating the final drawings for each design. Each person in each group will focus on a specific element of the design. For example: one person on concept, one person on user experience, one person on detailed design.
Posted 3 Apr 2019 17:35
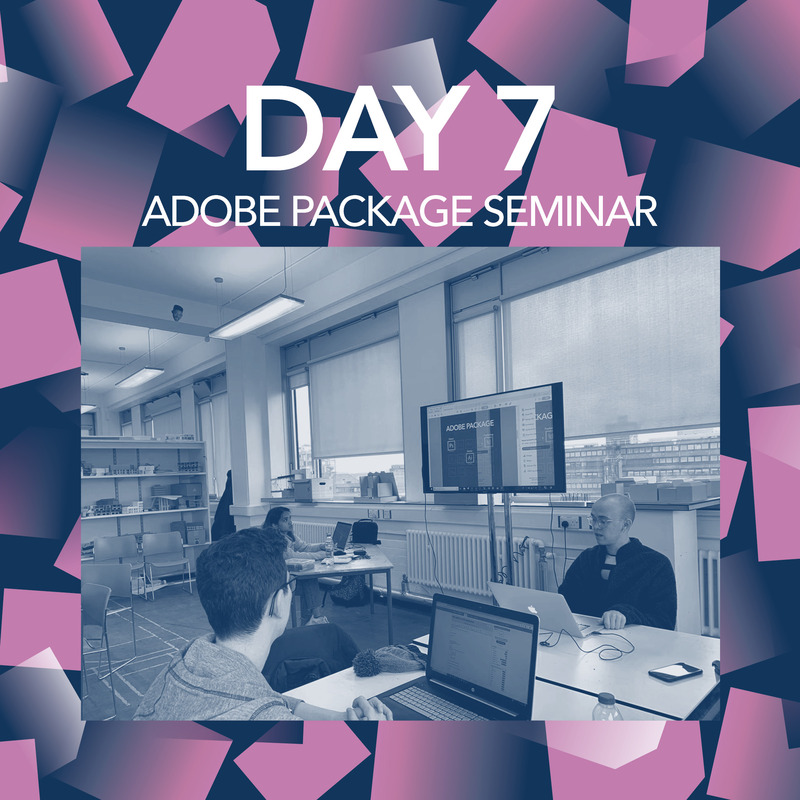
Connor started the day by giving a seminar to a packed crowd. The focus was to how to us efficient workflows between photoshop, indesign and illustrator. We Also went through the basic principles of each software and handy tips and tools to use. We then had a long Q&A session which was helpful for sharing each others knowledge about the softwares.
Posted 3 Apr 2019 17:32
The Urban Greening // Day 8 Presentation Boards
Today we started adding the work we have produced onto our presentation boards; we have a common template for every group so that there is consistency throughout our presentations. Throughout events we have worked well as a whole group, as well as in our smaller groups, so that all schemes can be read in conjunction with one another. Our boards are coming together well, and will be ready to print tomorrow.
As an additional output we would like to produce a flyer, showcasing all the designs, to be left with the building users at Alberton House on Friday; this will include information about the work we have been doing for the past two weeks. The challenge is reducing all the good work we have done down to the key information which best sells our proposals. This is a useful skill to learn and all the students will be involved in the selection of the work they think is most important.
Posted 3 Apr 2019 15:10
Monday 03/04/2019
Before we created our final model, we needed to figure out how the paper roll would revolve around the structure. The undergraduate students came up with a gear system on one cylinder, that when manually rotated, would push the paper around the entire structure.
Posted 3 Apr 2019 14:38
DAY 8
Today we are aiming to finalise key details of the model. As mentioned in previous posts, the end result looked a bit bare therefore we suggested to the group to add more characteristics of the site to it. We first tried to overlay the path and green areas with textured card in order to mimic the existing grass. Nevertheless, this covered the base, hiding the topographical lines which we feel its the most interesting part of the model. Thus, we decided to go with the watercolour option.
In order to achieve the effect that we wanted, we tested different water colour gradients on spare pieces of mdf and greyboard. We had to be very careful on not adding too much water because this could damage the materials. Finally, we thought it worked well so we watercoloured the model. This has enhanced much more the moat and brings attention to the central courtyard in front of Clayton Hall.
Posted 3 Apr 2019 14:29
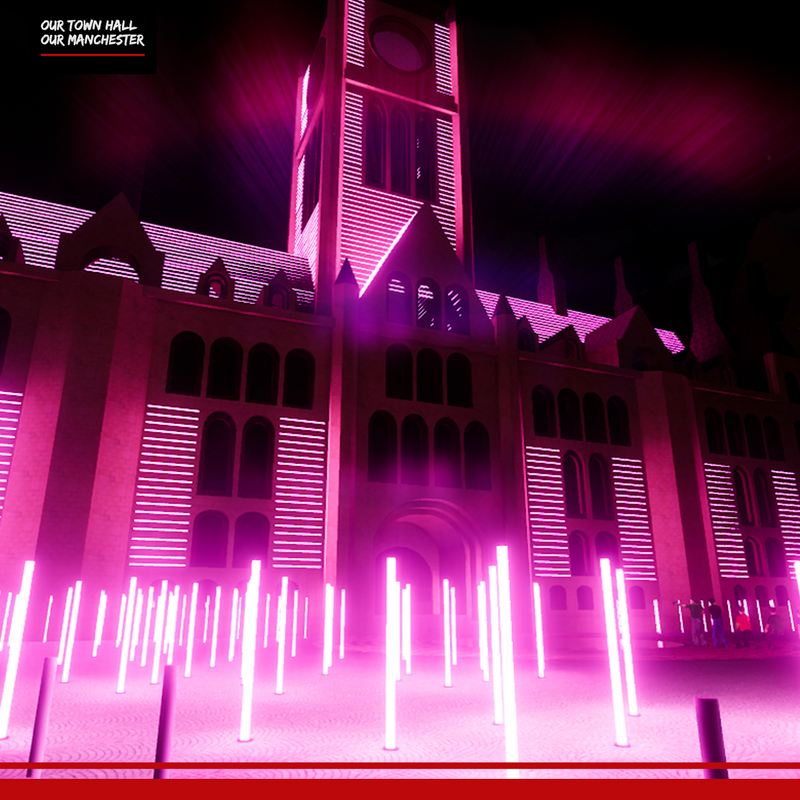
Group 2 Visual of the Albert Square illuminating as interaction increases
Posted 3 Apr 2019 14:17
Group 2 presented further development of their proposal. They have continued to resolve the atmosphere of the pockets of spaces carved out with the illuminated light rods they proposed for Albert square. They also started to explore the type of activities these spaces will encourage.
Posted 3 Apr 2019 14:11
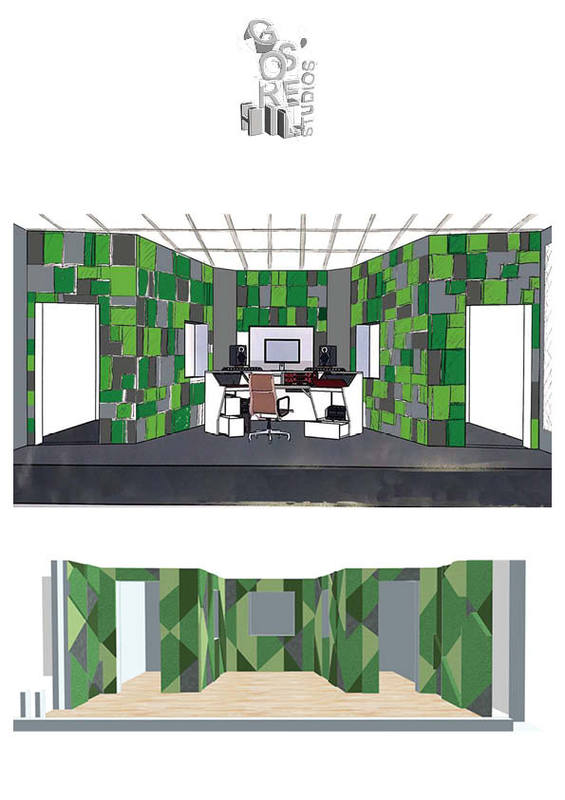
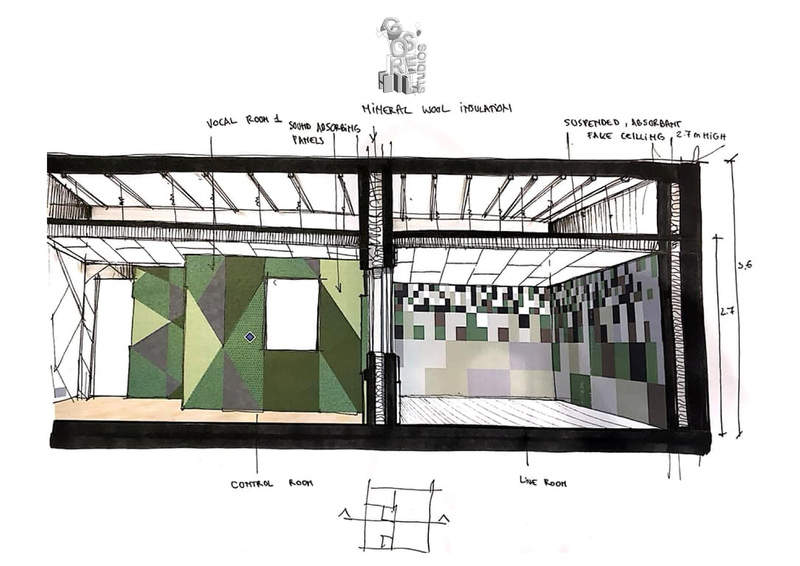
GHS // DAY 8
LIVE ROOM & CONTROL ROOM
Presented here is the sectional sketches showing the space in live room, the control room and the wall detail. The color pattern on the wall is chosen to match the theme color of Gorse Hill Stuido. Different geometry in two room identify the two different spaces. The sketch help us to understand more about the relationship betweeen each room in order to provide a more suitable design approach.
Posted 3 Apr 2019 14:04
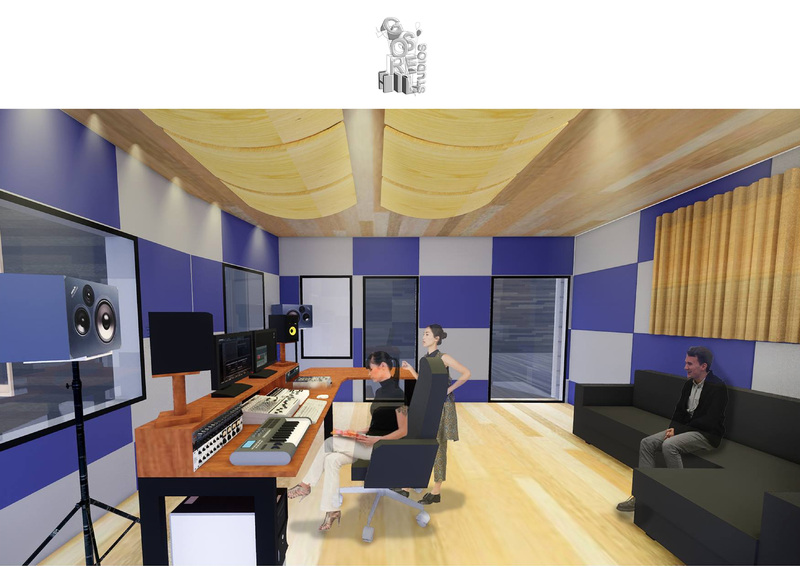
GHS // DAY 8
CONTROL ROOM PERSPECTIVE
Presented here is the first draft perpsective inside control room for us the visualize the room. We used a combination of diffusing panel and absorbing panel in order to achieve the best acoustic in the control room
Posted 3 Apr 2019 14:03
Group 2 starting to draw up their proposals within section, putting particular emphasis on the illuminating pink rods.
Posted 3 Apr 2019 14:01
Group 1: KJ, Beena, Jasper & Yasmine
The initial concept enclosed the entire floor space of the terrace and sought to segregate zones with fixed structure.
Following the feedback from Alex and Emma at AEW Architects, group 1 progressed and developed their design to focus around the user.
The terrace requires shaded spaces due to the needs of children who have medical conditions, while the unshaded are for other users who wish to bask in the sun when possible. Alex and Emma saw this reflection in the initial design and provided direction as to which elements could be more open and exposed to the surroundings.
During the presentation it was suggested that the canopy could be opened up internally. Permeability in the roof surface was introduced to create ‘zones’ in replace of the fixed structure. Overall, the project progressed, the result is a dynamic form which varies in height and space.
Posted 3 Apr 2019 13:22
Tuesday - 2nd April
Today both teams met in Stopford building in the morning to finish the last parts of the film editing and how the information about the event will be spread to other people around Manchester.
The film editing team is about to complete their work, after retro transition video was made and all footage and images were assembled into a short movie. New impressive sound effects were added, as well.
The booklet team was working on some final details on how to use the North West Film Archive (NWFA) website.
The next step was printing out draft copies for which the format, resolution and scale of the text and the images were carefully taken into consideration. Therefore, the team could get a sense if there was any difference between the way copies and onscreen information looked.
Copies of the latest poster for the Film screening on Friday were printed out and discussed where to be pinned up.
Posted 3 Apr 2019 12:59
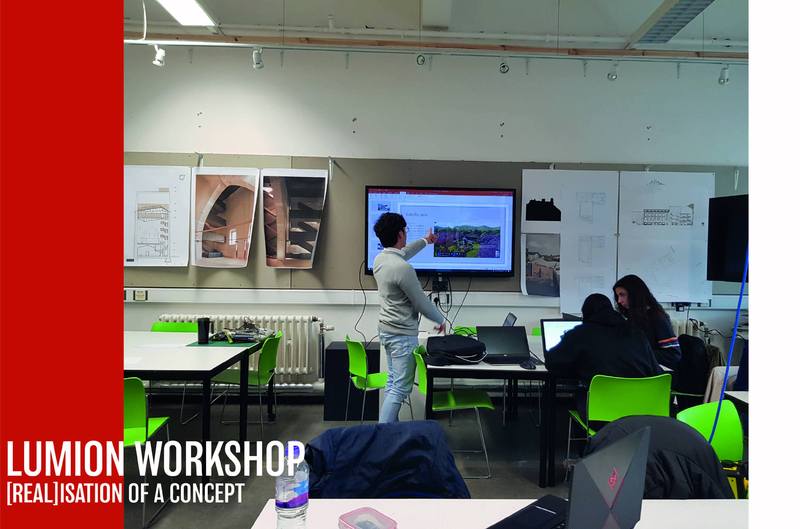
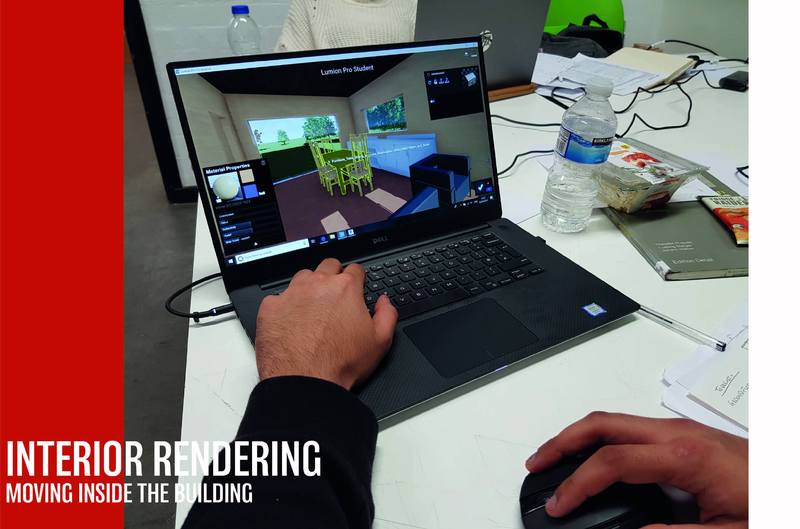
Lumion Tutorial workshop:
Now that the students are close to finalising their design layout, we can begin taking their concept into realisation. The tutorial runs through the basic User interface, movement, features of the program. The aim of the presentation is to introduce an easy to use rendering program that helps the students visualise their design, but more importantly engaging them to compose their proposal in a beautiful narrative; how will light hit the facade, and how do you want your materials to be shown?
The tutorial also runs into material customisation, landscape placement, object placement and sunlight orientation to help them curate their final render image.
Posted 3 Apr 2019 12:19
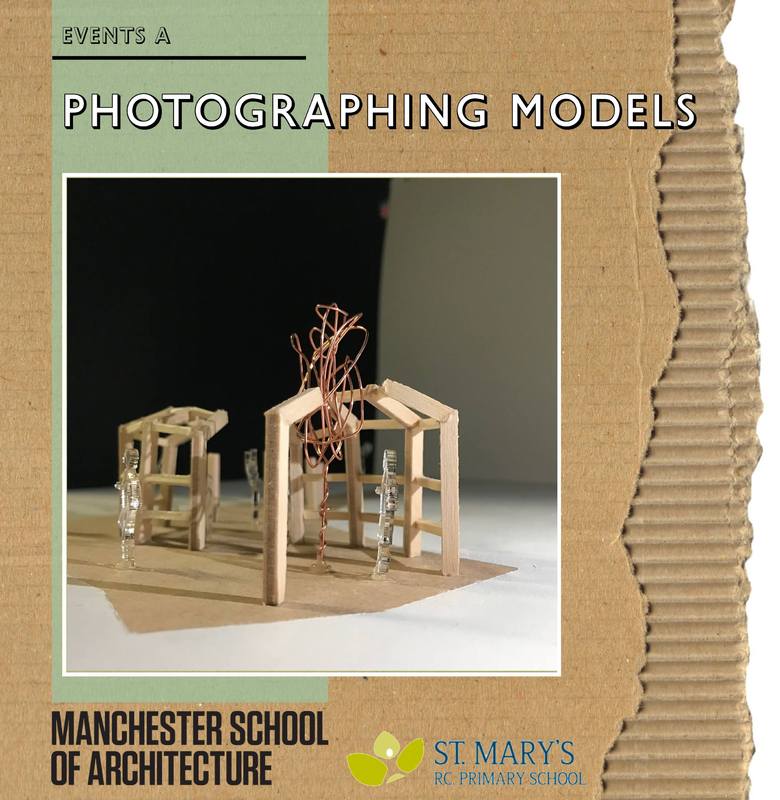
Yesterday we managed to finish both our 1:50 and 1:200 models! We are beyond thrilled with how well the undergraduates have worked together to produce two stunning models, which we feel really showcase their design superbly.
Today we are photographing the models to put into our final document, which will then be given to St Mary’s RC Primary School on Friday. Photography models is a skill in itself, as sometimes even the most beautiful models, if not photographed well, fail to illustrate the design properly. It is important to consider what you are trying to convey about the scheme when photography a model, and whether an additional level of annotation of the photograph would be needed in a portfolio format.
Therefore we hope that by teaching the undergraduates basic photography skills now, it will serve to enhance their own work further into their degrees and careers.
Posted 3 Apr 2019 12:17
THURSDAY 24/03/2019
16:00
The model displayed above is the 1:200 scale concept model done by Group A. They created a makerspace which has the look of an old paper-printing machine and looks very industrial. But, the paper loop rolled along the model through the cylinders is for the public to explore ideas, create vibrant, colourful doodles and thereby giving a play of contrast of the structure and the paper.
Posted 3 Apr 2019 12:15
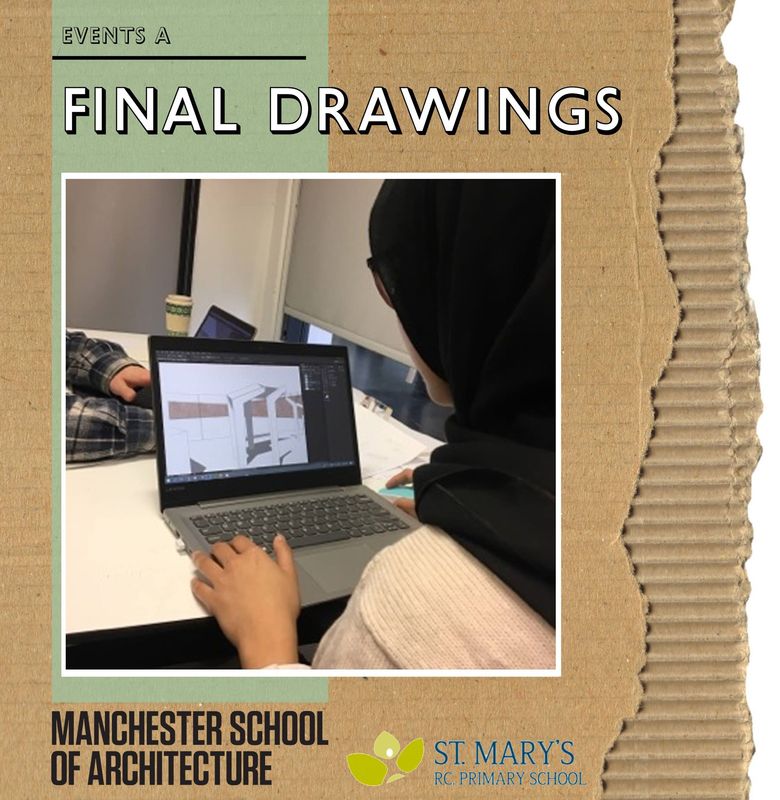
In preparation for our final handover document which we are presenting to Mr Usher at St Mary’s RC Primary School of Friday, today we are finalising the floor plans, elevations and visuals through finishing our sketchup model.
We spoke in yesterday’s blog post about teaching the undergraduates sketchup, and they have come on leaps and bounds in a really short amount of time. Today we have extracted line drawings from the model, and am in the process of using Adobe Illustrator and Photoshop to clean them up and add colour, texture and shadows, helping the drawings look more visually appealing. Through this process we are helping the undergraduates to develop their rendering and software skills, as well as their eye for design. Being able to produce visually appealing illustrations and visuals in an important aspect of architectural presentations, as they are usually the drawings that the general public, or clients with little to no architectural training can engage with best.
Posted 3 Apr 2019 12:15
The Semi-detached group have been looking at the interior spatial quality of their dining space, ensuring there's good natural lighting. Lumion rendering software has quickly given them some answers; the software allows them to simulate the sun location and daylight penetration in their room. Through various testing, the group confirmed the efficiency of their window and proceeded onto setting the scene for their interior render of the dining room. This involves customising the materials of the furniture, the colours of the walls, the glossiness of the floorboards to set the "mood" and atmosphere of their design. Keen to see how the final product will turn out to be!
Posted 3 Apr 2019 12:13

//DAY 07//FIXTURES & FITTINGS
For a Pop-Up shop the interaction with the elements is a key area for consideration, how will the member of staff supervising the shop interact and what are the fixtures/fittings that will enable the transformations. The students need to decide the aesthetic of these and their placement, whether they will be visible form the outside or hidden. If they are hidden, how will the shop assistant know how the draws open and the elements go together without prior knowledge.
With these questions in mind a team looked at the functionality of the base unit, how the draws would be fitted and what type of brackets will be necessary to ensure it is robust. A key feature was the wheeled system that which was a key component of the original design. It is important that the shop is easy to manoeuvre but also secure when open. Initially two wheels were used with supports in front, but this was later changed to four wheels with 360 degrees of rotation and breaks so that staff can reposition the shop with minimum effort.
Another aspect they looked at was the mechanisms that attach to the pull-out shelving positioned on both sides of the shop. They researched existing draw units from the internet to see how they resolve the issue and opted to use a similar system which would sit on the base of the shelving. This will mean that they can more effectively support the pull-out elements and remain hidden.
The peg board feature also needed further analysis to ensure that the back board will provide enough support for the shelving. Although at first glance the peg system appears a simple elegant and adaptable solution for displaying items there are a number of factors that must be considered. Firstly, the depth of the board must be deep enough to receive the pegs and securely hold the shelves. The placement of the holes must also be taken into consideration, where the pegs will be positioned on the shelves and how deep the shelving will be.
Posted 3 Apr 2019 12:10

Our design is based around large structural wooden columns, which then have infill panels which the undergraduates and the school children can design. To fully illustrate this to Mr Usher and the year 6 children, we have asked some of our undergraduates to design examples of what the infill panels could be.
We want this infill panels to function as the educational elements of our design, showcasing the sustainable and eco-friendly technologies and building techniques we brainstormed last week, and then discussed with the school children during the workshops. Some key elements of these were rainwater collection, plant growing and elements of play.
The undergraduates are producing some excellent work for these infill designs, and we’re really excited to see how they’re starting to take shape. As many of these designs features the re-use of water bottles, we’ve been discussing with our undergraduates the possibility of making 1:1 models and examples of how their ideas would actually work. Can’t wait to see what they start to produce!
Posted 3 Apr 2019 11:53

//DAY 07//BRANDING & MATERIALITY
For a shop its brand is its identity, a set of aesthetic qualities that when done successfully can achieve a variety of goals. Firstly, it can link all the products or facilities that fall under the same company/organisation. This creates familiarity and consistency making it easier for a customer to know who they are buying their products or services from and aware of where to return if they enjoy the experience. Combined with this the brand can highlight an ideal demographic through colours and font styles. More bright colours with bolder fonts will often appeal to a younger audience and pastel colours with simple fonts will present a more sophisticate persona and attract an older clientele.
The Pop-Up shop will work as an extension of the special collections and therefore must work alongside the museums’ visual palette. Through their research the students found that there was no defined branding for both the special collections and the university. They collected together all the fonts and colours that have been used on documentation/websites for both and created profiles detailing them. It was agreed that golden yellow was frequently used and complemented the deep blue more commonly associated with the university.
We encouraged the students to consider a typical client that they want to visit the shop. Commonly know as a pen profile, it would combine characteristics into one ‘Person’ and not an average overall client which can make a design feel vague. At the first meeting with Janneke she described the type of person who would buy the most from a museum shop. This was a middle-aged/older woman with grandkids and would buy cards for future occasions, a gift for the grand kids and a memento for herself. With this as a base we wanted the students to consider this but also think of a ‘future’ client and who they want to attract and buy more from the Pop-Up shop. Collectively we agreed that students would want to be our new pen profile as they will be using the facilities, have the most access to the shop and perhaps buys the least from similar shops. We therefore encouraged the students to design a brand trying to appeal to both audiences but create somewhere they themselves would want to buy from.
Following this they focused on the signage looking at how different size shops promote their brand. They came across various methods of displaying the company name and ways they are affixed to the outside of the shop. Using this information, they created a board on which they could add letters to so that sign could be changed depending on location or stock. To Accompanying this, they decided that a logo was a key component for an organisations’ branding. So, they started to draft a logo that could be used by special collections and would bring the whole brand together.
Posted 3 Apr 2019 11:45
We have also had confirmation back from MCC that our App will be exhibited in the Manchester Central Library Performance Space this Friday, which is great news for the team.
Posted 3 Apr 2019 11:43

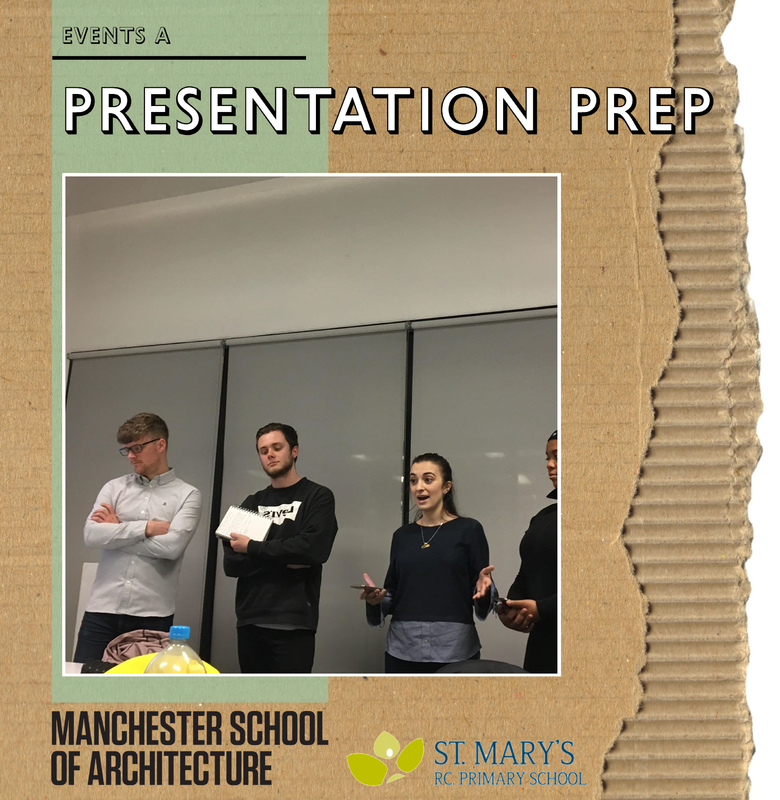
Today is the second Wednesday of Events week, and the clock is ticking down to our final presentation with to St Mary’s RC Primary School tomorrow afternoon! The undergraduates (and the Masters students!) are very excited to pitch our design process and final scheme to the children, and for them to see how the workshop sessions we undertook with them last week have informed our design. We’ve always felt that it is incredibly important for the school children to see their ideas in the final design, so that they feel an ownership of the proposal and subsequently the space.
We are currently preparing for the presentation by creating an indesign document. We introduced and taught many of our undergraduates indesign briefly last week, as we used it to prepare the initial workshop presentations and are also using it to create our final document, which will be presented to Mr Usher on Friday. Therefore, with this presentation we are building upon their indesign skills, which we feel is invaluable for them to successfully produce portfolios in the future, as well for practice life.
We have split the sub-sections of the presentation amongst the undergraduates for them to design their own page, and write a short script so that they are confident in what they’re speaking about. For this presentation it is important that the information we are presenting is accessible both to the year 6 students and to Mr Usher, as representative of the school.
Posted 3 Apr 2019 11:34
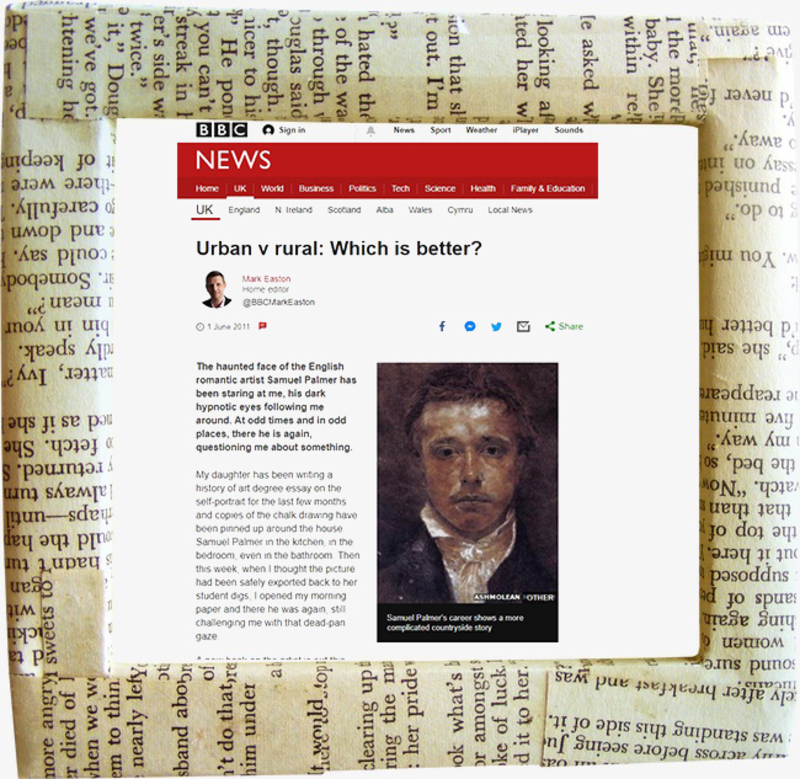
"Urban vs Rural"
Our team member, Lucy has shared with us an insightful article on BBC news about urban versus rural.
It begins with a book on the life and work of Samuel Palmer,
a romantic artist and how it opened up the discussion on the contrast between urban and rural lives. It then jumps on to some interesting statistics on people living in urban and rural area. Did you know that people living in urban tend to have a shorter life span by 2 years than people living in the rural? Did you know the proportion of the population living below the poverty threshold is 18% in the country and 23% in towns?
It's an interesting article that we can have a good discussion about. To view the article, please click the link below.
https://www.bbc.co.uk/news/uk-13617401?fbclid=IwAR0aWL2WfCzLyhdNMmWInZykmPhfNpcFcLFf0dd3b8YH1dSAVasOIcBzTZAPosted 3 Apr 2019 11:32
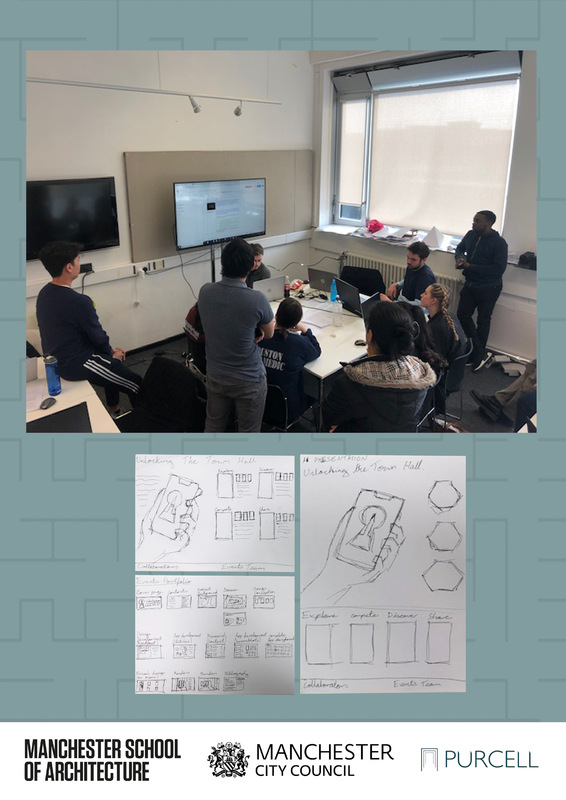
Great morning meeting with the team! Starting to think about portfolio output and the best ways we can document the progress we have made the past week and a half. Some nice ideas and early sketches for our poster design as well!
Posted 3 Apr 2019 11:32

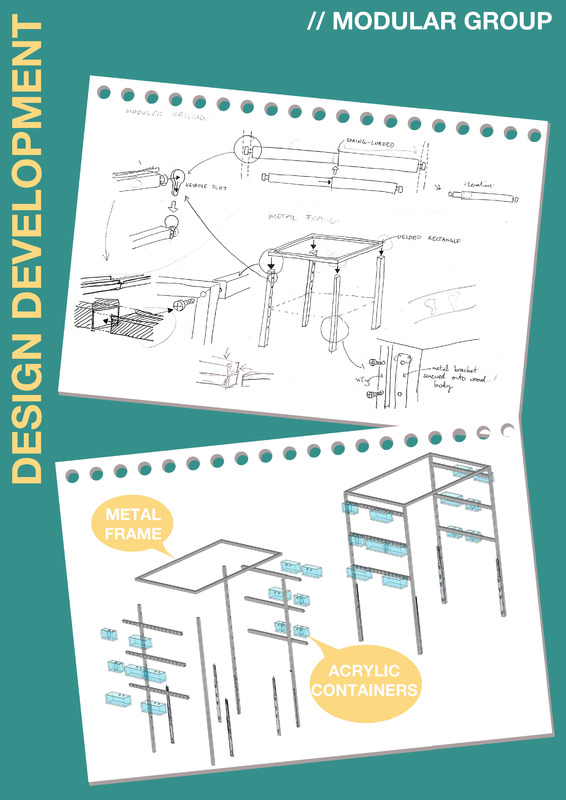
//DAY 07//MODULAR FRAME & CONTAINERS
Now that the overall components and basic form for the shop had been agreed upon, we needed to consider the design on a detail level. For building construction, details are fundamental drawings in the design process. They are on a small scale specifying technical information for junctions labelling the build up of materials and the placement of any fixtures and fittings. For the Pop-Up shop this will be fundamental for how the shop goes together, how the sliding elements work and the attachment of handles or signage. With the intention for the creation of a full set of technical drawings the details will ensure that the shop will successfully function and be robust enough for daily use.
A number of the undergrads researched the horizontal railings which will hold the modular storage. They devised a system whereby the end of the horizontal bars are hooked and which then slot into holes in vertical frame. This method will allow the containers to be positioned at varying heights to accommodate an array of container sizes. Leading on from this they explored how the modular display containers will be easily hung, ensuring they are stable when put in place and can be stored quickly after use. For the Pop-Up shop this will be its cladding, so we tried to encourage the students to come up with some inventive forms. A final consideration is how the frame overall attaches to the base unit whether it will be permanent or removable and what fixings are most suitable to attach an aluminium frame to timber.
Posted 3 Apr 2019 11:30
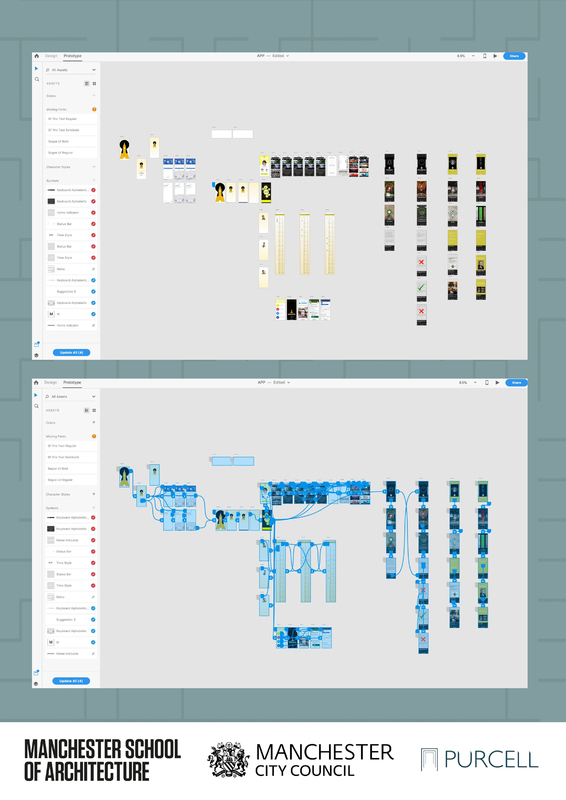
Great progress being made with the app as we continue to add and link more and more pages together. Our BA students haven't left any detail out, creating pages for different social media logins, and bonus content within the app.
Posted 3 Apr 2019 11:26
MODEL MAKING
Group 1 decided to make their final model through a range of materials and skills. They were taught to prepare a CAD file for laser cut as well as directed by the 5th years to produced certain part of their final model using this method. They also decided to hand cut specific elements of the model.
Their design will consist a combination of both softscape and hardscape to create a pleasant journey for the user of the space. Vertical plantings and planter boxes were also in cooperated into parts of the design to create a peaceful environment.
Posted 3 Apr 2019 11:16
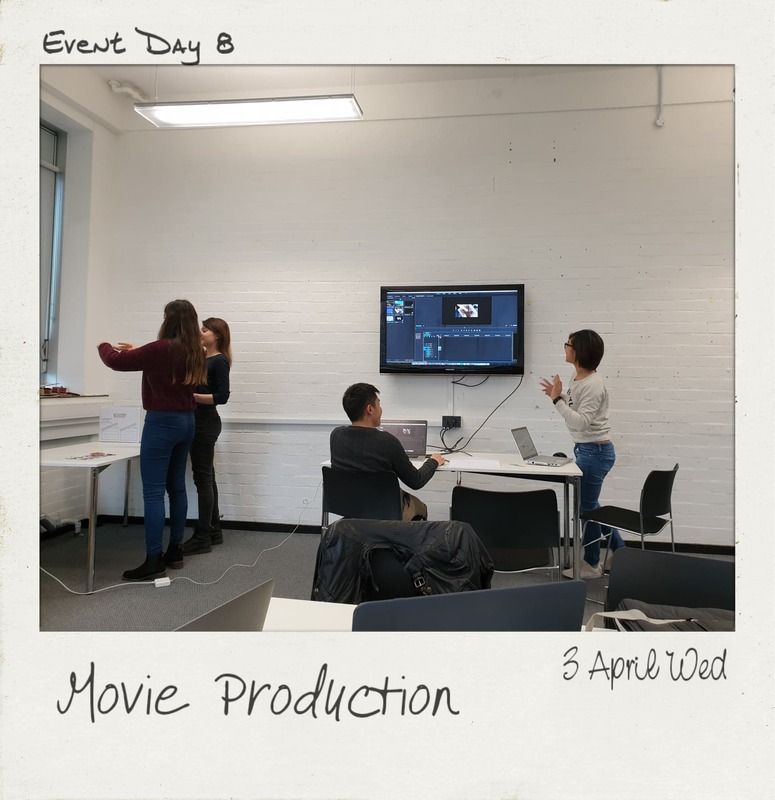
Event Day 8 Film Editing
This morning we continue to editing the videos — and we are combining them to be ONE MOVIE PRODUCTION! Yesterday we had a heated discussion on how we could produce a movie that is aesthetic, informative and interesting to watch and we came up with some brilliant ideas. So today we are working together as a whole team, with a big screen displaying the video editing process and everyone can comment instantly. We are also doing some further research on ruralism and hopefully we would be able to deliver those information through our movie production!
Posted 3 Apr 2019 11:07
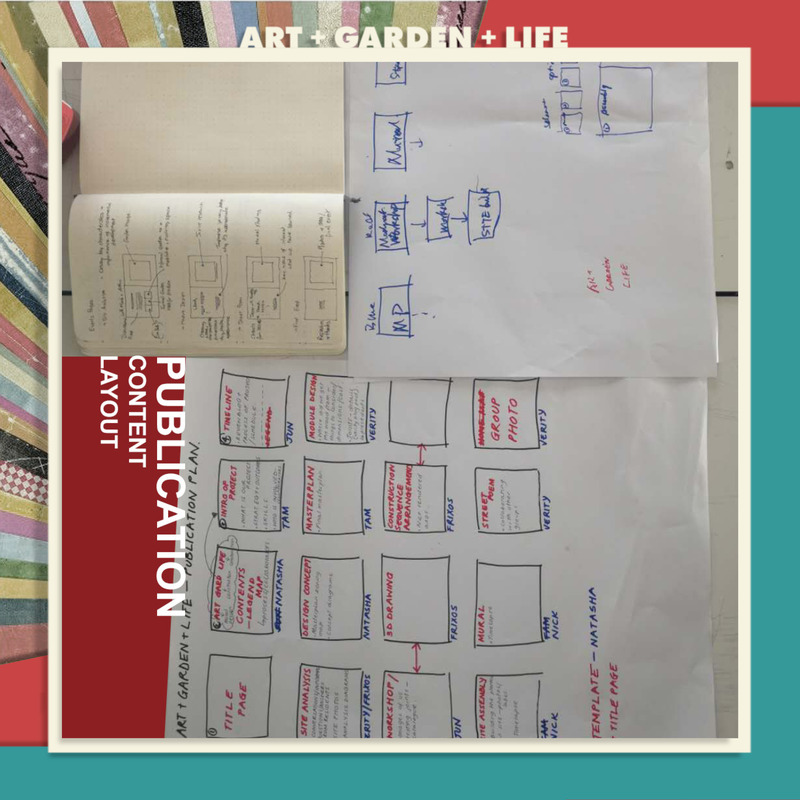
PUBLICATION DESIGN
Square Booklet t+ Time Lapse + Physical Model
Content:
1. Master Plan
2. Modular Design: Workshop and In-site construction
3. Mural
4. Street Poem
Posted 3 Apr 2019 11:04
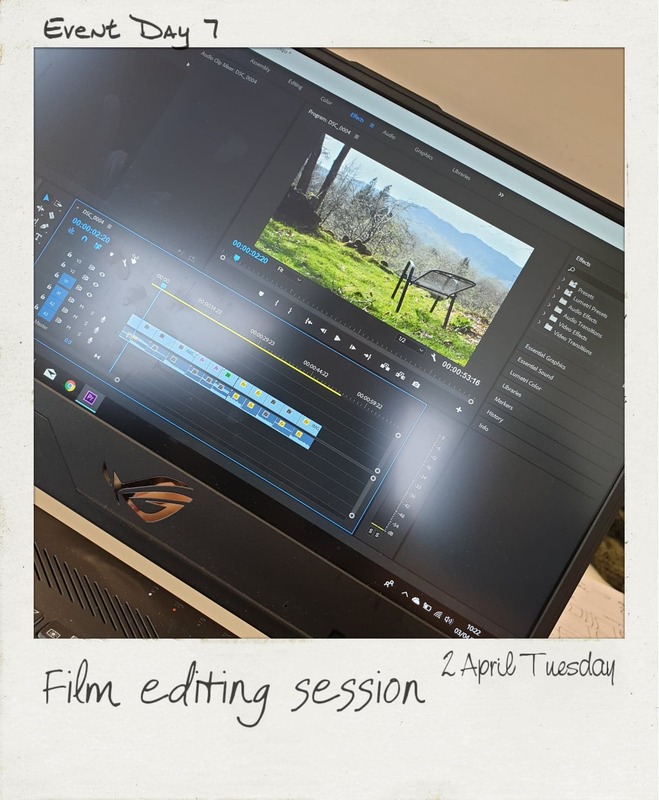
Day 7 Video Collaging
After we did some shooting in Manchester and Lake District and collected footage of city, rural and the Merz Barn, we have started editing the videos. We started the day with skills sharing session on video editing software and have made some short clips. We have explored video collaging, overlapping clips we took in the Lake District on city landscape. The white noises come along with the video are also used to accentuate the city and rural lives. The artistic collage we did on the previous day was a useful exercise for today as it helped us to think creatively and to test the materiality.
In the afternoon, we had a review session on the video clips we made. Comments and advice were given on each clip for further improvement. We will continue the editing process tomorrow as a whole team.
Posted 3 Apr 2019 10:53