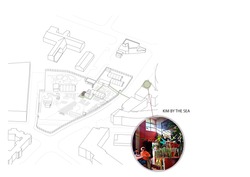
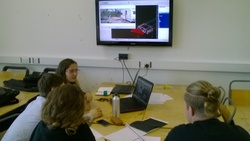
DAY 8 - 06.05.16
We began the day by presenting our events week to our tutors and got a chance to listen to other groups presentations and see their outcomes.
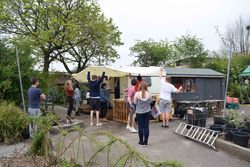
The previous day, as a group, we decided to hold a picnic at lunchtime on our decking to celebrate the end of the two weeks.
After the picnic, we finished the afternoon by cutting the canopy sheet into two triangular pieces. We planned to fix the two parts with cables and tension it using the stakes, however we found that, when tested, the concrete in the foundations had not set causing it to crack. We made a group decision to leave it to dry over the weekend.
Posted 15 May 2016 00:32
DAY 7 – 05.05.16
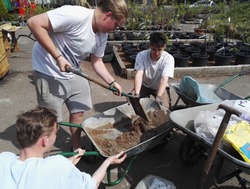
We began the day by cutting the canopy poles to size to deal with the level change on site and cut stakes from pole pieces. To do this we used an electric circular saw, we were careful to wear googles and protective gear when handling the saw. We moved the tires into place carefully using a trolley, we put the poles in place and surrounded each one with rubble to secure it. We proceeded to mix concrete in a wheelbarrow and poured it into the tire foundations which we plan to leave overnight to dry.
We completed the decking by adding facia boards and we created the last step to connect the decking and the shelving unit. The afternoon was spent planting and watering a willow hedge around the decking, which will act as a boundary between the decking and the footpath.
We ended the day by taking another trip to B&Q and Screwfix to source turn buckles, cable clamps and more cabling that will be used to tension the canopy sheet.
Posted 15 May 2016 00:30
DAY 6 - 04.05.16
The shelving unit is now complete, so we moved the shelving team onto the decking. Together with the sites volunteers, the team spent the morning working out a way to tie the decking panels onto the trellises. Initially we wanted to do it with garden wire but we found that when we twisted the wire it snapped. We ended up bolting the individual panels onto timber slats that ran underneath each trellis, this was more secure and more aesthetically pleasing as all fixings were hidden underneath.
The second team moved onto the canopies foundations, where they bolted two tires at each foundation together. They cast postcrete in the base of them to dry ready for tomorrow, where they will cast polytunnel poles in situ.
We ended the day by going to B&Q to get more postcrete and materials for casting the concrete.
Posted 15 May 2016 00:28
DAY 5 - 03.05.16
In the morning we wheelbarrowed the chip fat from Kim By The Sea over to the Garden Centre. We spent majority of the day painting the individual panels for the decking and the shelving unit in the chip fat. To create a pattern effect with the decking panels, we alternated the direction of each panel and painted them in a darker finish, to do this we mixed oil paint with the chip fat which gave a two toned effect. To refine the sides of the decking, any rough edges were cut off with a saw. The shelving units were sand-down with an electric saw to give a more even surface, making it easier to paint. These were all left overnight to dry.
Posted 15 May 2016 00:26
DAY 4 - 02.05.16
On Monday the garden centre had a May festival on, which meant the site was not safe for working, so the students had the bank holiday off. We took this day as opportunity to get materials for the rest of the week. We went to Kim By The Sea to source chip fat for treating the timber – we also tried takeaways on Oxford Road, but they were reluctant because they sell their fat to someone. Tyres for the canopy foundations were sourced from Kwik-fit – they usually pay to dispose of old tyres so were happy to give some away. We could just fit 8 in the back of the car – enough for two tyres per foundation. Decking wire, canopy cable and clamps were sourced from B&Q.
Posted 15 May 2016 00:24
DAY 3 - 29.04.16
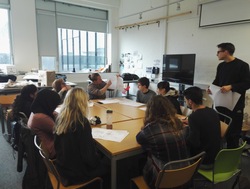
The weather was very temperamental with rain, hail and even snow, so we relocated the group to Chatham tower to do some design work. We took this opportunity to have a design charrette for the canopy to be built next week.
For the charrette we provided a plan, section and axonometric drawing of the caravan and its immediate site, to trace over or for reference for sketching. Everyone sketched their ideas for the canopy and then shared their ideas with the group in a round table discussion. From this discussion there emerged two groups, one looking at creating a green canopy with curved polytunnel sections, the other creating a tarpaulin canopy suspended between upright posts.
Once the weather calmed down in the afternoon, we returned to site and tested our ideas in-situ with the polytunnel sections we would use to construct the canopy, to measure and work out our final design. It was evident from this testing that the curved polytunnel sections could not be used, because the shape of the site made it unfeasible. The spans between the curved pieces would be too far, and creating a foundation for them difficult. Furthermore, we could not connect anything directly to the caravan because it might compromise its structural integrity and create risk of leaking.
Posted 15 May 2016 00:21
DAY 2 – 28.04.16
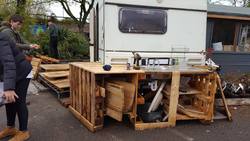
On the second day, we finished the shelving around the sink and started to think about making lockable storage, using more pieces of timber and the ironmongery components available on the site.
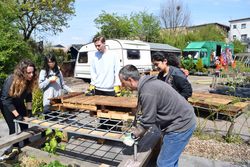
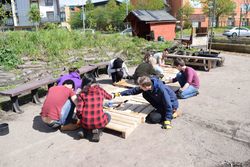
The decking team continued breaking up pallets and reassembled them into 600x600mm squares to create a tessellated grid for the decking. To break up the pallets we used various techniques and tools, the most effective of which was a long tool like a crowbar designed for dismantling pallets. This provided the leverage required to pull out the nails, but spread the force so there was less risk of splitting the wood. To reassemble the pallets, we used 2 joist sections with 4-5 decking pieces nailed on top. The decking pieces were different sizes due to the different pallets, so we had to be careful to make sure the spacing between the pieces was consistent. The metal trellis had bars going across in two directions which the decking rested on, however the bars were different heights depending on which way they spanned. Due to the tessellation of the decking, therefore, we had to add base pieces under the joists on the decking going a certain direction. We had to carefully position these for each one to fit securely and level on the trellis.
The workshop area of the site was used for cutting and assembling – this was for health and safety reasons and ease of access to a power source. Components were prepared in this area and put in place in situ at the caravan. We also cordoned off the caravan site during building work, to prevent passers-by coming into the work area.
Posted 15 May 2016 00:20
DAY 1 – 27.04.16
We spent the morning introducing our group to the site and to the Hulme Community Garden centre team. Where they were made aware of the sites health and safety regulations.
The garden centre prepared lunch for us all, which gave us a great opportunity to discuss the week ahead. After lunch, we proceeded to split the larger group into two and decided for the first week we would all concentrate on the decking as the garden centre is hosting a festival on the Saturday. The idea is that the caravan and the decking together will form one of the bars.
The larger group concentrated on constructing the decking whilst the smaller group looked at building a storage/shelving unit around the sink located at the back of the caravan.
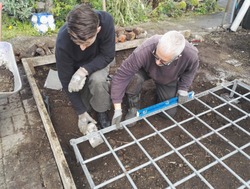
We worked with the garden centres volunteers throughout the day, we found that many of the volunteers had previous building experience and so were a great help. By the end of the day, we managed to level out the site for the decking and created a foundation from the trellises.
Posted 15 May 2016 00:17
PLANNING DAY – 26.04.16
The aim of the day was to create an initial design for the stepped decking, which we then could present to the larger group on the first day. To do this we looked at precedents and drew up ideas to how we could tackle the slope on the site.
Posted 15 May 2016 00:11
