[ Fig.11 ]
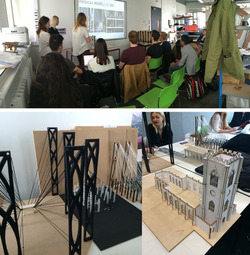
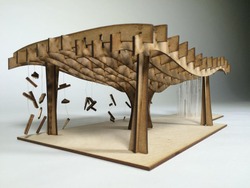
Our event finally comes to an end. On the last day, all four groups present work to each another alongside with strong graphic image and great physical model.
Posted 21 May 2015 22:58
[ Fig.10 ]
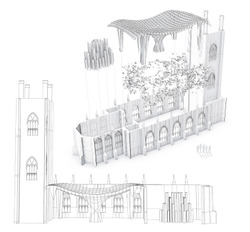
Exploded axonometric drawing and the section through the building.
Posted 21 May 2015 22:53
[ Fig.9 ]
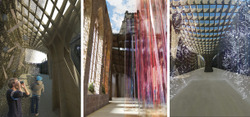
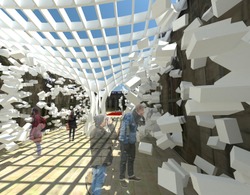
Here is some quick render visualising the interior of the church installation in different view point.
Posted 21 May 2015 22:49
[ Fig. 9 ]
We fit in our installation to the church model. We decided to install a series of stained glass columns at the end of church where used to place an alter. Since such place is almost enclosed by huge window, we think that its a perfect place to make it as a memorial by representing them as the stained glass lost after the bomb.
Posted 21 May 2015 22:12
[ Fig. 8 ]
This image clearly shows how installation free stand by itself, it is stable without touching the edge of the church. We are trying to attach all the hanging debris at the side.
Posted 21 May 2015 22:01
[ Fig. 7 ]
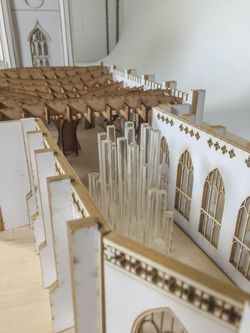
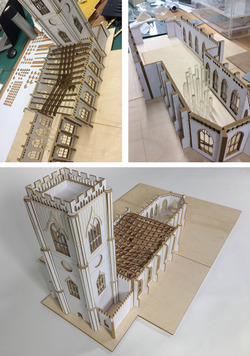
We laser cutter out our 1:100 final model and slotted all the pieces together perfectly to form the structure. The photos show how it fit in to the existing church structure.
Posted 21 May 2015 21:56
[ Fig.6 ]
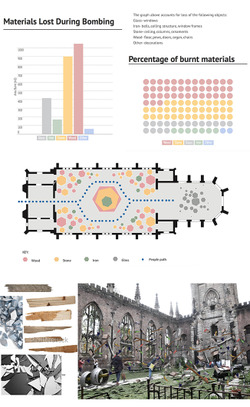
We calculated the total area of materials destroyed by the bomb from the plans and sections and the diagram shows the amount of each material burnt and destroyed by the bomb. We allocated the circulation and how different materials located, finally come up with the plan shown in the middle.
Posted 21 May 2015 21:53
[ Fig. 5 ]
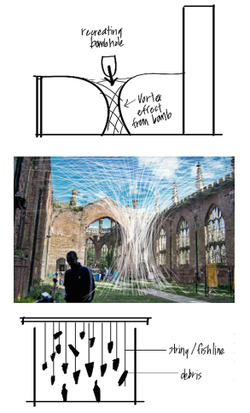
The reason why we designed the installation in such why is to show the damage created by the bomb to the church's roof. The void in the middle represent the vortex effect made by the bomb. We decided to form the whole structure in a grid shell structure so that numbers of debris can be hung from the structure itself.
Posted 21 May 2015 21:52
[ Fig. 4 ]
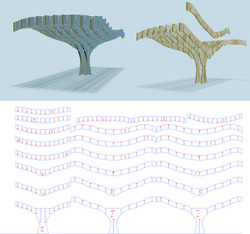
Our group decided to use interlocked slices as the model construction technique. Further improvement is made due to my concern towards loads transfer. The cad drawings is finally ready for laser cut in the end of the day.
Posted 20 May 2015 03:35
[ Fig. 3 ]
Our design scheme is to create a memorial intervention within the church. The commemoration to the WW2 is being reflected by the frozen explosion scenario. As you can see from the image, the structure in the centre of the church represent the twist made by the falling bomb while the random brick-like material on both side represent the loosen material of the church after WW2.
Posted 18 May 2015 15:06
[ Fig. 2 ]
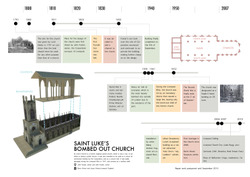
Before formulating our own response towards a scheme in group, we were told to advance our knowledge towards the bombed out church in the historical aspect.
Posted 18 May 2015 14:54
[ Fig. 1 ]
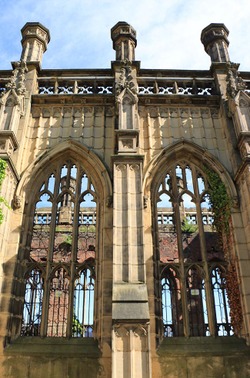
We started our day off to visit St Luke's Church in Liverpool. We did diagrams and sketches, well as took photographs, in order to develop a full understanding about the site. This result is then used as a starting point for the development of the design process.
Posted 18 May 2015 14:47
