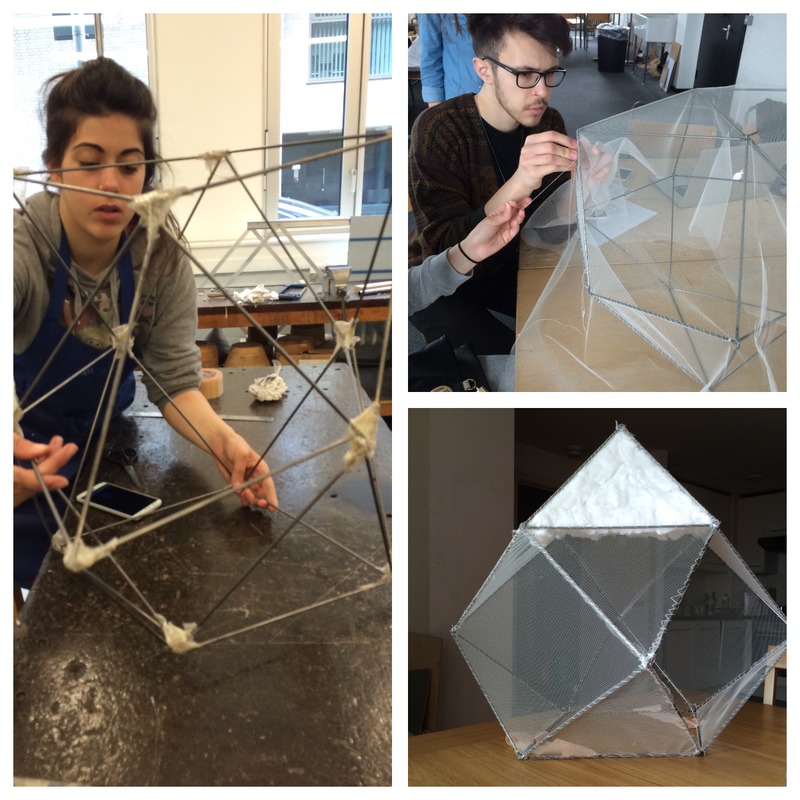
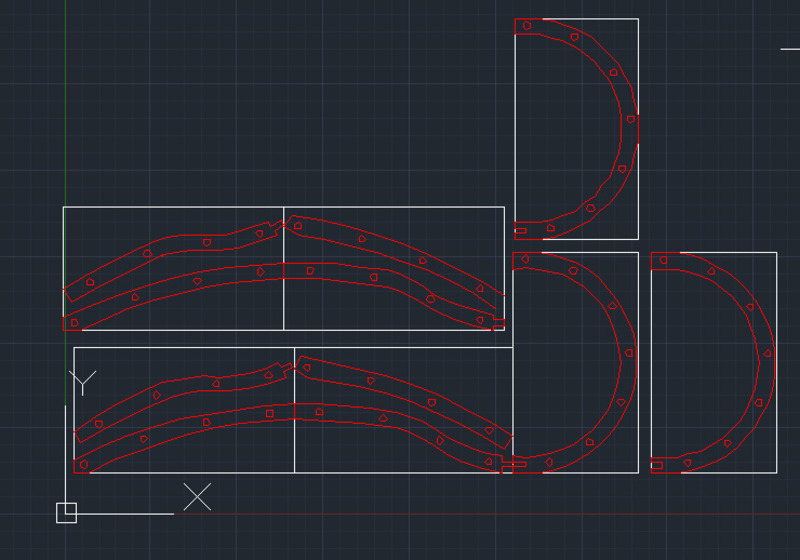
The CAD file that Rameez made. We used the CNC machine as the laser cutter bed was too small.
Posted 22 May 2015 17:00
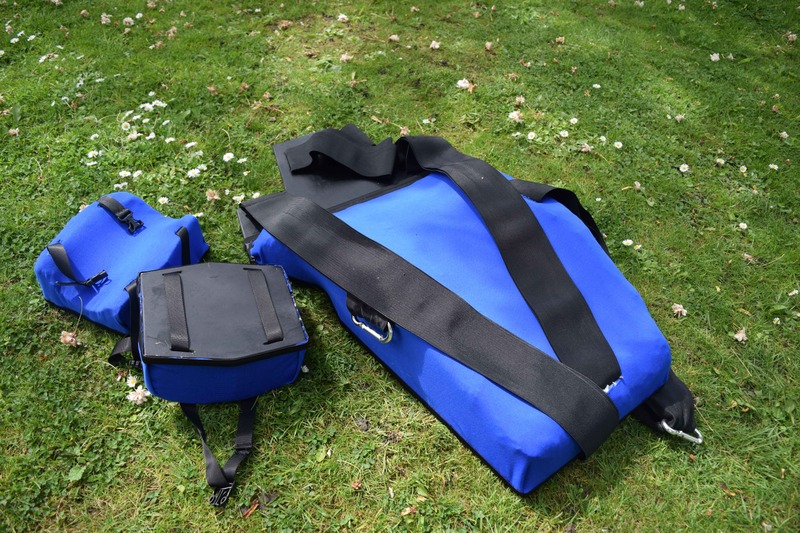
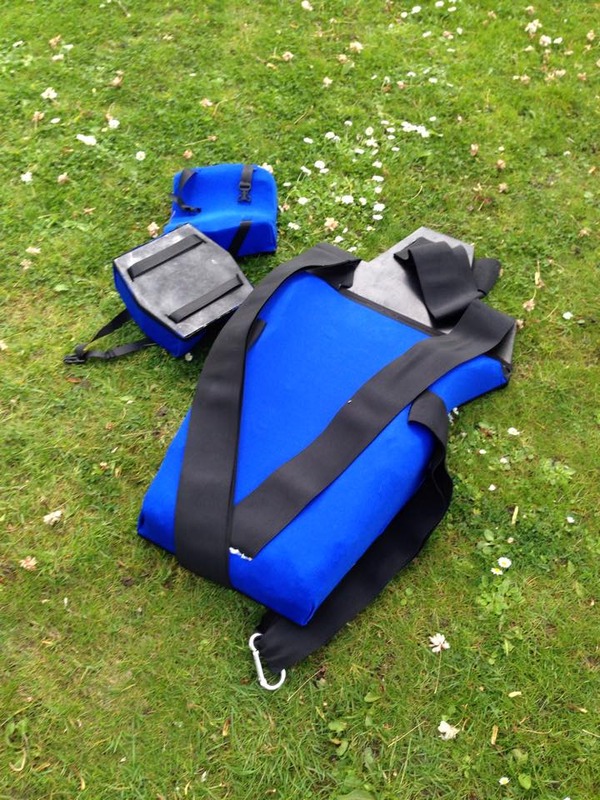
Testing our design after we attached the straps.
Posted 22 May 2015 16:59
Presentation day.
Posted 22 May 2015 16:57
Testing final model.
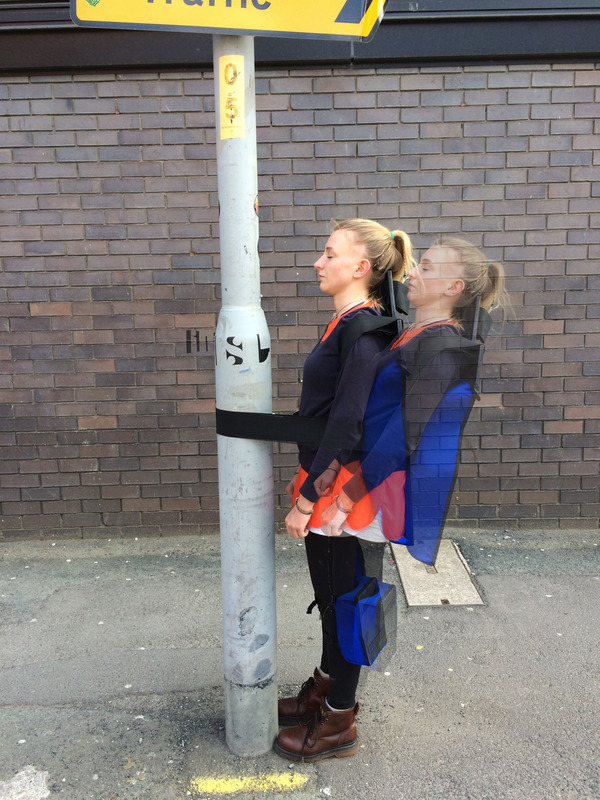
Posted 22 May 2015 16:15
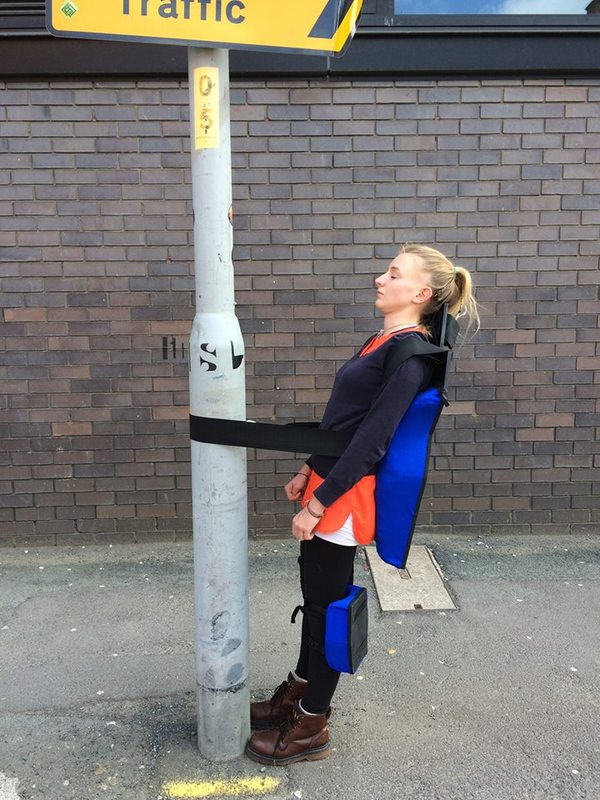
Testing out the product in public for the first time. Attaching ourselves to the lamp post on the street. One of the problem we faced was that the knee pads could have had a better grip to the back of the knees.
Posted 22 May 2015 16:09
Presentation Day- this is where we presented the final output of our two week project. We wanted someone to wear the garment during the presentation to demonstrate the whole idea behind it.
Posted 22 May 2015 13:54
The final product generates oxygen to allow access on a construction site.
Posted 22 May 2015 13:49
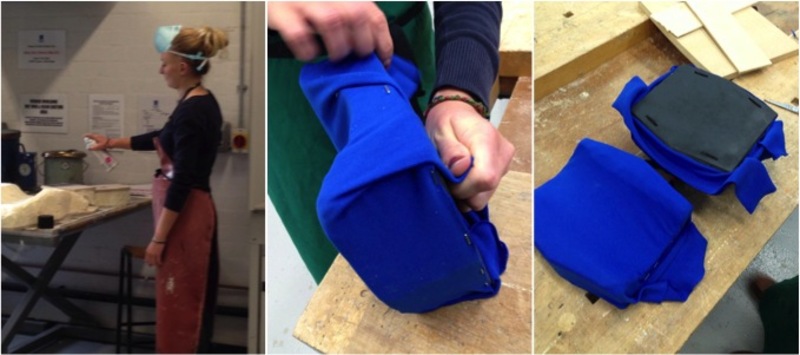
When the foam had completely dried, we attempted to spray the entire model black but then we realised that the foam did not take the paint well and that we needed a better finish for the product. So we had the idea of using fabric to cover up the foam. This solution solved many problems, the fabric covered up the negative spaces between the foam and also provided a more comfortable backing for the user. The back board was covered in black paint, creating a nice contrast between the striking blue fabric.
Posted 22 May 2015 13:48
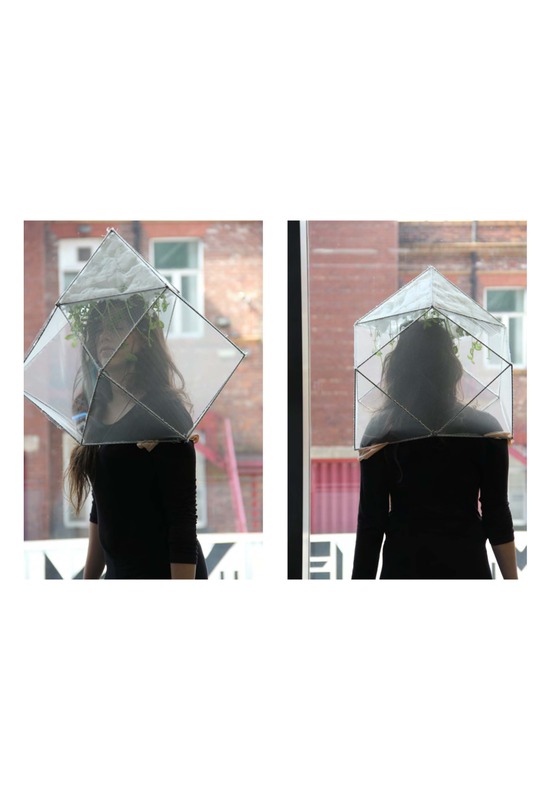
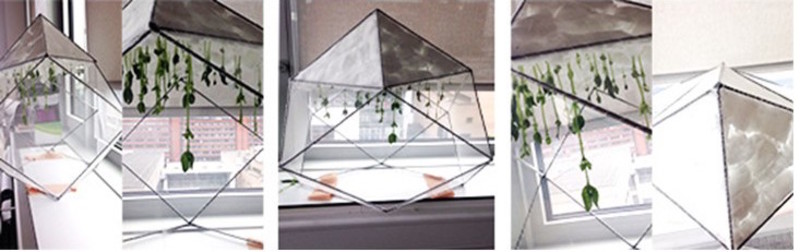
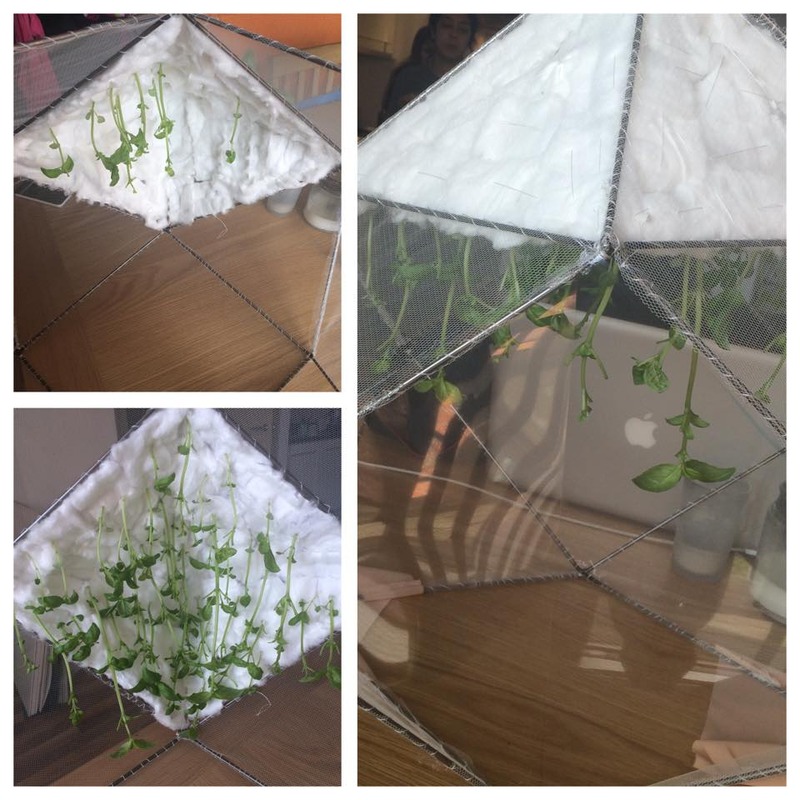
At the end of the two week period of the Events this is our final model. These are photographs from different angles to demonstrate every detail and to show the plants inserted in the final model.
Posted 22 May 2015 13:37
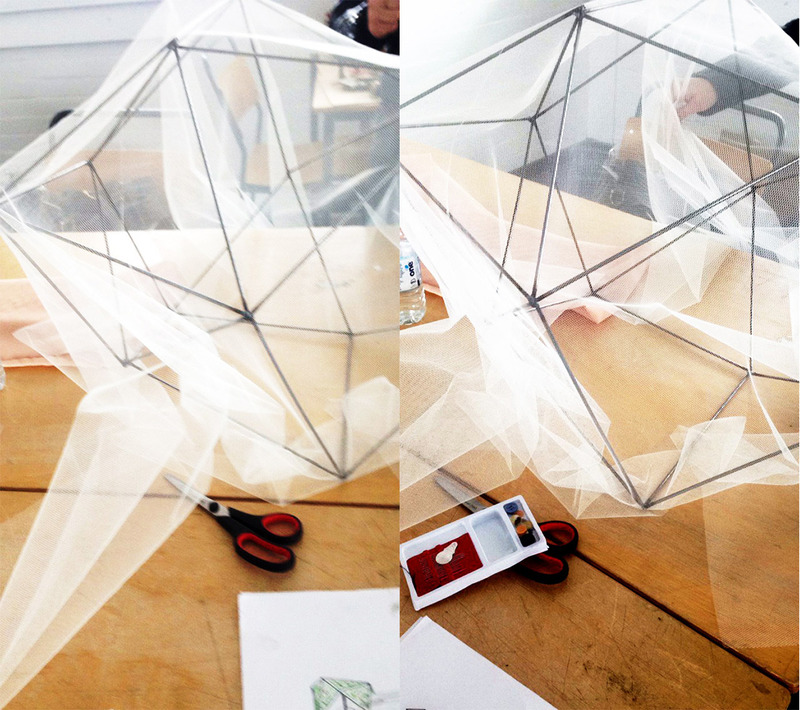
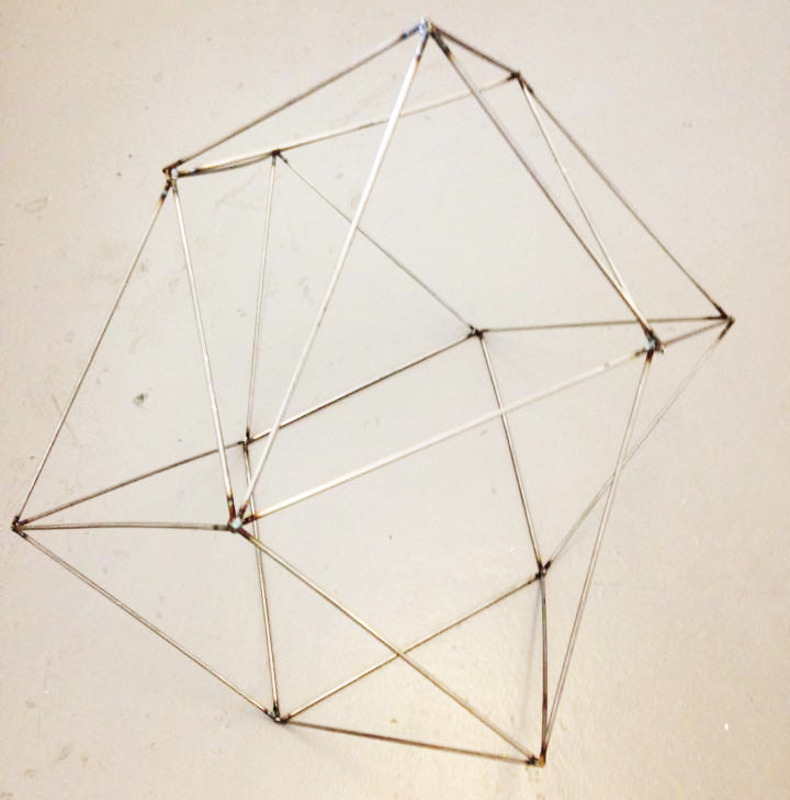
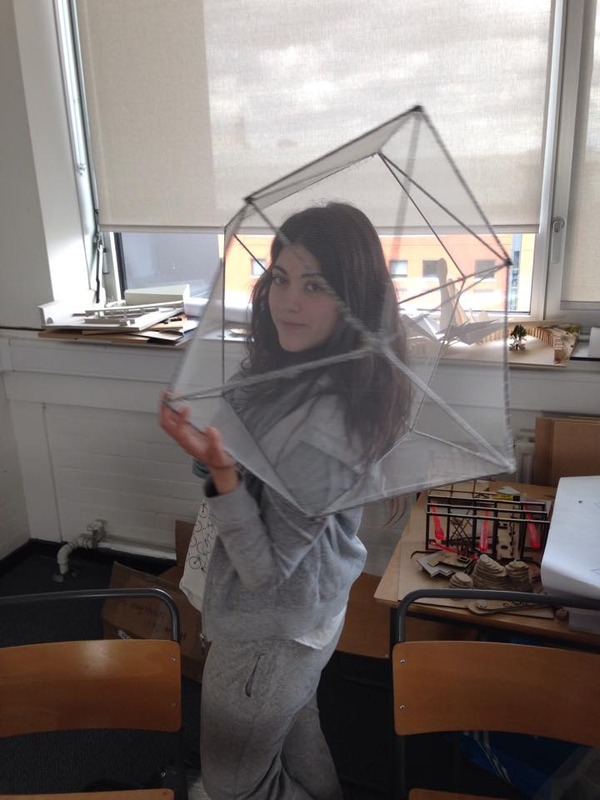
The metal frame with the nylon netting fabric sewed onto it.
Posted 22 May 2015 13:35
Final product
Posted 22 May 2015 12:35
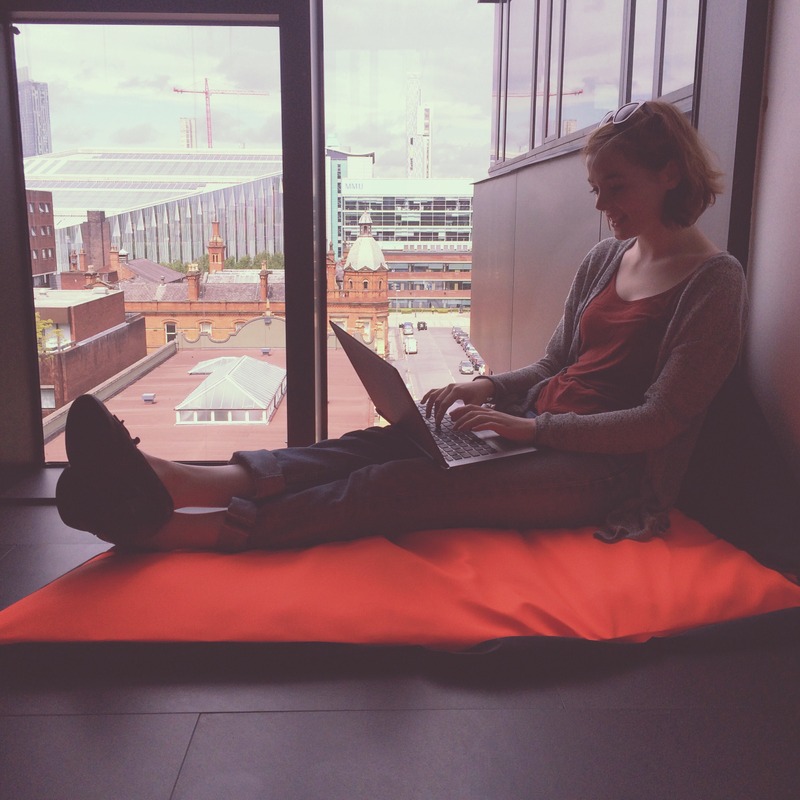
Day 6 - Final Product in use
Once the finishing touches have been added we took our invention to test it out in various places around the university campus.
Posted 22 May 2015 11:54
Day 5 - Construction
Once the foam had dried and been carved we spray painted the boards with black spray paint. We decide to cover it in fabric as a finish to cover up the imperfections in the foam. After this was complete we attatched the straps and connections. The great thing about this project was that it allowed us to experiment with materials and demonstrate other skills such sewing and working with fabric.
Posted 22 May 2015 11:51
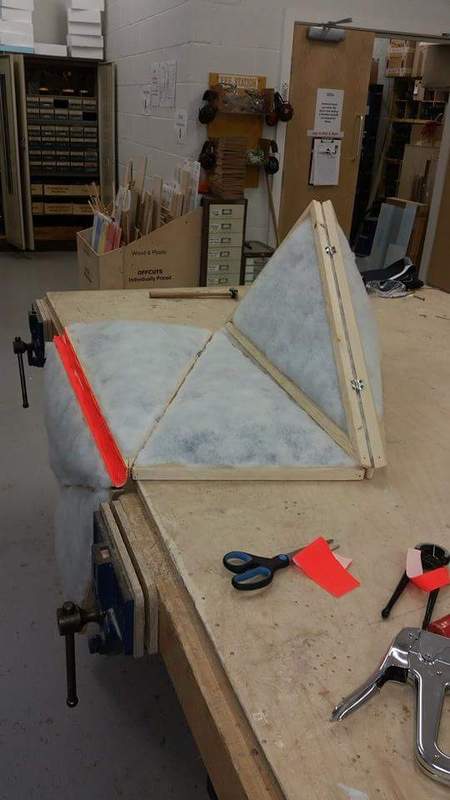
Day 4 - Construction
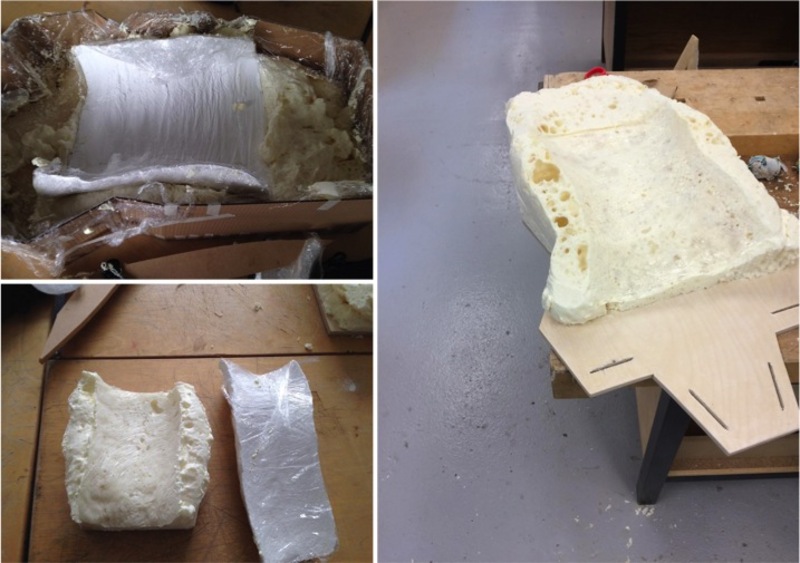
On the first day of construction we split into two groups, as the device is custom made to fit the user so we had emily make a cast of her back and legs while lisa and I worked on creating the backboard. The cast would later be used as a mould for the expanding foam that we used to create the foam lining in an effort to make the device more comfortable. The back board was made of 12mm ply wood so that it would be able to support the user, and for this reason it had to be hand cut as this size would not fit in the lazer cutter.
Posted 22 May 2015 11:31
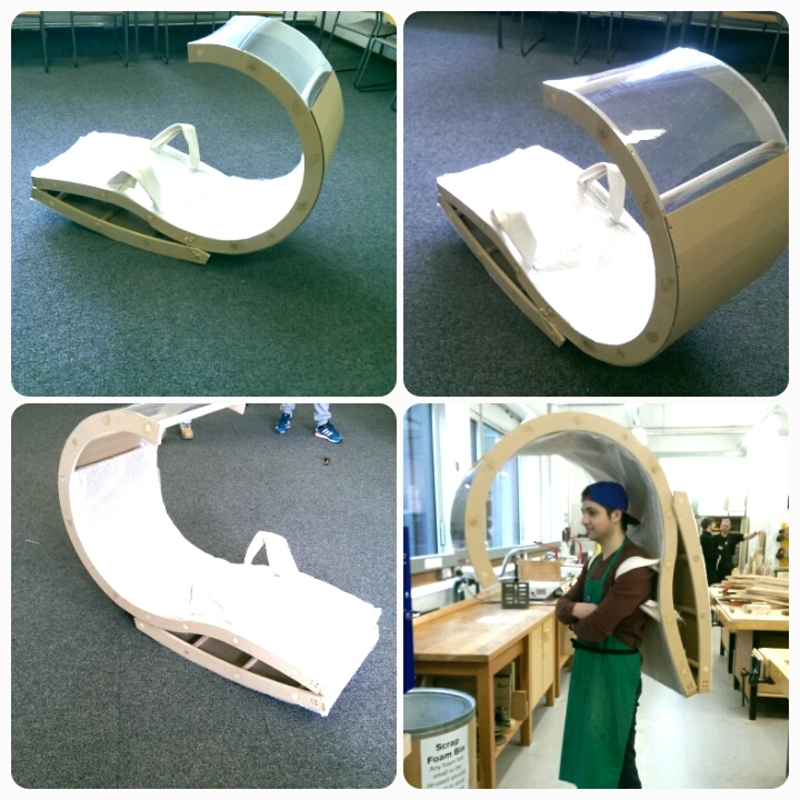
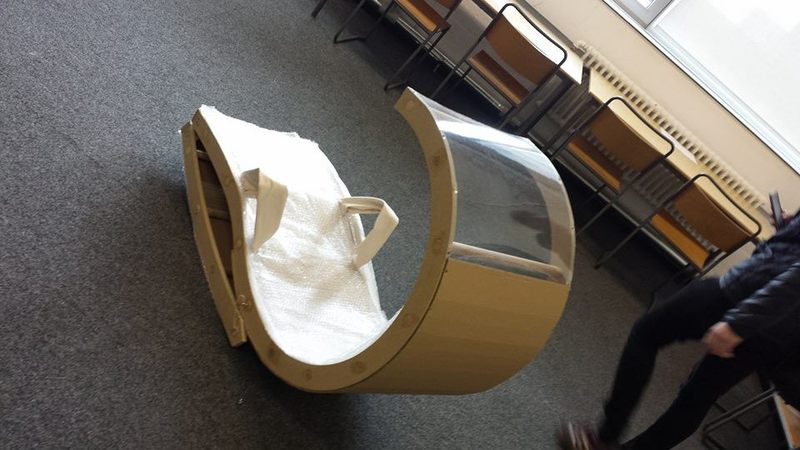
FINAL PRODUCT
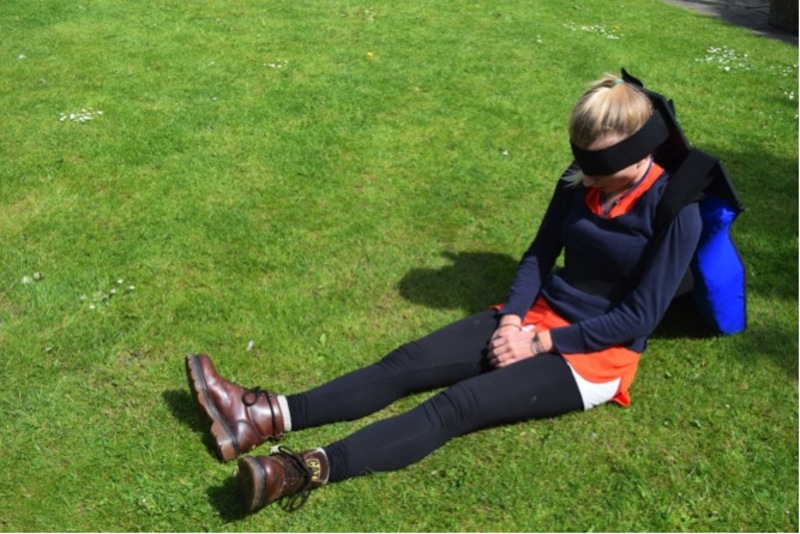
On finishing the device we took it outside to test on various columns, trees and walking around. We found it was comfortable to wear and move in and easy to fall asleep, with my back and head being well supported.
The leg devices however did not support my knee joints and this prevented my body from fully relaxing. Therefore the main improvement which could have been made would have been improved leg supports maybe with foam moulded around the front and back of my knee joint.
Overall reaction from the public was positive with many people commenting how professional the product looked and some people even wanted to try it out.
Posted 22 May 2015 11:31
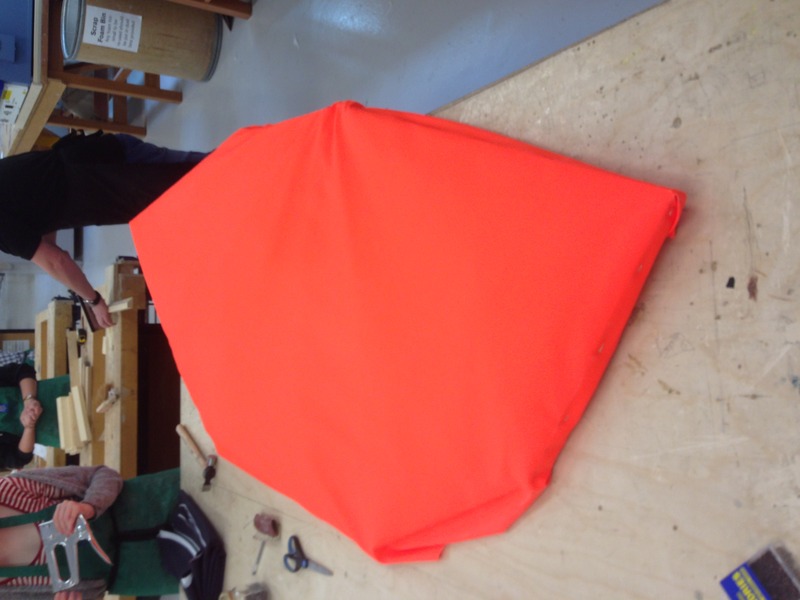
Today we finished the device, adding fabric to soften the appearance, hand sewn straps and clip and finally an elastic finishing band to create a professional appearance.
Posted 22 May 2015 11:28
Exterior fabric being fitted to the interior.
Posted 22 May 2015 11:16
The solution to the hinge problem is to use the exterior fabric as the hinge
Posted 22 May 2015 10:46
The rest of the sections have been completed and pushed together. The only problem now is to make the fist section able to fold both up and down as the hinges do not allow this movement.
Posted 22 May 2015 10:43
The wadding had been stapled to the frame with the newspaper within it. The first sections interior has been completed.
Posted 22 May 2015 10:40
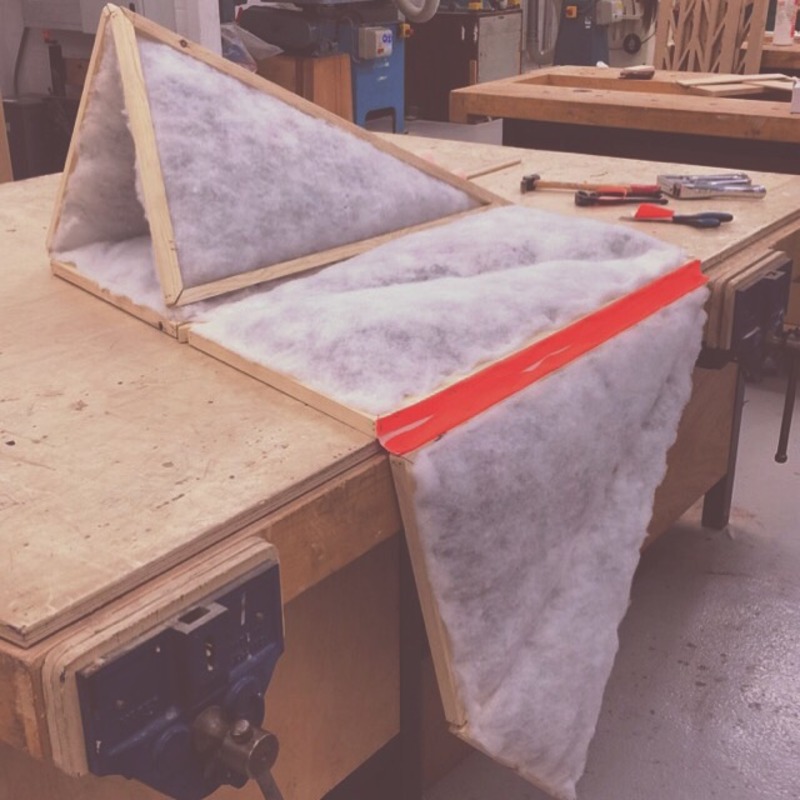
We added wadding to the frame and filled it with scrunched up newspaper pages to make the seat more comfortable.
Posted 22 May 2015 10:38
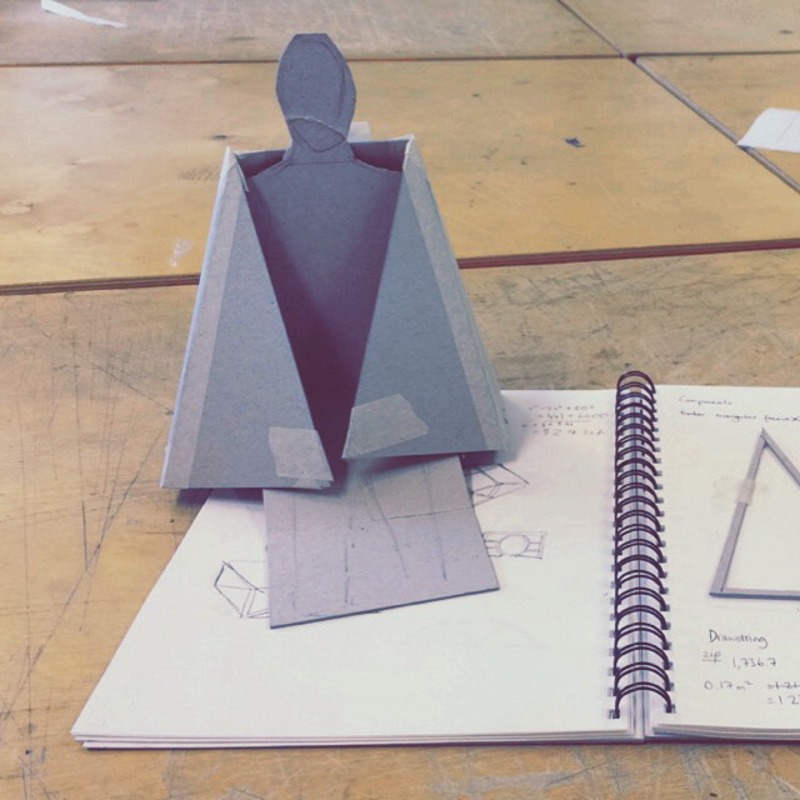
Making the frame of our cape/seat.
Posted 22 May 2015 10:36
Final model.
Posted 22 May 2015 09:41
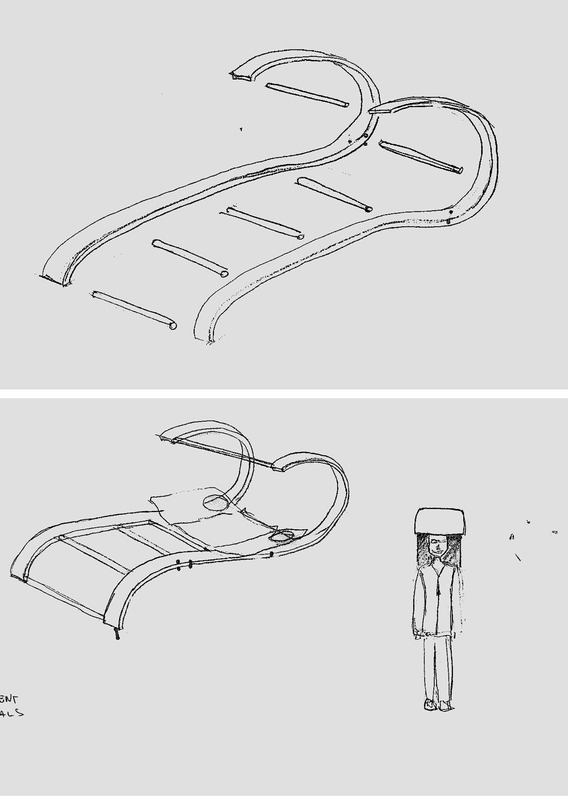
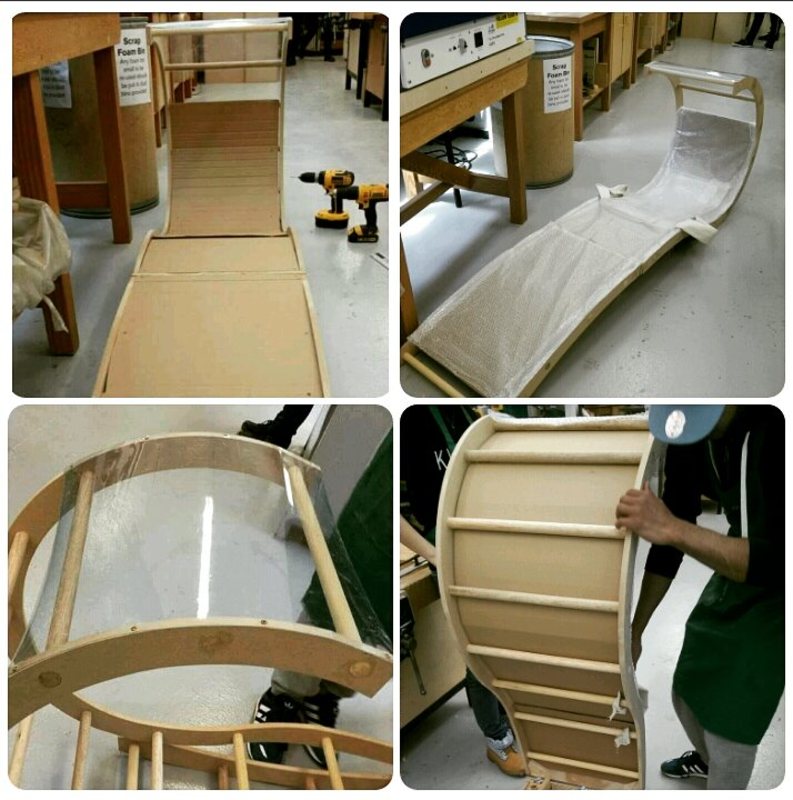
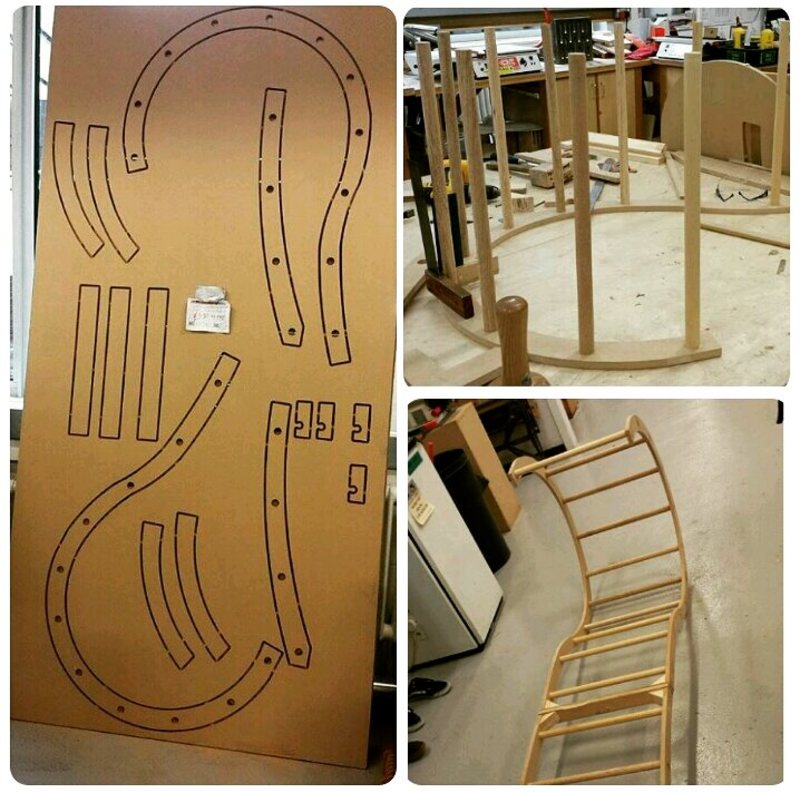
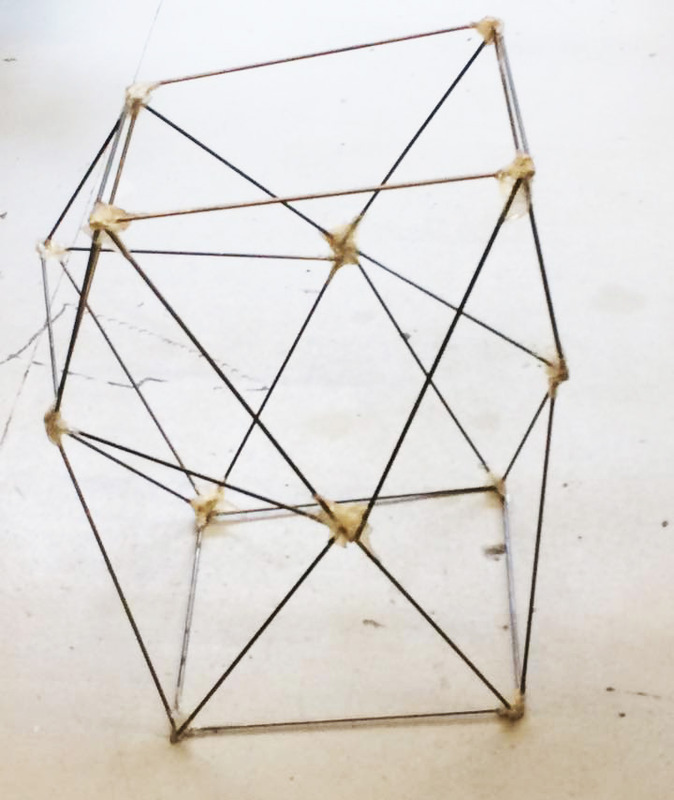
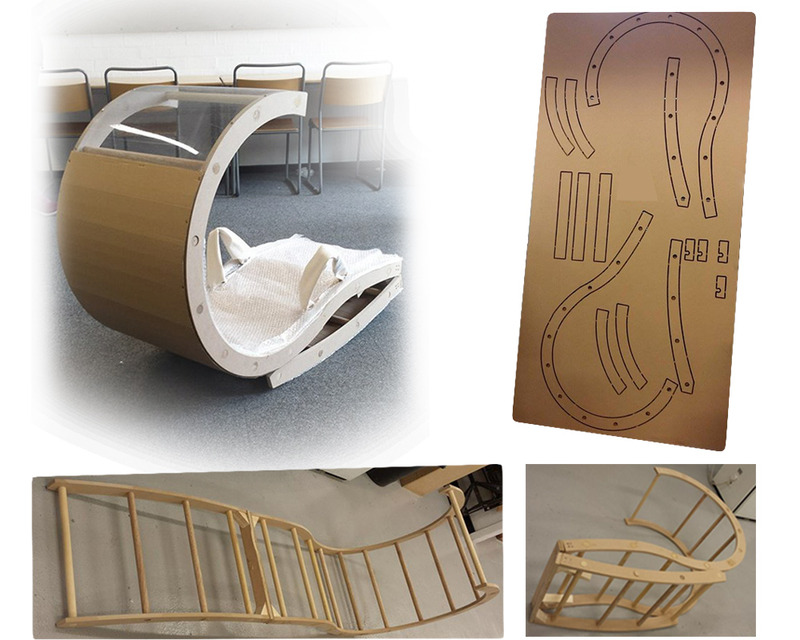
First we made a 1:1 drawing of the frame. Then Rameez made the CAD file and we booked the CNC
machine. The next day we went to the workshop and started assembling the bed. We used 25 mm dowells
in order to connect the two main parts. For the bending part, we used hinges attached to a whick plywood piece. We used plywood because MDF could not support so many screws. After the frame was build we layered it with corugated card and bubble-wrap for confort. We also attached a PVC screen. The straps ere made from a thick material folded in three layers.
Posted 22 May 2015 02:09
After we went back to the studio, we started to think about designs that would address the private/public problem and that would be suitable for our site. We agreed upon developing our concept around some key terms: confort, portability, relaxation. We agreed to design a portable bed what would also act as a windshelter when worn, as the wind was the main micr-climate factor.
Posted 22 May 2015 02:09
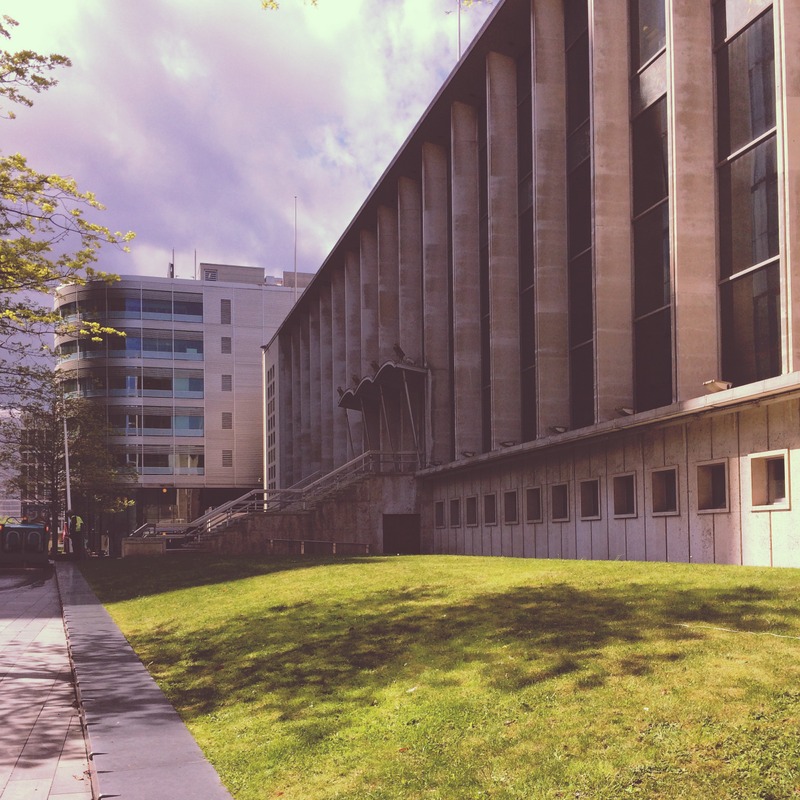
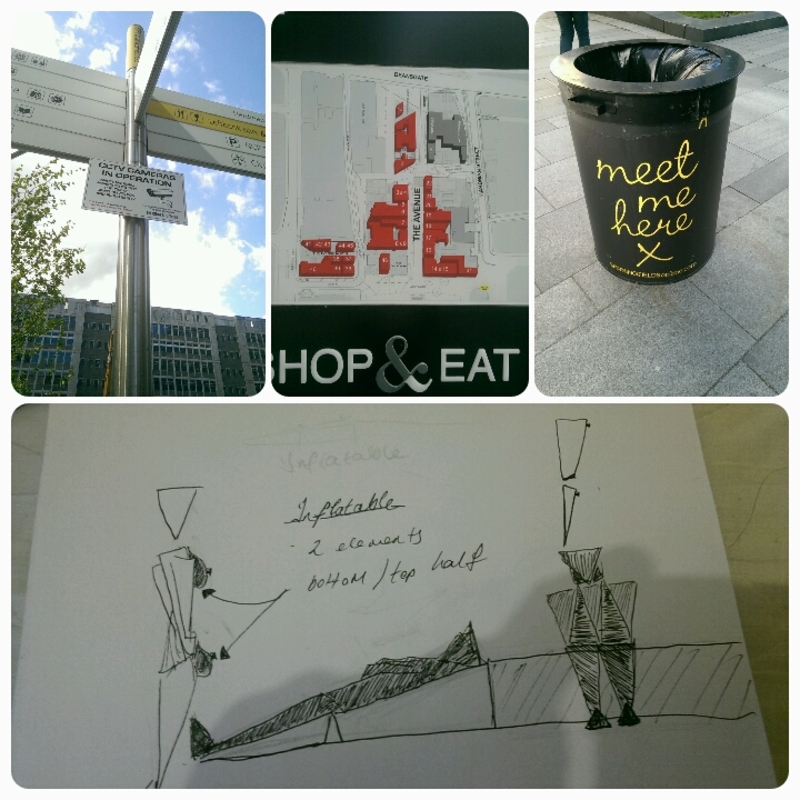
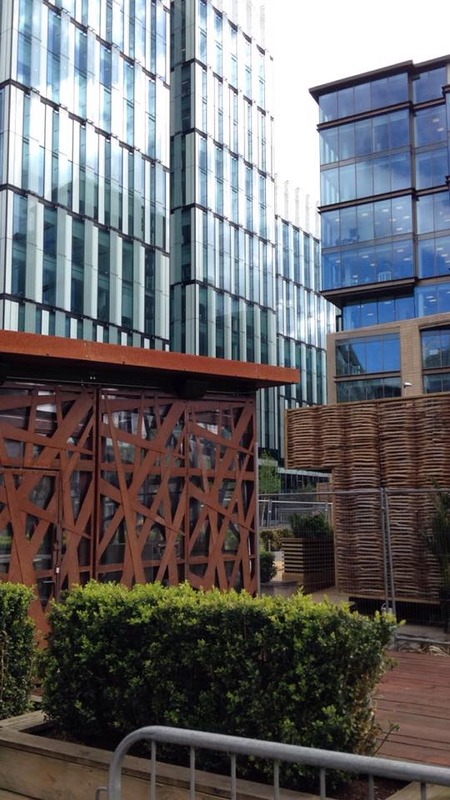
On the first day we went to our site, Spinningfields, in order to explore it and take photos. The site is privately owned but acts as a public space. Our aim is to test the limits between this boundaries by
creating wearable items that are to be used on site. I photographed some potential spots and signs that were all around Spinningfields. It can be observed that the site is monitored and has restricted areas. We also talked to a security gurad about the site and its boundaries.
Posted 22 May 2015 02:07
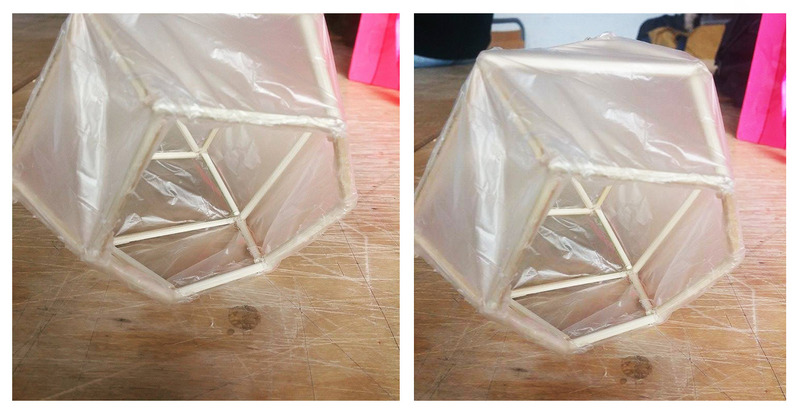
Second day of construction:
After filing and sanding the backboards to achieve smooth surfaces, a temporary frame of cardboard was constructed around it to allow expandable foam to fill the necessary spaces. The mould was wrapped around cling wrap and rested on the foam. The expansion of foam would take about 1 hour and another 12 hours for it to dry. It was definitely a messy affair. After the foam dried, the mould and cardboard frame around it was removed, leaving the foam stuck to the plywood as intended.
Posted 22 May 2015 01:35
First day of constructing the wearable furniture.
The product is meant to be customised to fit the users body shape therefore the first thing we had to do was to create a cast allowing us to have a less rigid backboard so as to provide a more comfortable leaning position for the user.
Plywood was chosen as the material for the backboards mainly for its sturdiness, adaptability to harsh weathers and also because in comparison to materials such as metal, plywood is lighter in weight, making it more convenient to carry around.
Posted 22 May 2015 01:07
Nearing completion, we resolved issues that occurred during production. These included the fabric hinge, and sanding down corners of the frame to make the frame safer. Even before the fabric had been applied it was encouraging to see the garment coming together.
Posted 22 May 2015 00:33
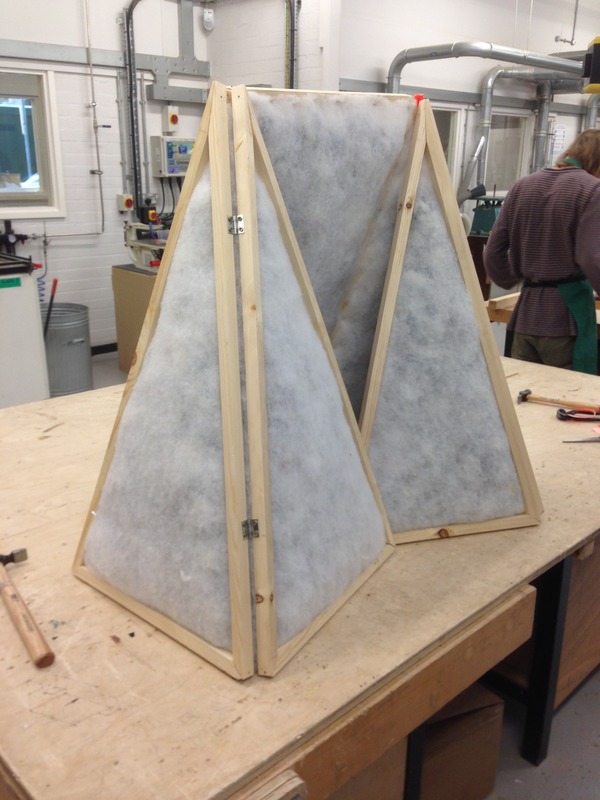
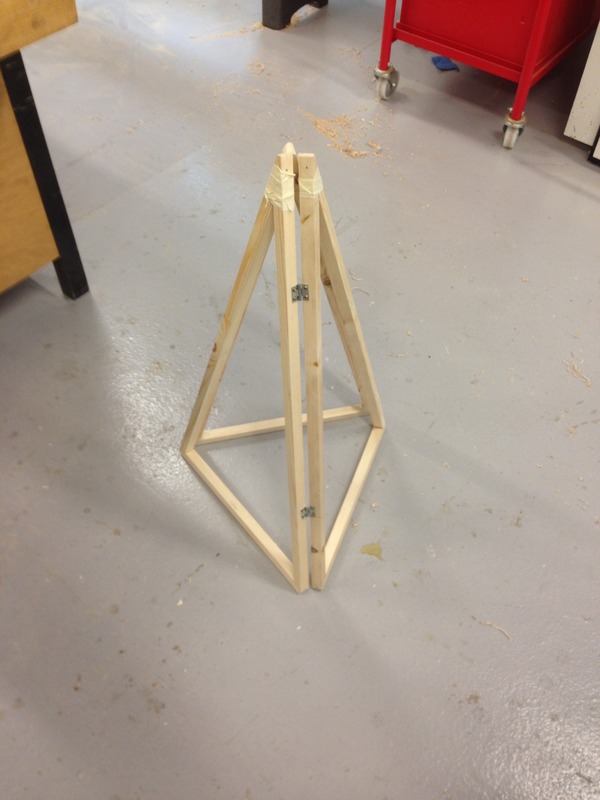
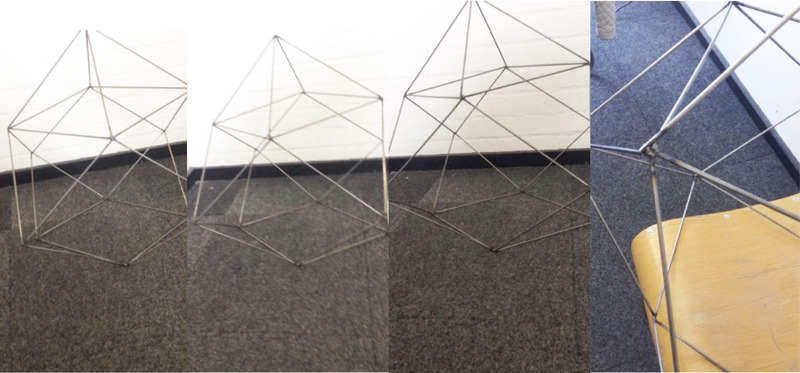
Our production process began with making the seven triangular frames, hinging them then cushioning each frame. We stuffed rolled up newspaper into wadding and stapled each cushion to the frame. Using newspaper kept costs down while providing the needed comfort.
Posted 22 May 2015 00:33
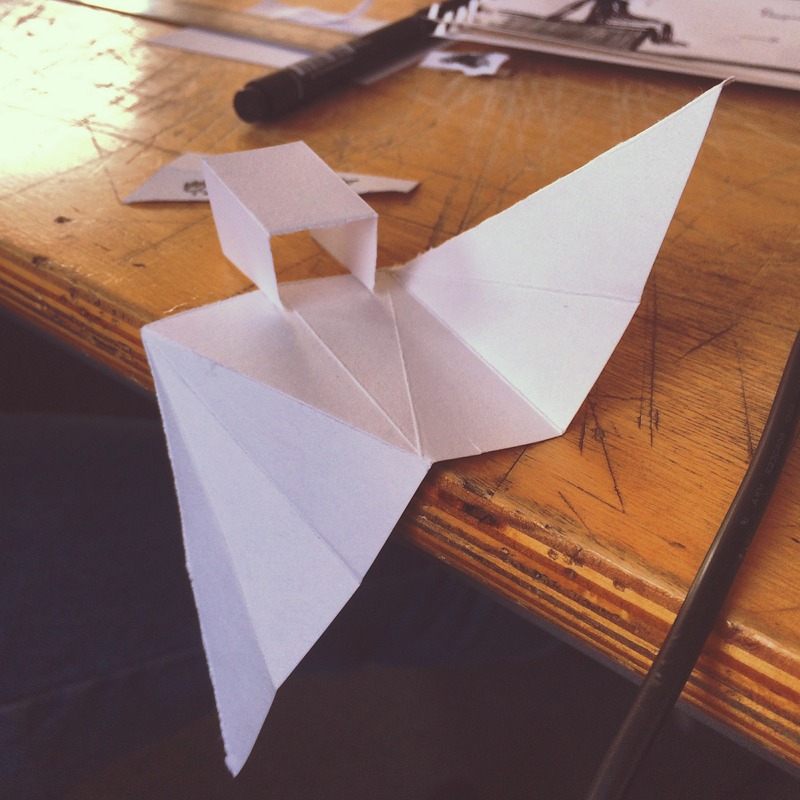
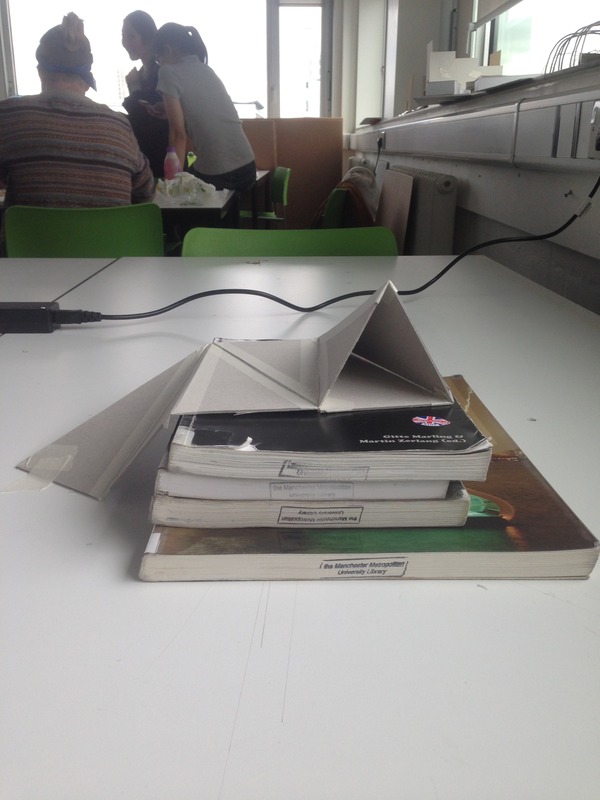
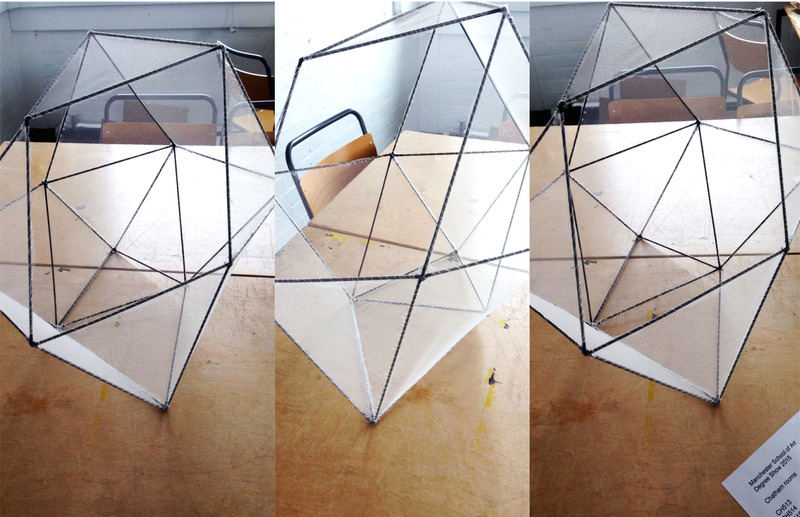
Our first sketch model, using a folding structure made up of 7 identical triangles that can open up into a seat. Here we included a small table beside the seat, a possible addition to the design which enforces the concept behind our idea as the users makes themselves at home in the space.
Posted 22 May 2015 00:12
Brainstorming designs, our initial concept was a piece of clothing suitable for the workplace, which could then transform into a loud, brightly coloured, reclined seat during the user's lunch break.
Pushing that boundary placed on us in Spinningfields, our design strives to balance between conforming and expression. Secondly the comfortable seat stretches the time the users spends doing a completely free activity - relaxing. The expression of comfort and individuality is only temporary though, when the user gets up to leave their seat back to work the seat is back to following its original design and complies with the regulations once more.
Posted 22 May 2015 00:06
Exploring Spinningfields as we initiated the project, we took note of the regulations enforced on the privately owned public space and discussed how the design enabled these guidelines. Lawns were fenced off from public use, seating was minimal and were ridged to prevent skateboarding on them.
Looking deeper into the architecture of Spinningfields, it's corporate design of a grey/blue colour scheme, smooth hard textures and lack of typical public space features (fountains, foliage, shaded areas) degrades users of the space to mere consumers here to buy from the mainstream cafes and restaurants dotted all around the site.
Posted 21 May 2015 23:51
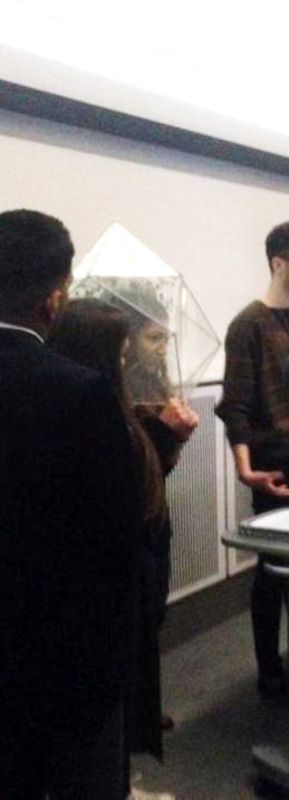
Photographs from the final stage of the breathing mask constructed.
Posted 21 May 2015 21:01
Test model.
1:1 scale, made from cardboard, grey card and elastic bands.
Posted 21 May 2015 20:17
Testing prototype along the railings of the stairs to mimic the actual scenario when at the site.
Posted 21 May 2015 20:15
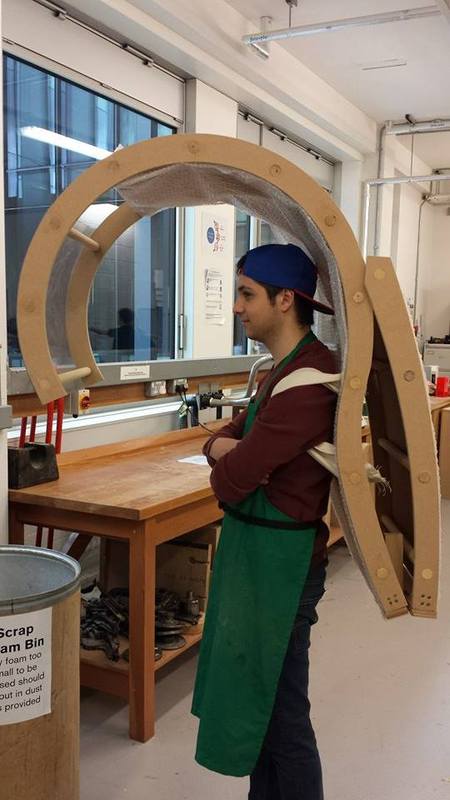
Designing a wearable furniture allowing users to be able to sleep while standing up. In the process of planning and building a prototype from scrap materials.
Posted 21 May 2015 19:49
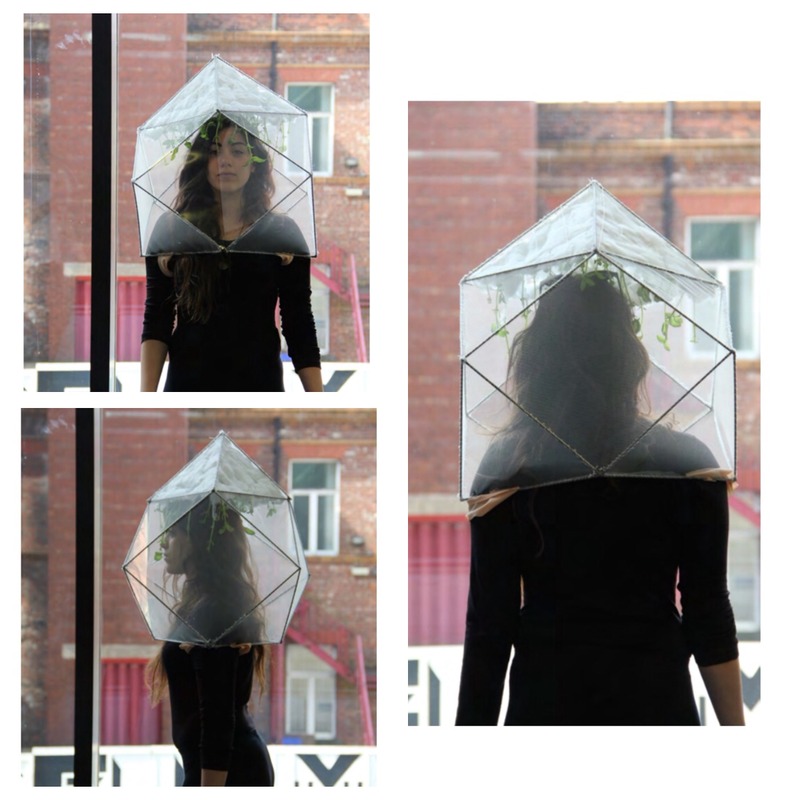
In order for the structure created to function we had to provide oxygen to the user therefore we grew plants with cotton and water and placed them on the top of the metal structure.
Posted 21 May 2015 16:04
Final additions/refinements were added such as a hook to keep the folded aspect in place, and straps which allowed the user to comfortably and easily carry the item wherever s/he intends.
Posted 21 May 2015 14:23
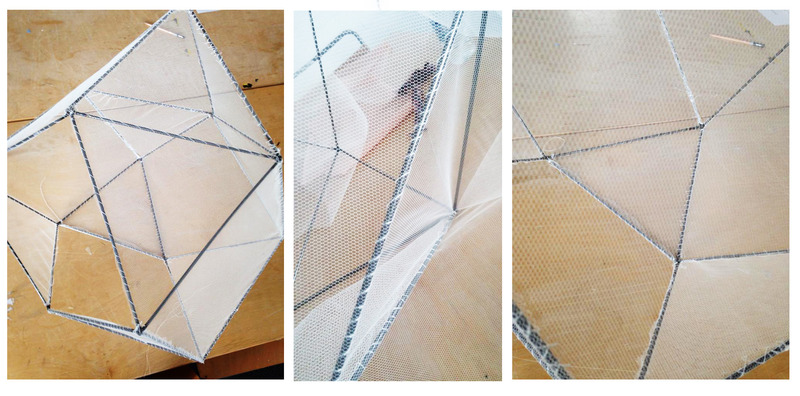
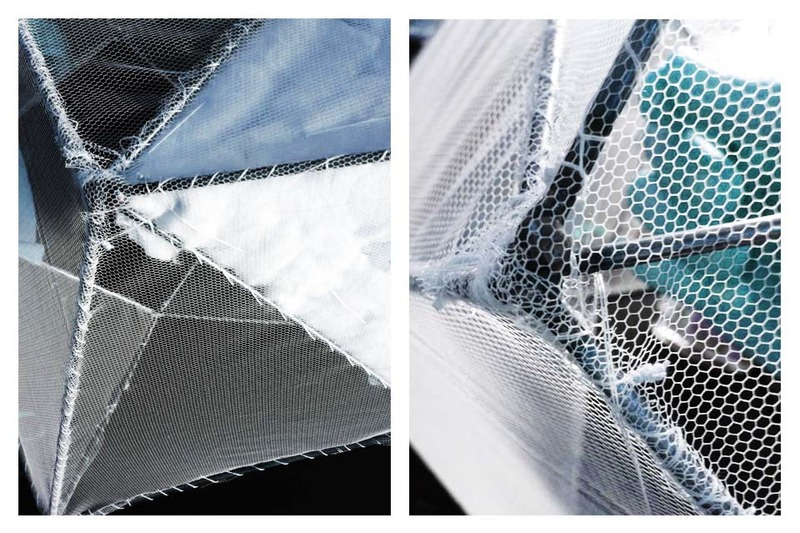
Day 3- When we decided on the materials we started the final construction of the garment. We sew together the nylon netting fabric in order to be more secure.
Posted 21 May 2015 14:21
Once we had the frame constructed and stable, it was a case of making it comfortable for its user. We firstly added clear PVC to the circular end (wind-break), thus allowing the user the clearly see where s/he is going. Cardboard was then added along the entire length of the design which would provide the base for the bubble wrap to be placed upon. Bubble wrap was decided upon after a hardship in finding a more comfortable 'spongey' material. Bubble wrap was a cheap and practical. yet 'comfortable' alternative.
Posted 21 May 2015 14:19
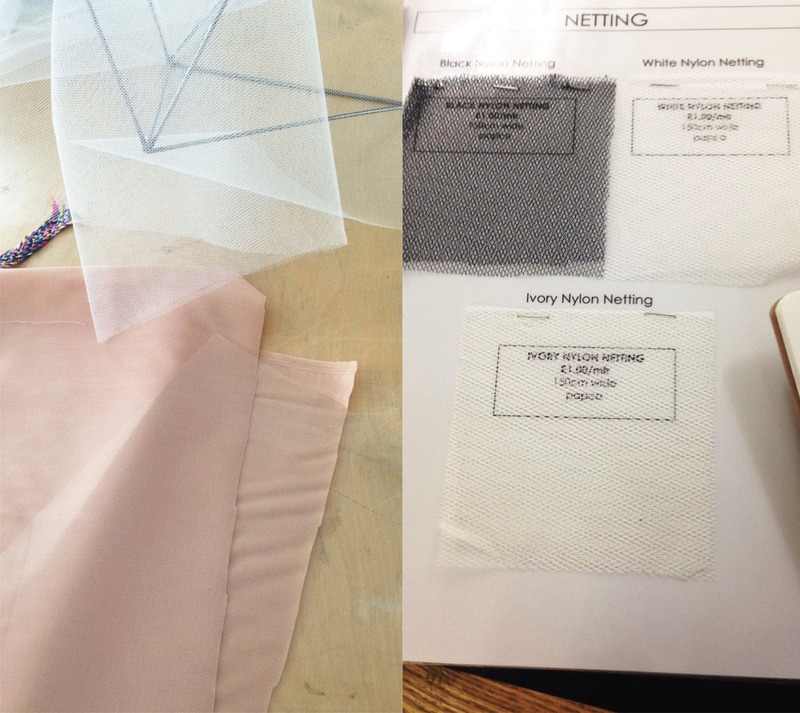
Day 3- When the frame was ready we headed down to the fabric store to look for different fabrics to cover the garment. The main aim was to find a breathable, lightweight material to cover most of the garment and also a stretchy material for the straps. At the end we decided to use an ivory nylon netting to cover the garment and a transparent material for the face so the person wearing it would have a clear vision.
Posted 21 May 2015 14:16
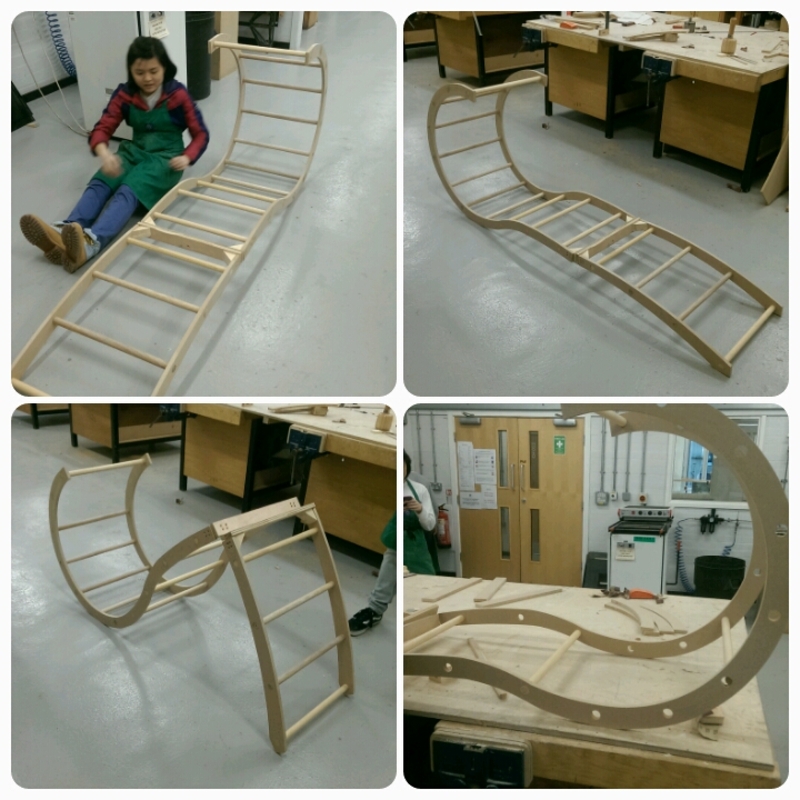
The frame was mainly constructed using 15mm MDF and was supported by 25mm dowel pieces. The design involved a hinged folding piece in order to enable the user to more easily carry the item. For further structural support where the hinges are, addition fold-able legs were added. Without this addition, the design would not be structurally sound.
Posted 21 May 2015 14:13
Day 6
The garment is wrapped in the polyurethane fabric and straps are attached to finish. We then took photos of the final garment.
Posted 21 May 2015 14:10
Day 5
We fixed the internal padding to the wooden structure. We used rolled up newspaper wrapped in layers of wadding to create this. The padding is fixed using a staple gun, so as to ensure a strong hold.
Posted 21 May 2015 14:07
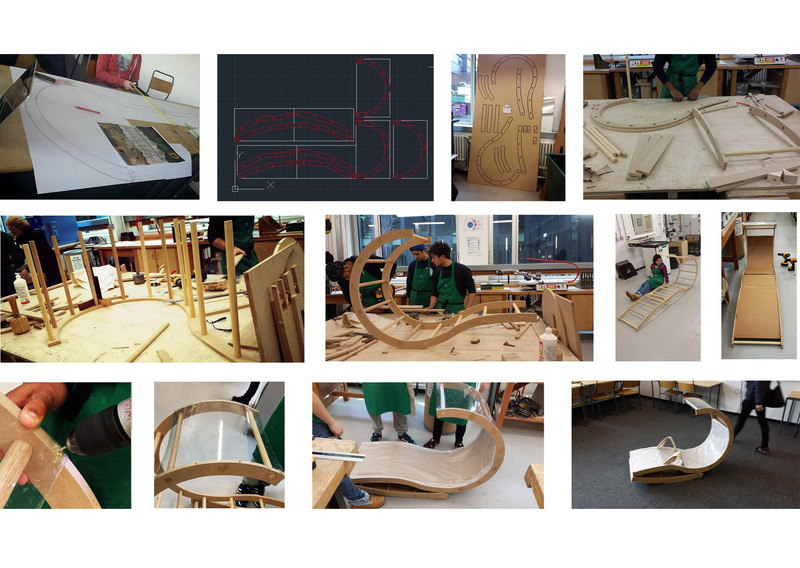
Our next step was converting the design from potentiality into actuality. With the aid of the CNC cutter. we started to fabricate the model.
Posted 21 May 2015 14:06
Day 4
We went to the workshop and began the construction of the garment. In doing so, we decided that the separate panels should be connected using hinges, to ensure it remains rigid.
Posted 21 May 2015 14:04
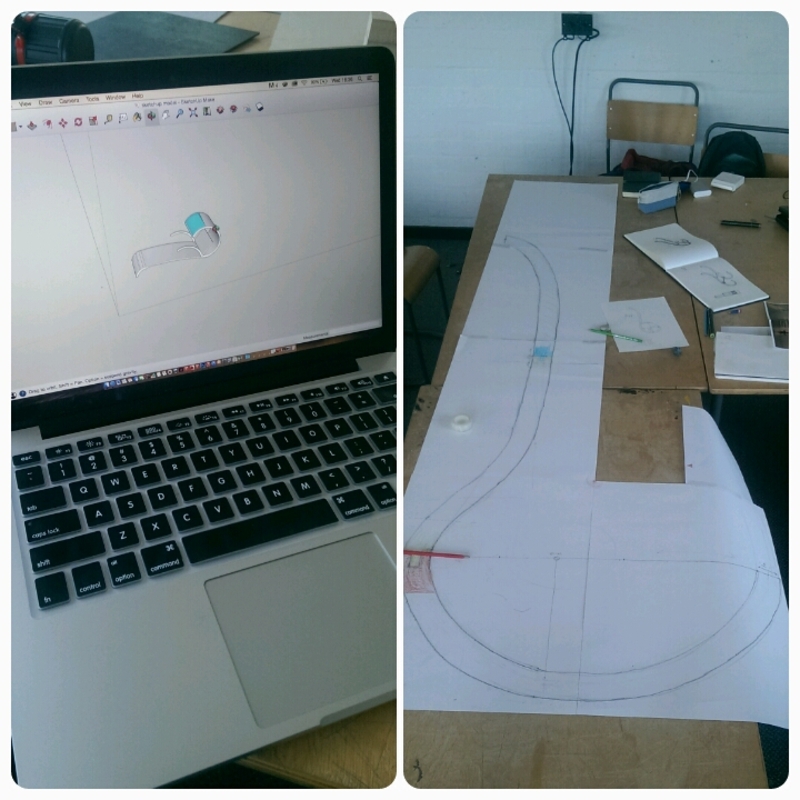
On our second day, we brought together our different concepts and finalised the design. Through sketches, 3D modelling and photoshop, we were able to propose our idea and understand it in greater depths.
Posted 21 May 2015 14:04
Phase IV -
The model on a human body.
Posted 21 May 2015 14:03
Day 3
We finalised our design, deciding that we should build it using a wooden frame so as to ensure that the item is lightweight and therefore wearable. We also looked at different materials for the covering, settling on a polyurethane fabric which would give the garment a waterproof exterior.
Posted 21 May 2015 14:02
We started our Events task by a site visit to Spinningfields, in order to investigate the concept of public and private space. After determining and identifying specific features and observations about the site - such as its lack of comfortable seating areas or lingering spots - we went back to the studio to design an item that responded to these findings.
Posted 21 May 2015 14:01
Day 3-The metal frame of the garment after being connected with welding
Posted 21 May 2015 13:59
Day 2
We created some quick models from our initial sketches to try and assess how any possible ideas might be used. We decided that something like in the image above would work well, enabling the user to wear the item as a cape, and then easy fold it out to form a seat/bed.
Posted 21 May 2015 13:59
Phase IV -
The metal skeleton dressed with the transparent fabric.
Posted 21 May 2015 13:57
Phase III -
The metal frame after the welding at the metal workshop.
Posted 21 May 2015 13:39
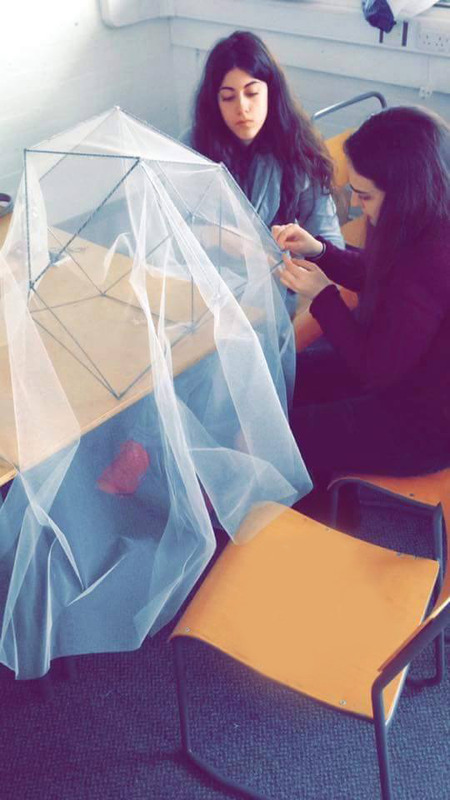
Phase IV -
While sewing the transparent cover on the metal frame.
(A mesh fabric was chosen so that fresh air can pass through and plants be able to breathe).
Posted 21 May 2015 13:34
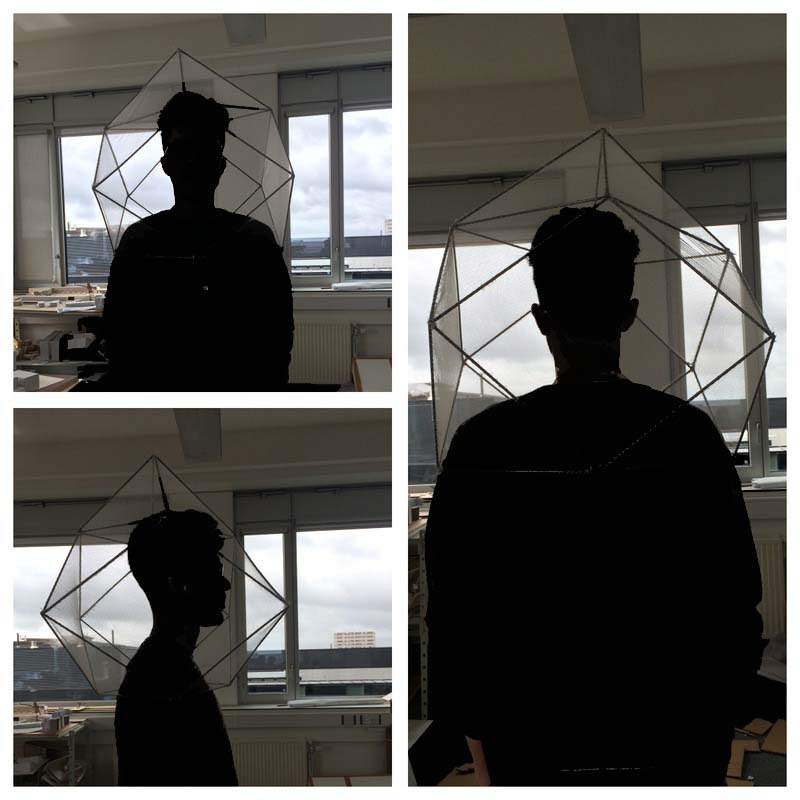
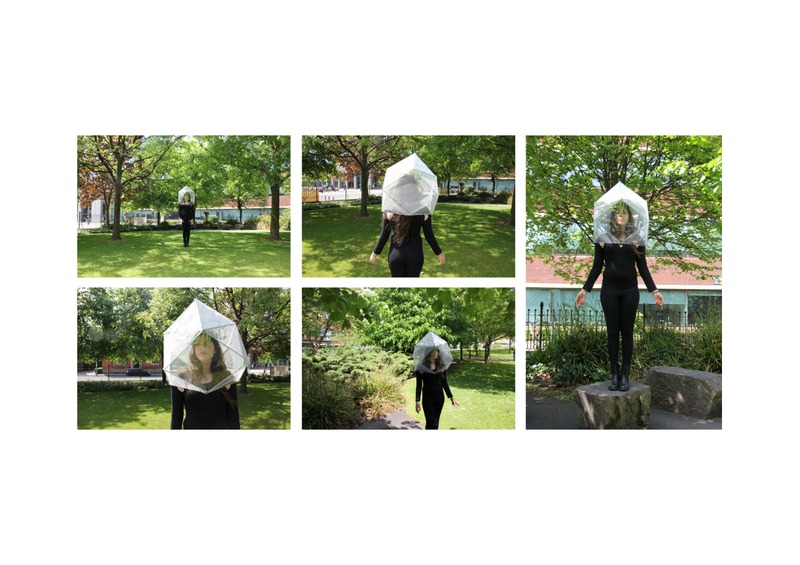
Photographs showing the size and the application of the structure on the body.
Posted 21 May 2015 13:20
Day 2-During our time in the studio we started brainstorming ideas about our garment. The main idea was to provide oxygen in this privately owned public space. We searched for different masks and hats that would cover the face. We wanted to create something that could be worn but could be easily be carried so it wouldn't be a burden to anyone wearing it. At the end of the day we came up with this idea of a breathing mask that anyone could carry to "filter" its own air in order to avoid the dusty environment/air created by the two construction sites. The mask would be covered by a lightweight material and would have straps in order for the person wearing it to be able to carry it.
Posted 21 May 2015 13:15
Day 2- In order to come up with an idea we searched for wearable breathing masks. We used some of these photographs in order to form our idea and design.
Posted 21 May 2015 13:10
The first step taken was to cut the metal rods and then weld them in the desired shape. Continuing we wanted to use a fabric to cover the metal structure and used a transparent fabric to succeed this. Finally we added cotton on the top of the structure with plants which would bring oxygen to breathe for the visitor of the site.
Posted 21 May 2015 13:05
Phase II -
Metal Frame -
Shaping the final form of the frame the day before the rods' welding in the metal workshop.
Posted 21 May 2015 13:02
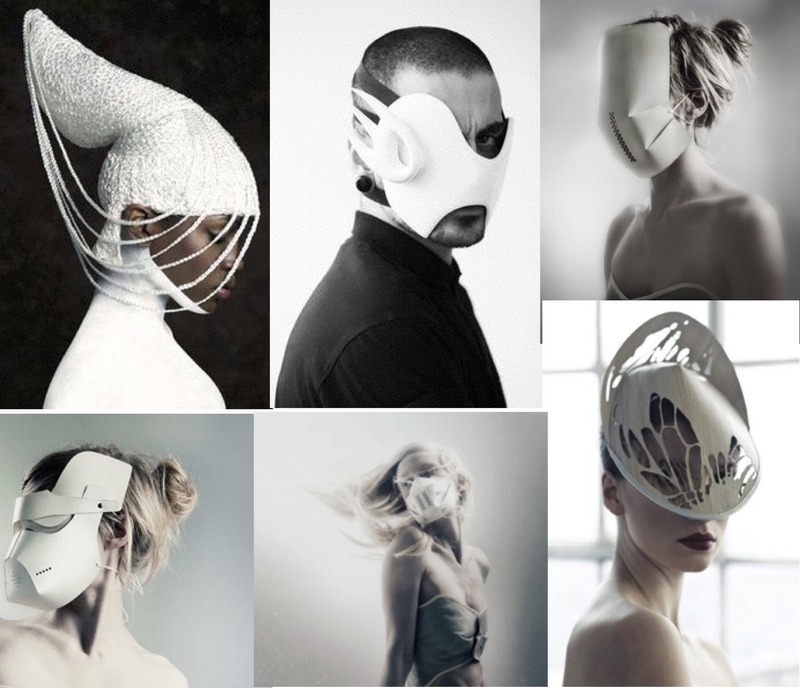
Looking for precedents of wearable masks exploring various shapes and forms.
Posted 21 May 2015 12:54
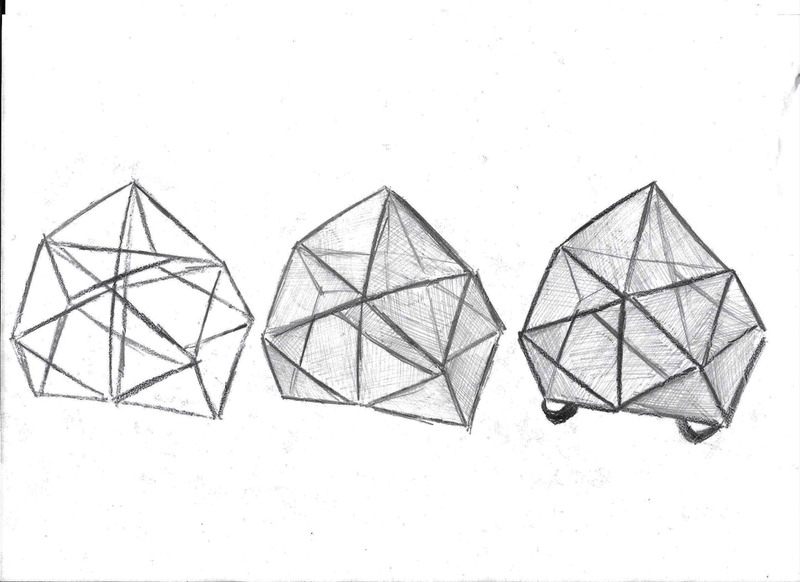
Phase I -
Test model -
Experimenting with the shape and materiality.
Posted 21 May 2015 12:50
The site given for the P(R)UBLIC was Spinningfields. The brief given instructed building a wearable equipment to make a private space public. Thus we noticed the construction sites that brought polluted air into Spinningfields and decided that our scheme would be based on bringing your own air into the site.
Posted 21 May 2015 12:48
Sheer fabric was stitched on the metal frame in order to filter the air of the site.
Posted 21 May 2015 12:22
Day 3 - Risk assessment
This is the poster we drew up illustrating our final scheme with dimensions, how it is worn and materials we were going to use.
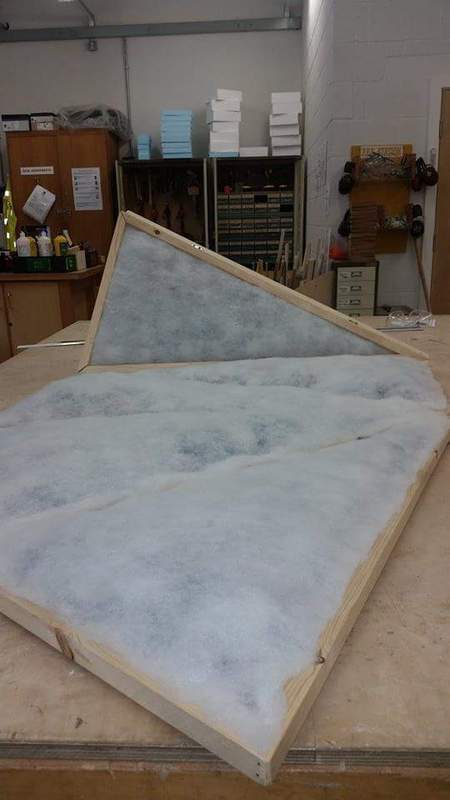
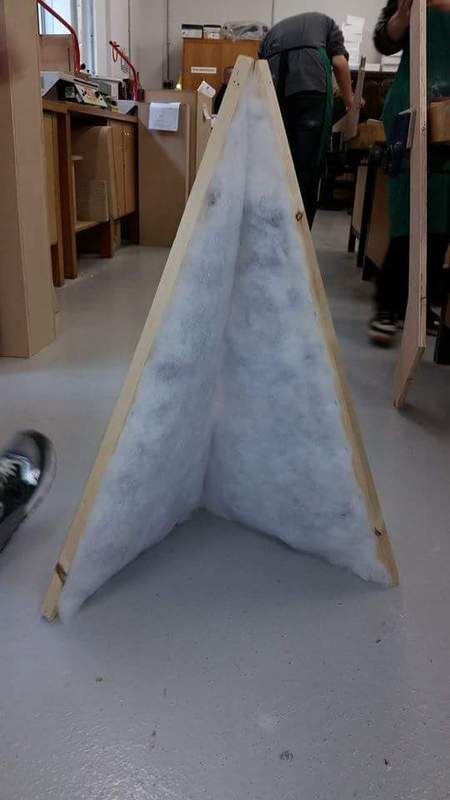
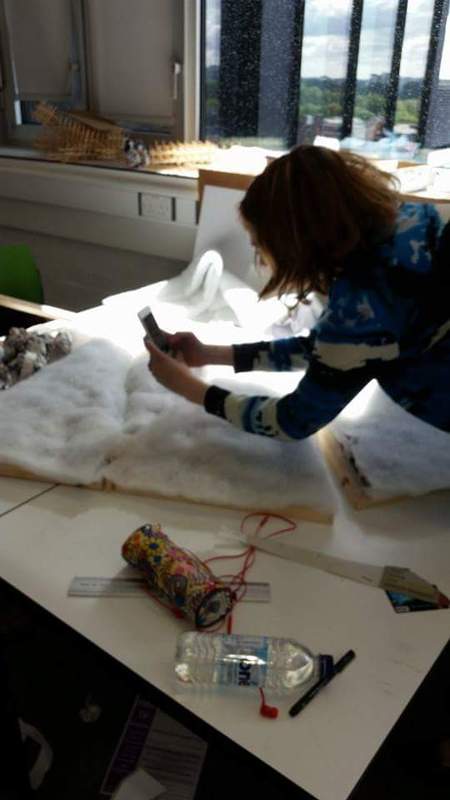
Posted 21 May 2015 11:47
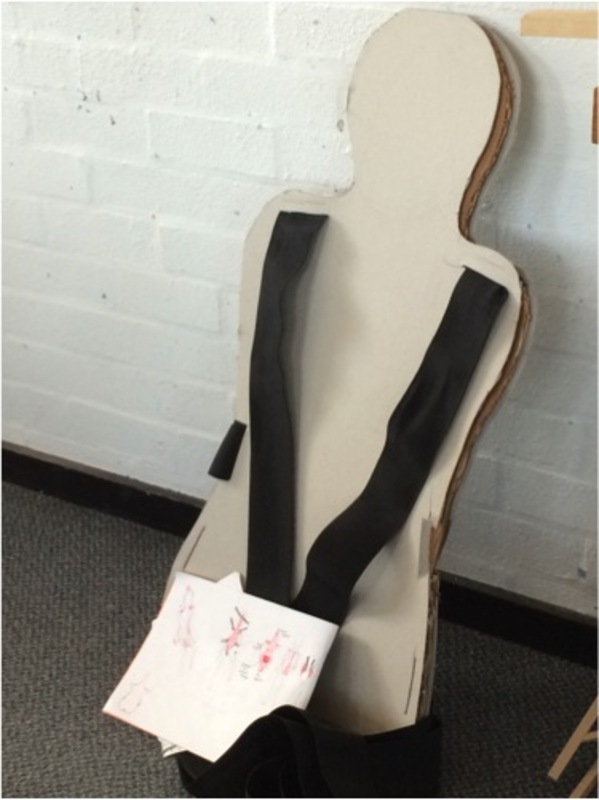
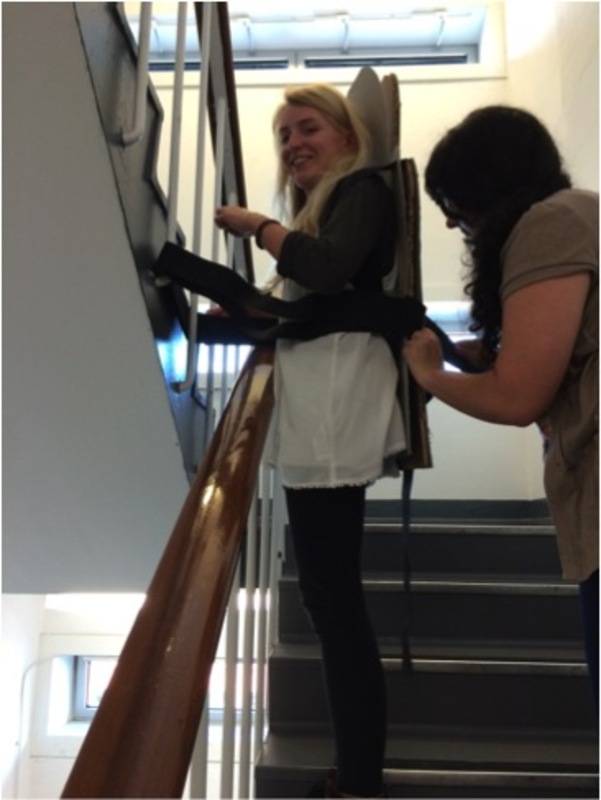
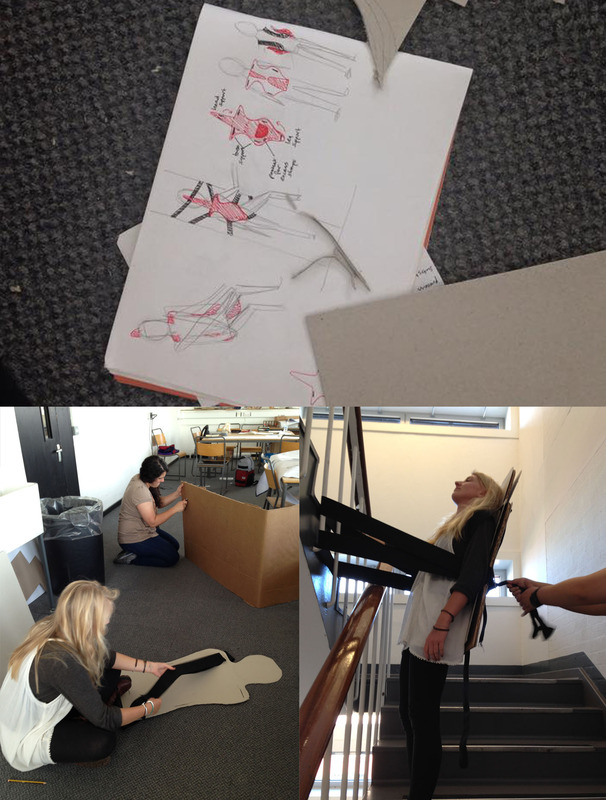
1:1 Test model
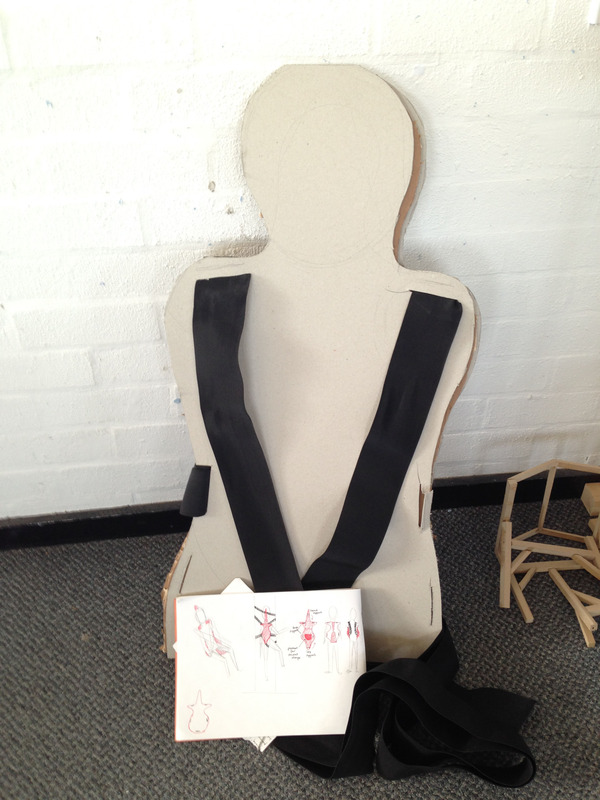
The test model was very helpful in developing our design, from it we were able to see where most of the force would be exerted on the back boards as well as considering how best to wear it and what connections we were going to use. another thing we noticed from the test model is that we would need some form of support at the knees so when the wearer fell asleep their knees would not buckle preventing them from falling.
Posted 21 May 2015 11:44
Final MODEL
Posted 20 May 2015 20:57
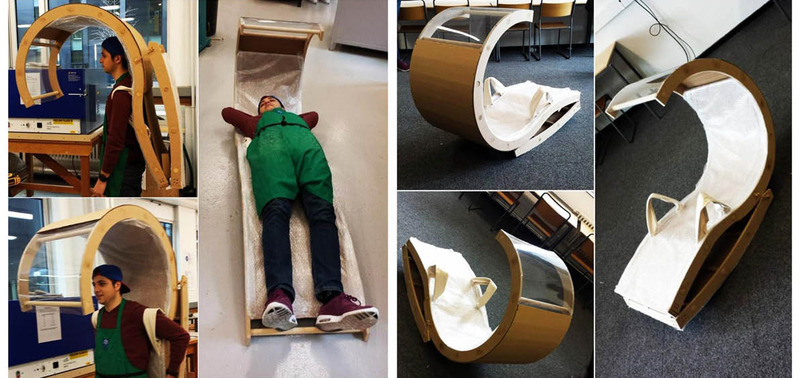
Photos of the Final Model and also when the Object was under construction.
Posted 20 May 2015 20:52
Perspective view of the Object when in use. Below the sketches illustrate step by step how the structure unfolds and the person lies on it.
Posted 20 May 2015 20:49
AutoCad drawing
Posted 20 May 2015 20:48
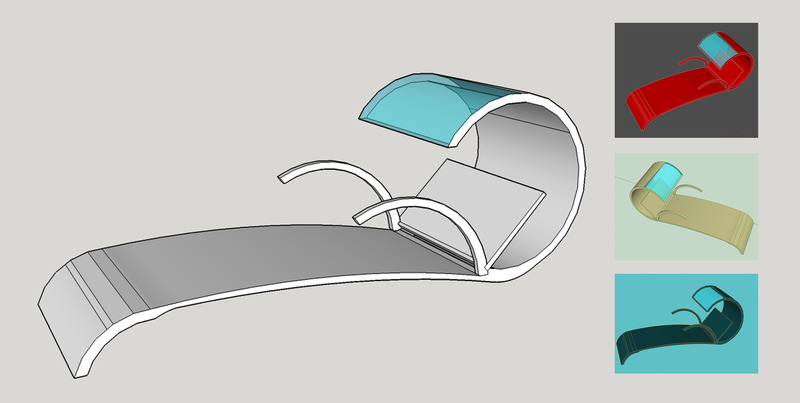
After finalising the sketched designs we then made a sketchup model to see how we could create this model in reality. By making a sketchup model it made it a lot easier for us to figure out how and what we could use to make this structure. At the point we were starting to think in dept about materials and the components we would need to make this structure solid so that it could hold a persons weight when they lie on top of it.
Posted 20 May 2015 20:47
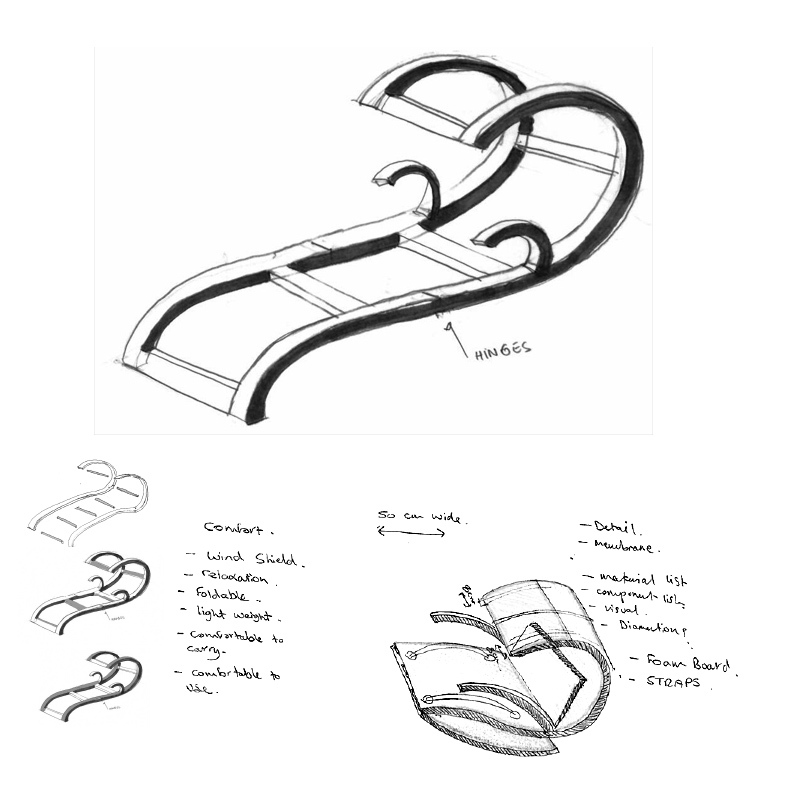
By Observing the area and coming up with a whole new design which would be within the limits and rules and regulations of spinningfields
We came up with this dramatic yet very interesting design "THE PREDITOR".
We sketched 12 different ideas as a group and came up with this final design.
This Design is for a foldable structure which is used for multipurpose for example you can use it to lie on or you can use it to protect you from the wind by wearing it like a backpack.
Posted 20 May 2015 20:41
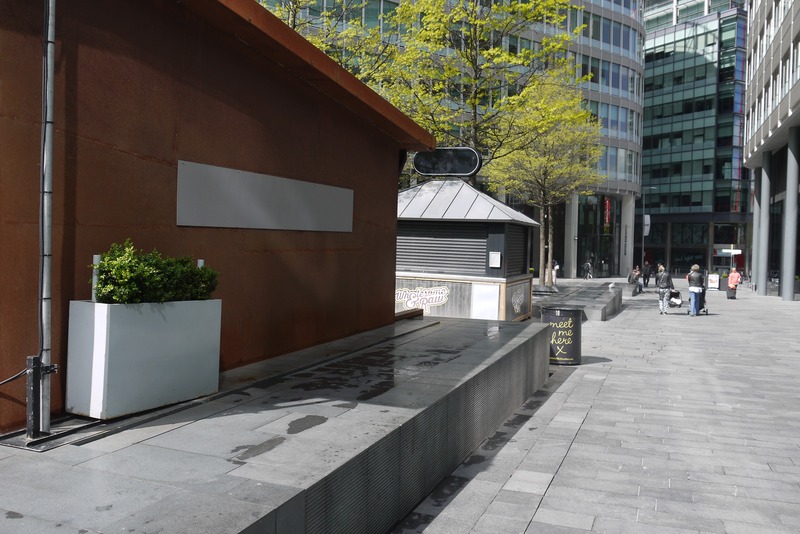
Session 1 Site visiting.
Chosen site= Spinningfields, Manchester
Spinningfields is a private sector owned by a private company so therefore there are certain restrictions in this area, which we going to discover on our first site visit.
On our first day of events we went to visit this area to discover what the area is like and what are the restrictions for example what is forbidden in this area?
We discovered that the spinnignfields does not allow bikes, skate boards and homeless people sitting around, they have security guards operating majority of the times and they have CCTV pretty much all around spinningfields.
Posted 20 May 2015 20:36
Day 1
We explored Spinningfields to try and assess the site for ways in which rules might be subverted or questioned. One of the initial observations we made as a group, was that all the spaces which had been allocated for seating were rather uncomfortable. From this we returned to studio and began to brainstorm and sketch some ideas. We settled on some form of cushioning which might be applied to existing seating.
Posted 20 May 2015 11:13
Day 2 - Developing our design.
We built a 1:1 test model developing one of the designs we sketched in the previous session. The idea was to create a piece of wearabe furniture that allowed you to stand upright while sleeping.
Posted 20 May 2015 10:57
Day 1 - Visit to the Spinningfields site.
Although spinningfields is a public space it is privately owned so while exploring the site we were looking for signs displaying and rules and regulations to be adhered to. So when we did not find any that specified exactly what not to do and when we spoke to security guards and care takers they stated there were no rules exactly we began to speculate as to what would be inappropriate activities to complete on the site.
When we returned to studio we began to sketch ideas based upon this thought.
Posted 20 May 2015 10:31
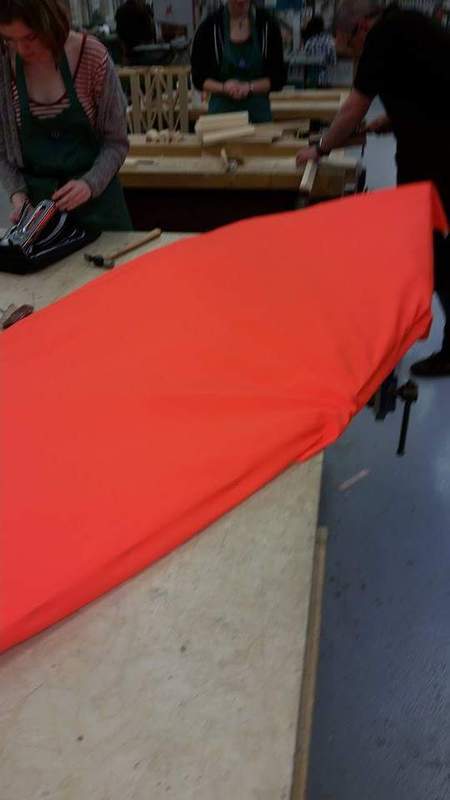
Day 5 (19/5/2015) -
More photos of the final product
Posted 19 May 2015 20:06
Day 5 (19/5/2015) -
Finally we added the strap by cutting a hole through the layers and placed another piece of cardboard onto the back of the bed, added a hook with a piece of rope on the side and it is finally done!
Posted 19 May 2015 20:02