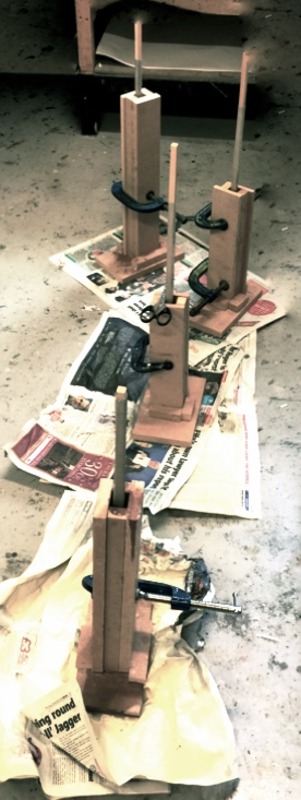
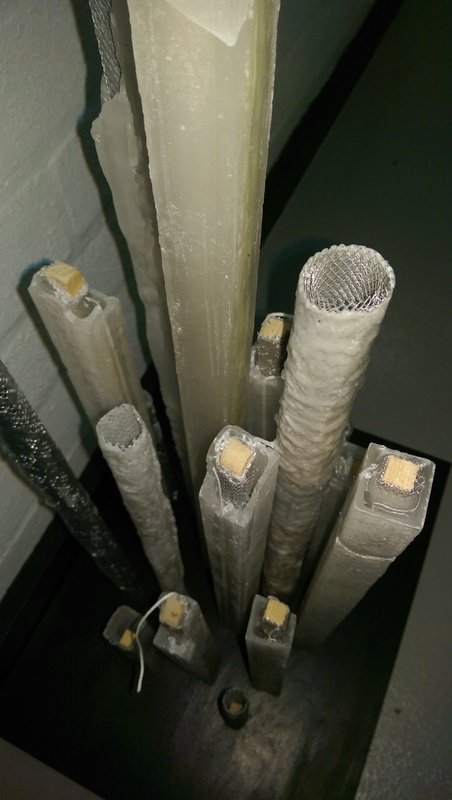
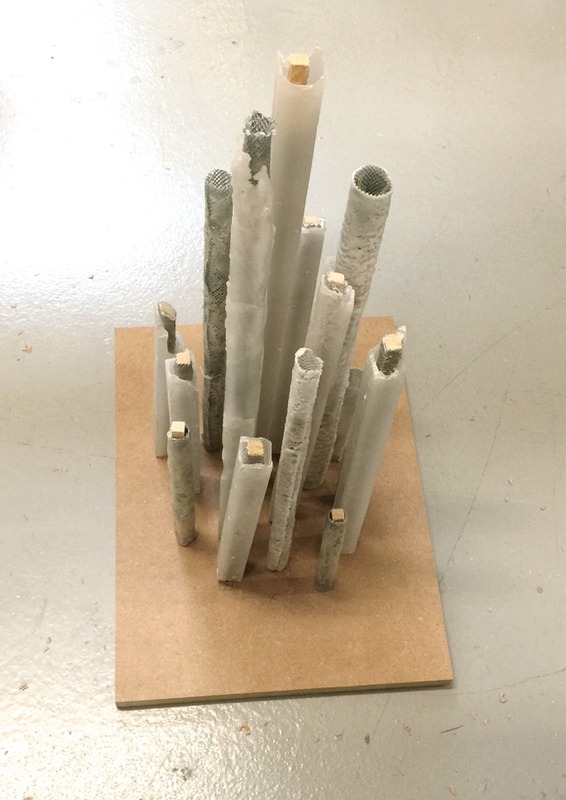
This image shows the wax towers all in place on the base. The base has still to be painted. However, it gives us a good indication of what the final design will look like.
Posted 21 May 2015 17:21
We decided to spray paint some of the towers. We tested it on some left over wax first and then decided that we liked the finish enough to implement it in some of our design.
This allowed us to have more variety of buildings without having to alter the design too much.
Posted 21 May 2015 17:18
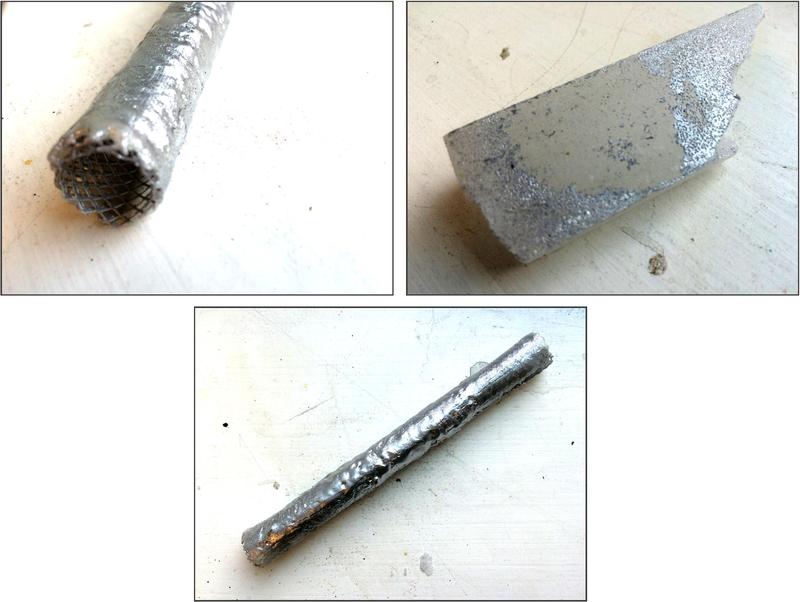
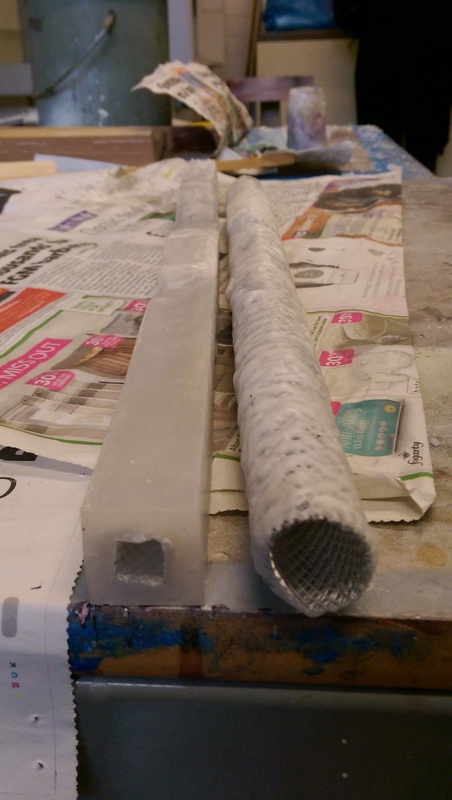
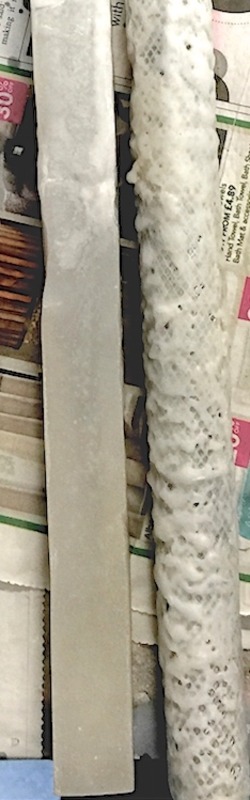
Using a scalpel we removed a few centimetres of wax and wire mesh at the bottom of the towers.
This left behind the wooden dowel that could be then slotted into the base, thus holding the structure upright.
Posted 21 May 2015 17:15
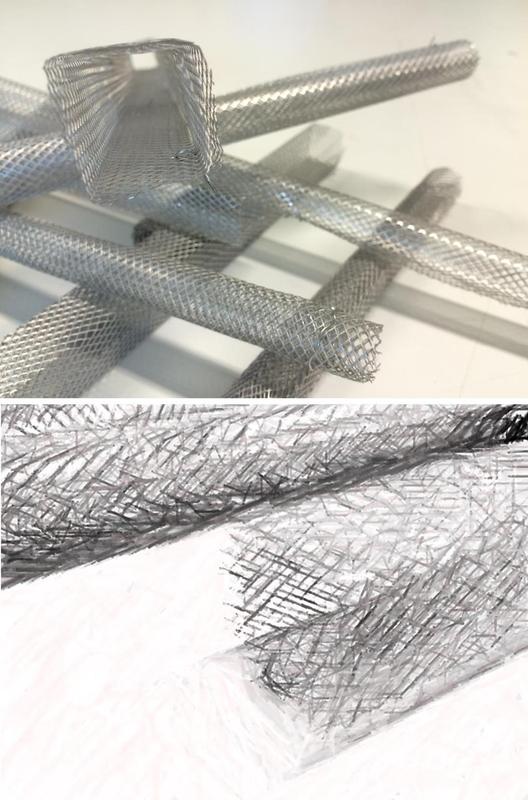
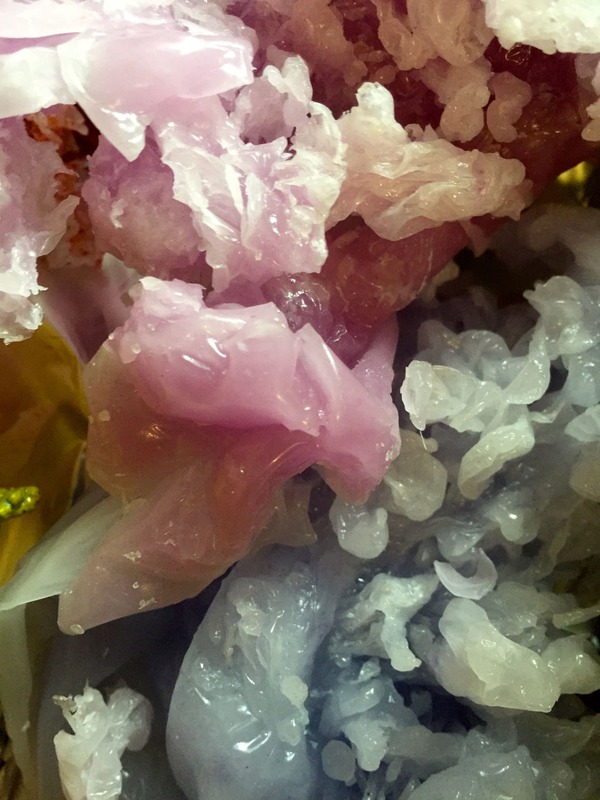
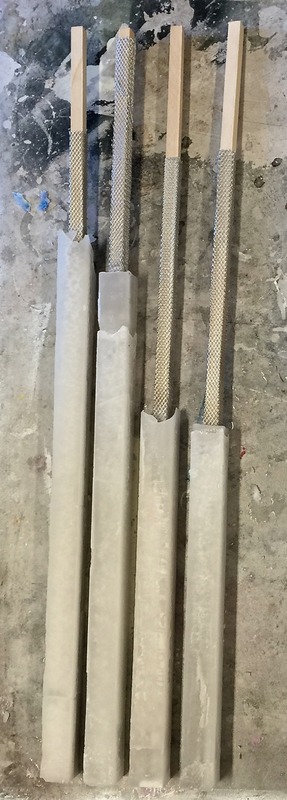
Close up of one of the towers.
Wax, Metal Mesh and Wooden Dowels are all visible in this image.
Posted 21 May 2015 17:13
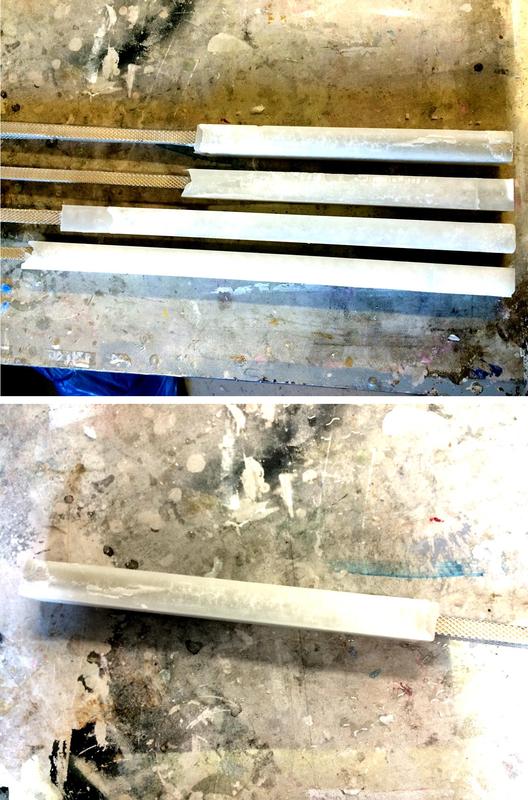
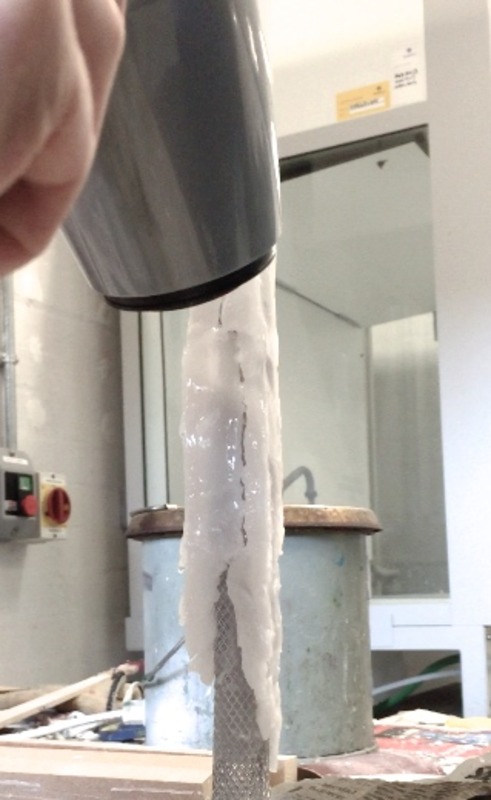
How the wax looked when we removed it from the MDF casts. You can see the wooden dowel and wire mesh passing through the wax tower.
The idea is to melt the wax and allow it to flow down the towers leaving behind the metal skeletal frame of the structure.
Posted 21 May 2015 17:11
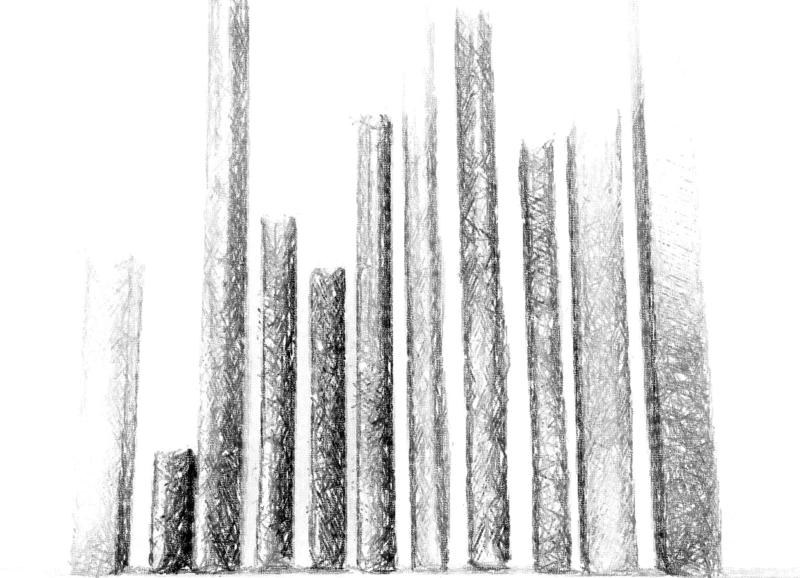
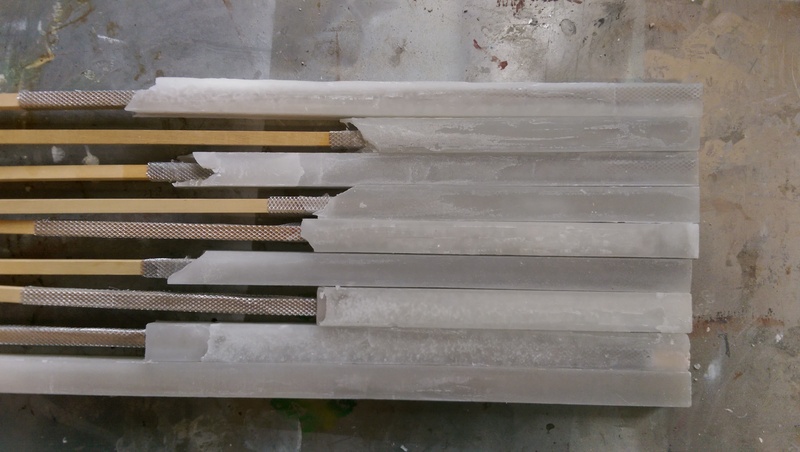
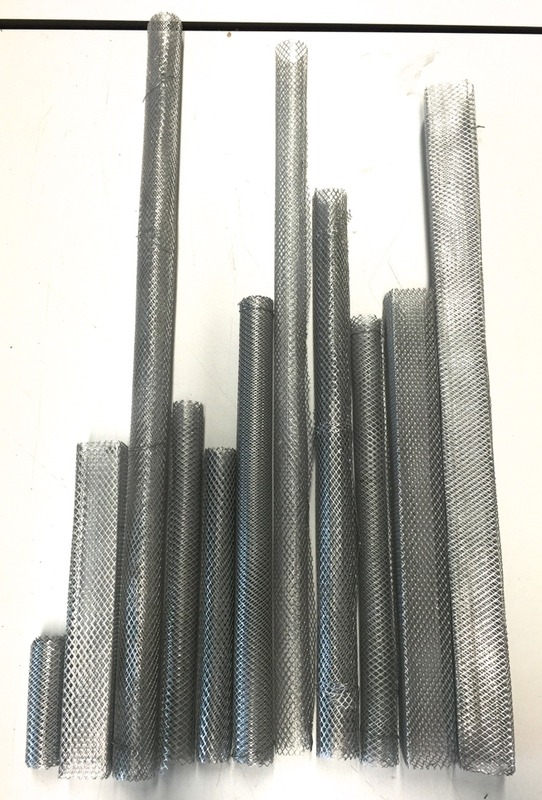
A sketch showing the mesh towers all lined up.
Here you are able to view the varying lengths and thicknesses of the towers.
Posted 21 May 2015 17:08
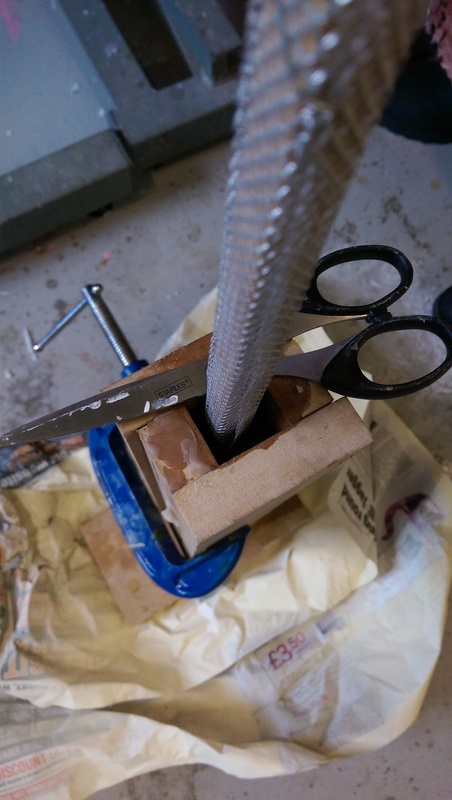
Thin wire mesh was rolled up either into cylindrical or rectangular shapes. These would act as the "skeletons" of our skyscrapers/towers. These would be inside the MDF casts when we poured the wax in.
Posted 21 May 2015 17:07
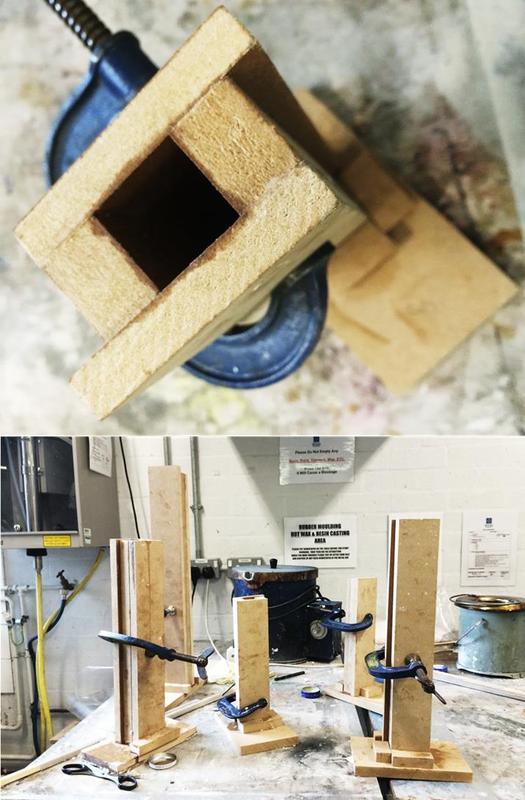
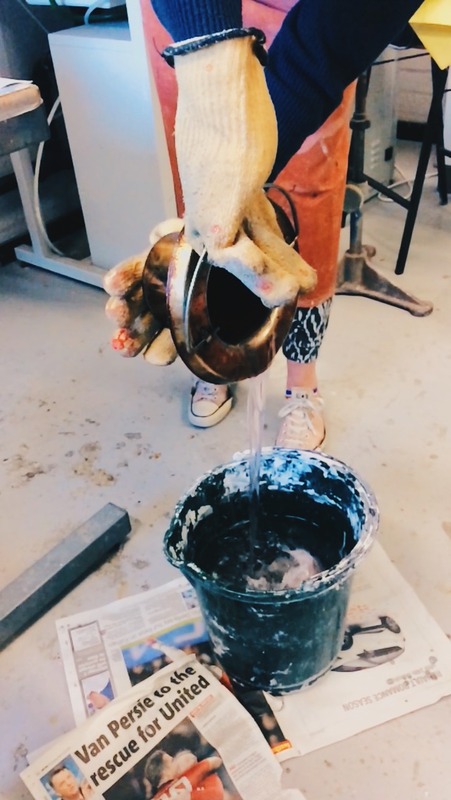
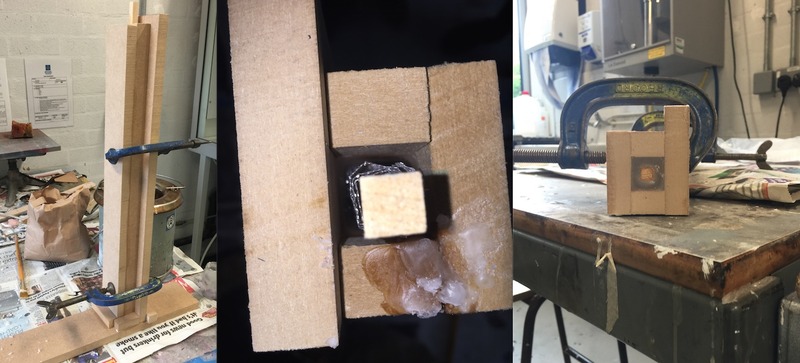
Sheets of scrap MDF were used to create casts that we then poured hot wax into. Vaseline was used to prevent the wax sticking to the casts and G-clamps held the pieces all together.
Posted 21 May 2015 17:04
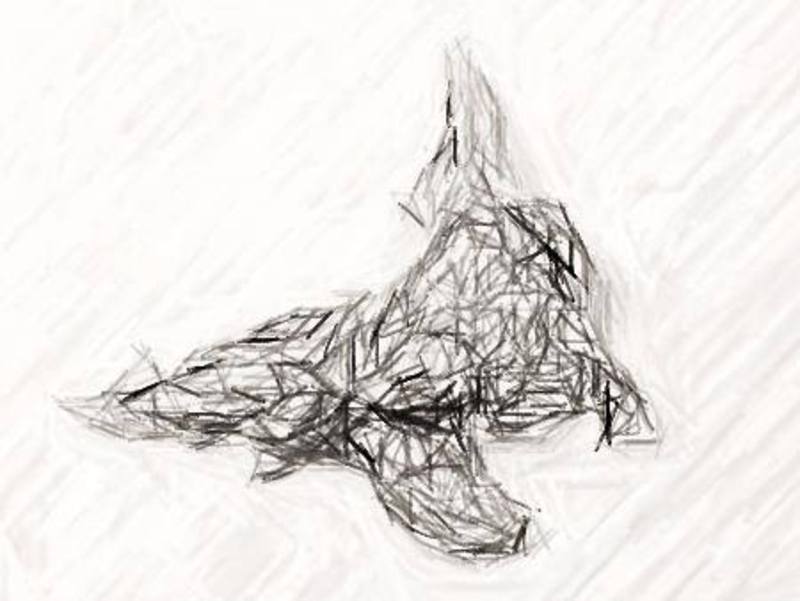
Pencil sketch showing how hot wax can be poured into water to create very interesting, freeform and organic structures.
Posted 21 May 2015 16:58
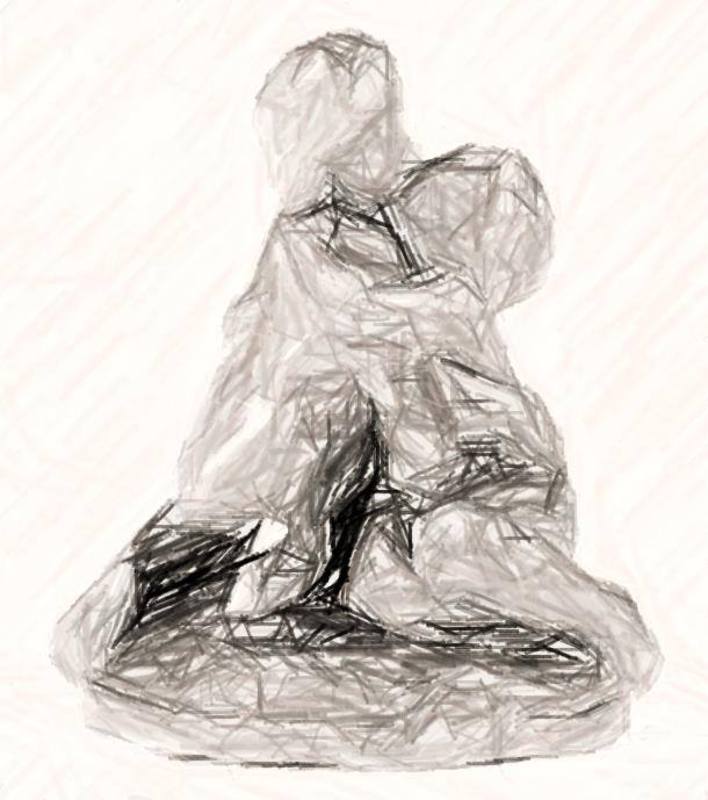
Pencil sketch showing two people embracing.
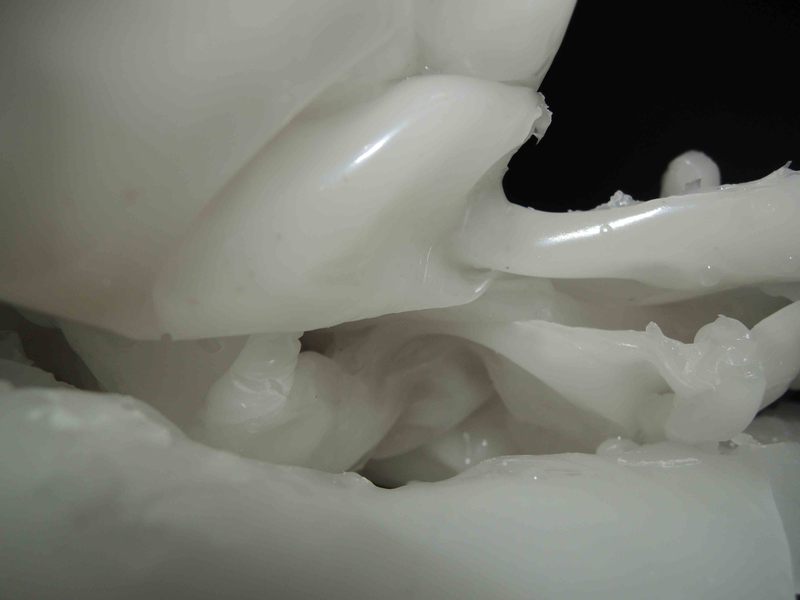
Once heated the wax will become very malleable and can easily be shaped. Two pieces of wax can be joined together and shaped while warm to create a sculpture.
Posted 21 May 2015 16:57
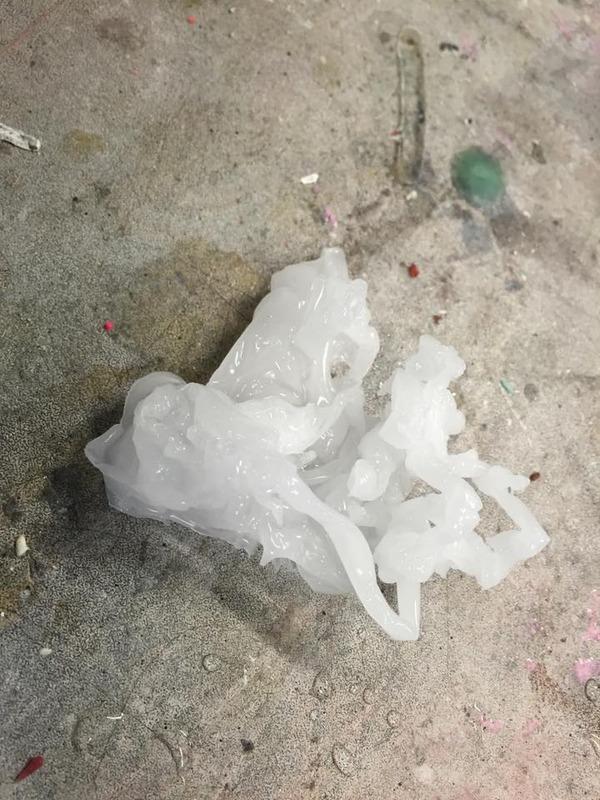
Finished piece before melting
Posted 21 May 2015 16:10
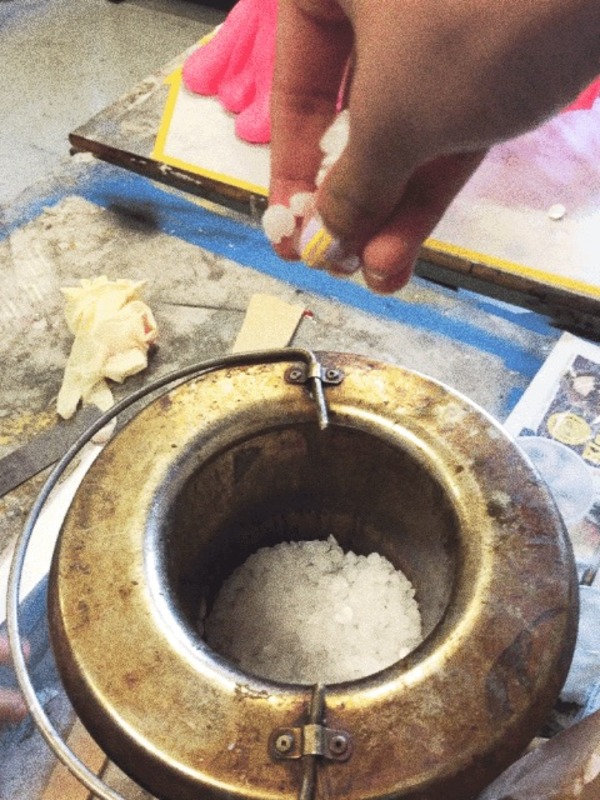
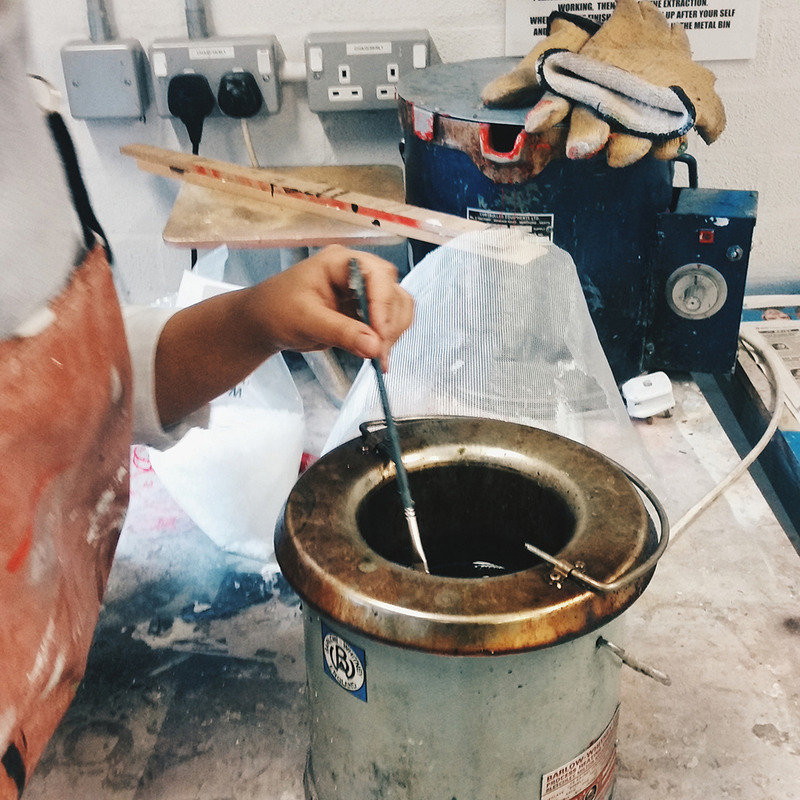
In order to melt the wax, wicks were placed into the cast pieces by cutting small grooves into them, placing the wicks in these grooves and painting a layer of melted wax to cover them
Posted 21 May 2015 16:09
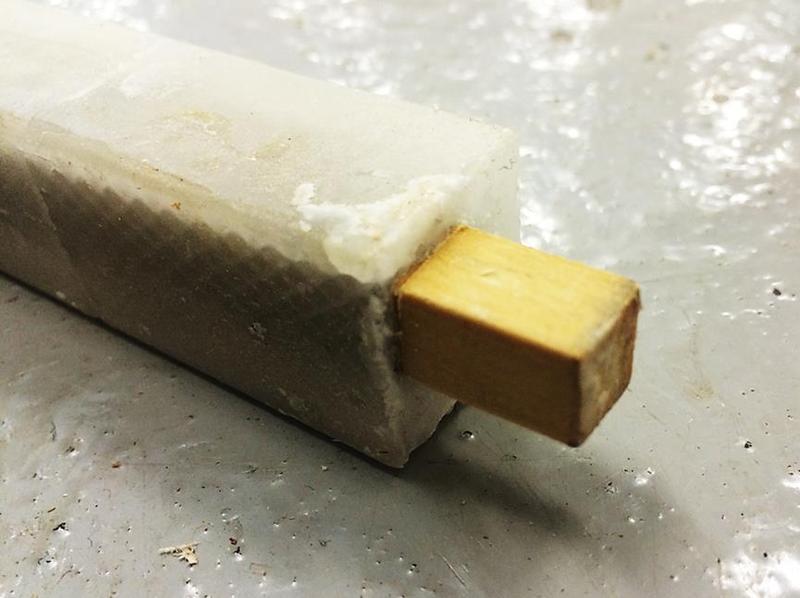
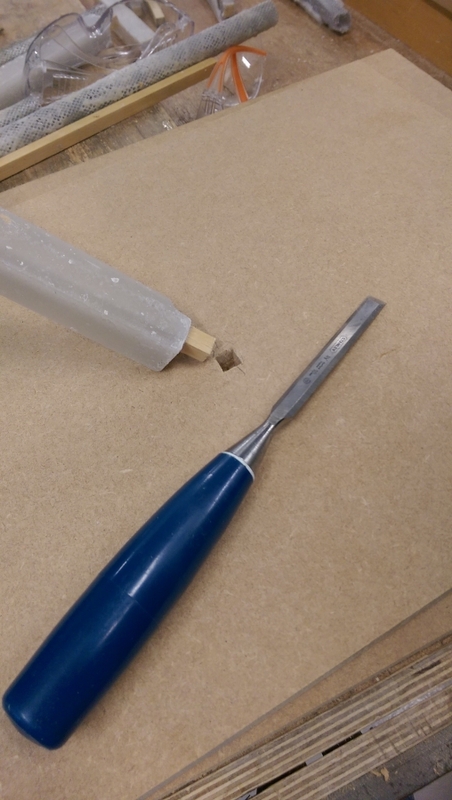
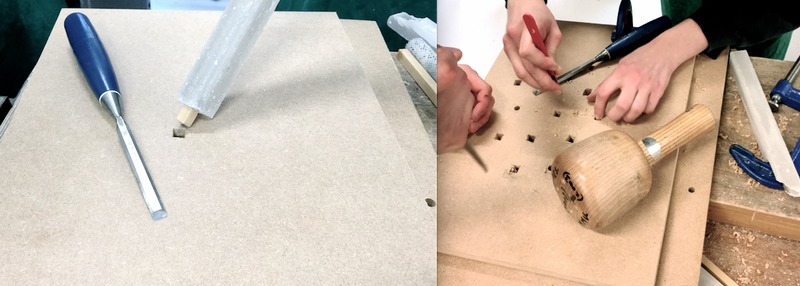
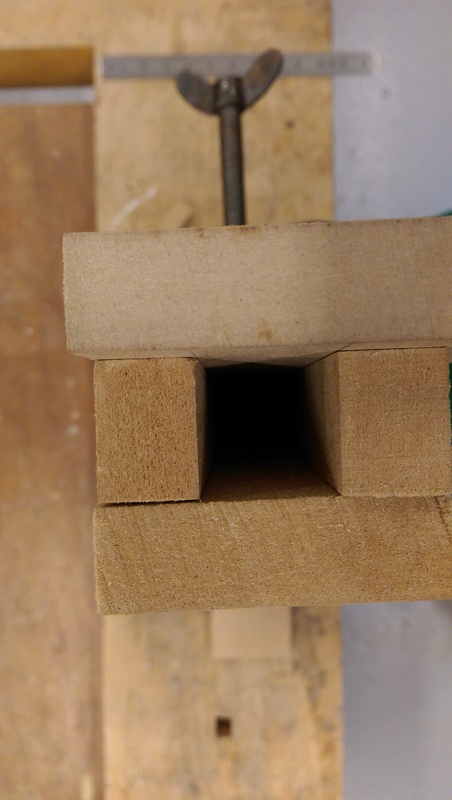
For the base, holes were drilled and then chiseled to fit the square dowels protruding from the bottom of the cast wax 'skyscrapers' to fix them in place
Posted 21 May 2015 16:04
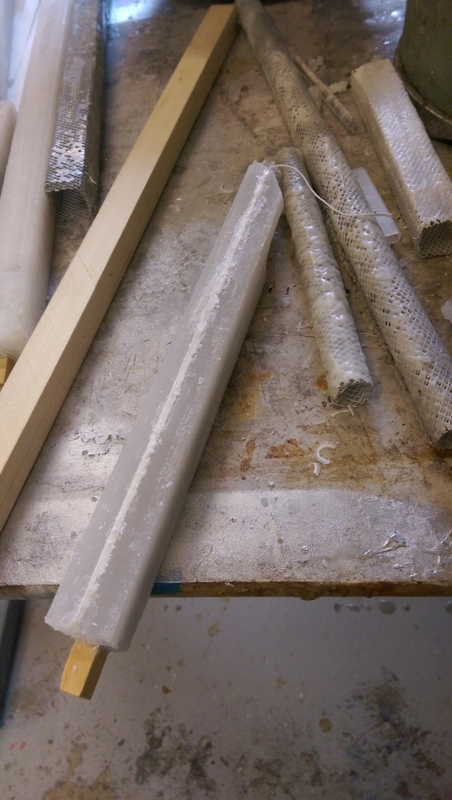
The solid wax pieces are removed from the cast, and the dowel and mesh cut down to size
Posted 21 May 2015 16:00
In order to give the wax structure, a wooden dowel wrapped in wire mesh was placed in the cast with the wax solidifying around it
Posted 21 May 2015 15:57
Experimenting with combining several techniques in one sculpture - casting and painting wax onto wire mesh.
Posted 21 May 2015 15:54
Wooden casts for the melted wax to be poured in
Posted 21 May 2015 15:52
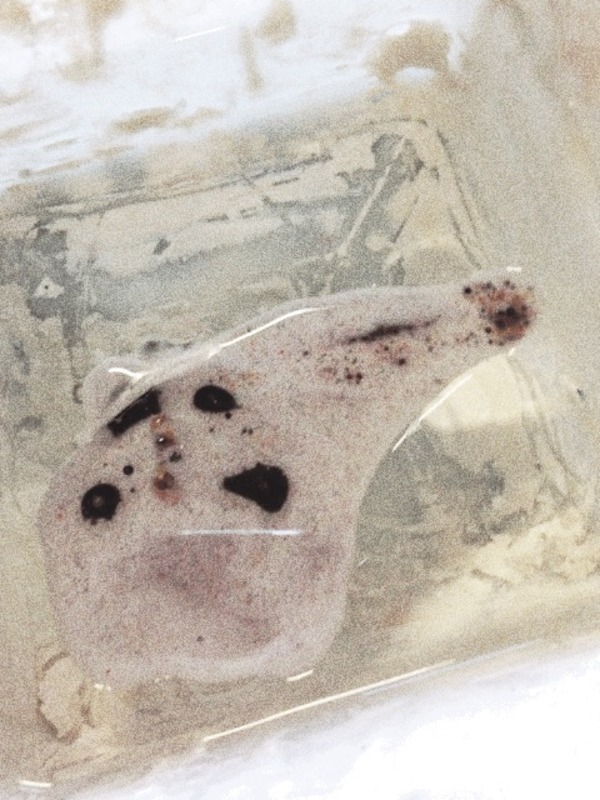
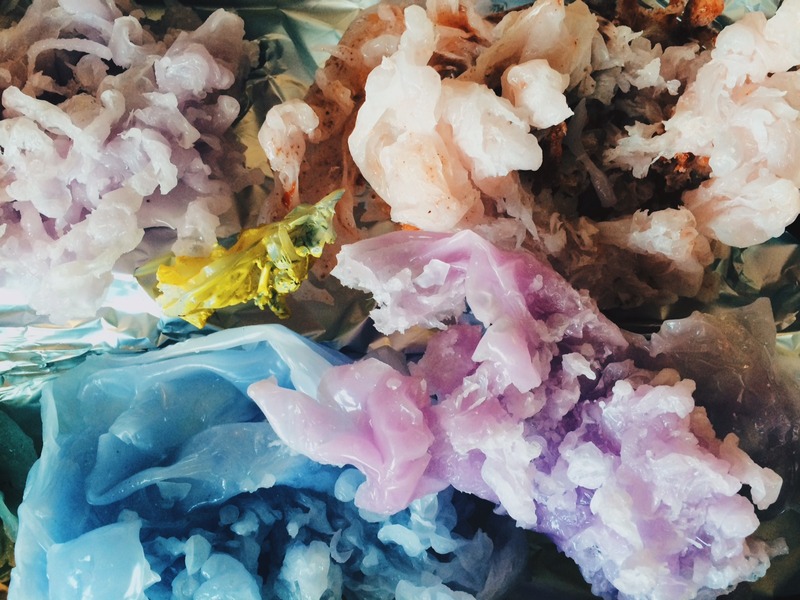
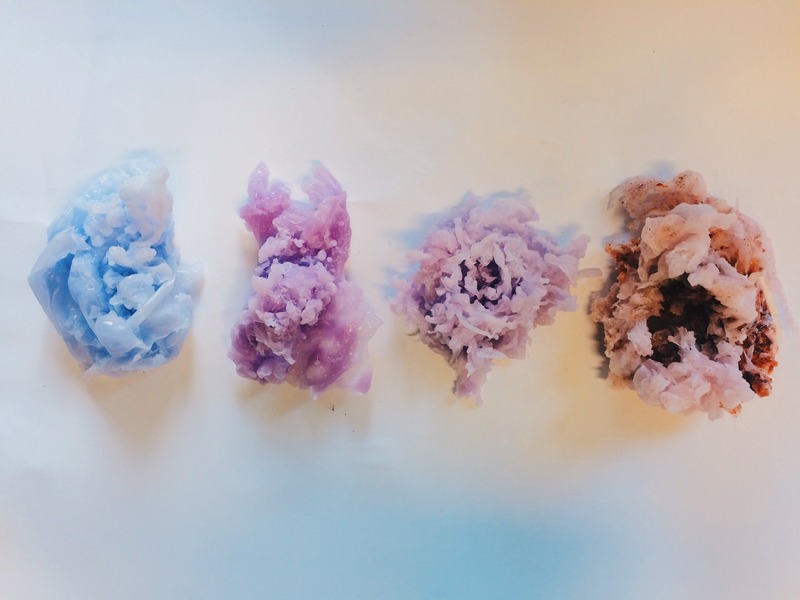
Day 2 // Colour Experimentation. We then put the ink directly into the hot wax to see if this would better colour the wax.
Posted 21 May 2015 12:15
Day 2 // Colour Experimentation. Our first thought was to ink the water to see if any of the colour would mix in with the hot wax.
Posted 21 May 2015 12:05
Day 2 // Experimentation. We liked the organic structures that were formed when we immersed the wax into water and this was the idea we wanted to experiment with further. We then decided to experiment by using colour.
Posted 21 May 2015 12:03
Day 1// Understanding the Material. We looked at moulding the wax buy pouring it onto a wire mould. We also moulded the wax by pouring into water and explored how the temeperature of the water affects how the wax behaves. The photograph shows some of our experimentations.
Posted 21 May 2015 11:59
Day 1 // Understanding the Material. Our first experiementation session we used it to test the different ways to form the wax.
Posted 21 May 2015 11:51
Today we finished our wax 'cityscape' - ready for melting.
Posted 20 May 2015 21:09
Making the base for the final outcome: making holes by drilling and using a chisel.
Posted 20 May 2015 21:03
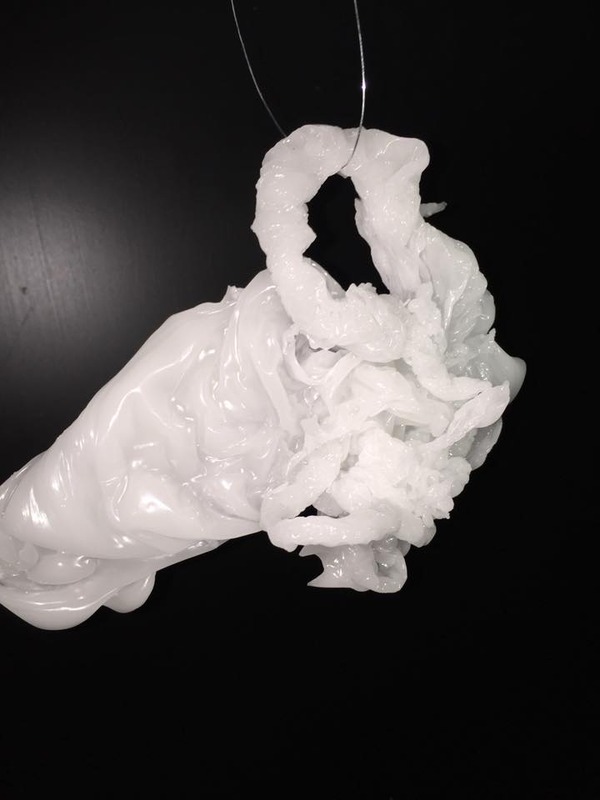
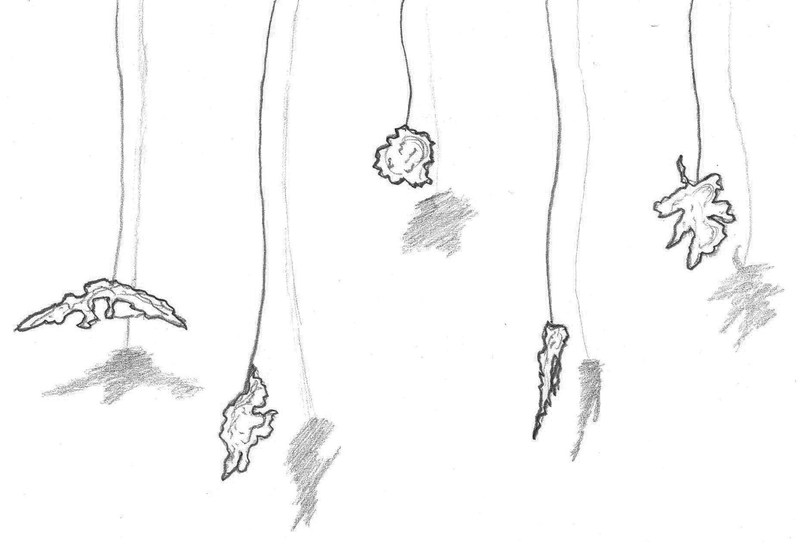
Hanging Wax
The initial idea after the first experiments was to hang the wax forms via fishing line and light them to show the translucent properties of the material
Posted 20 May 2015 19:26
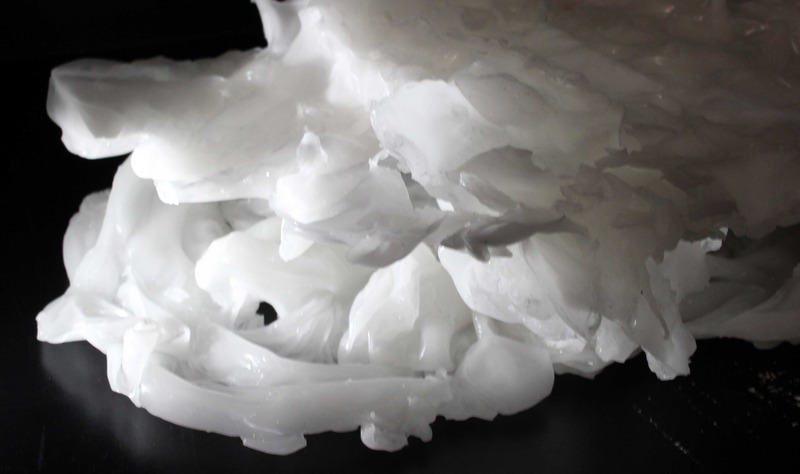
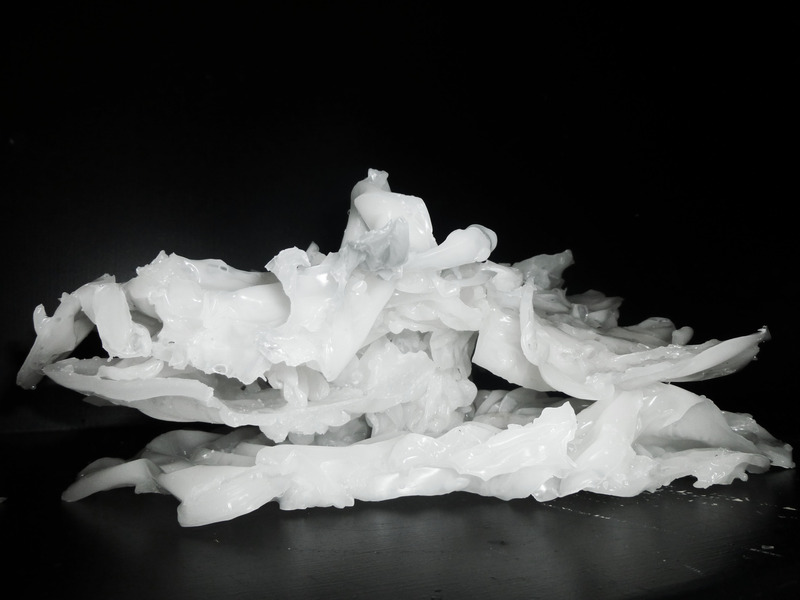
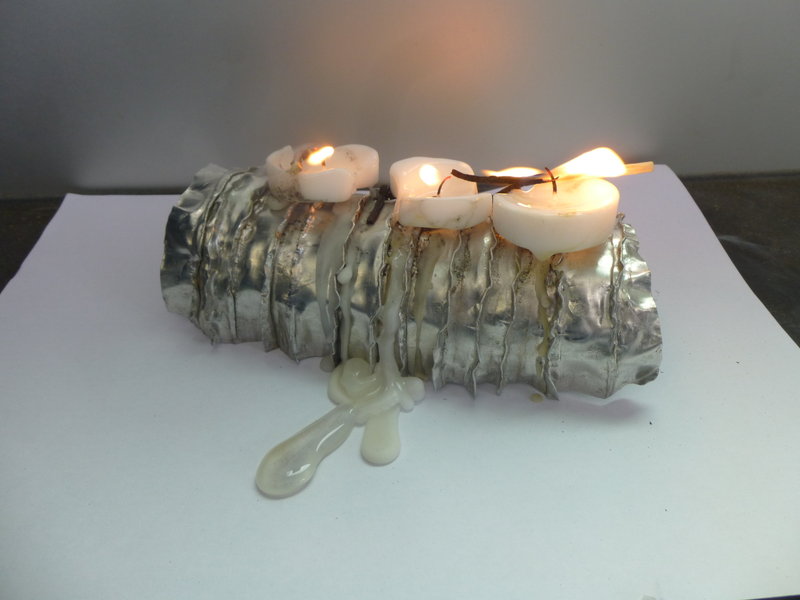
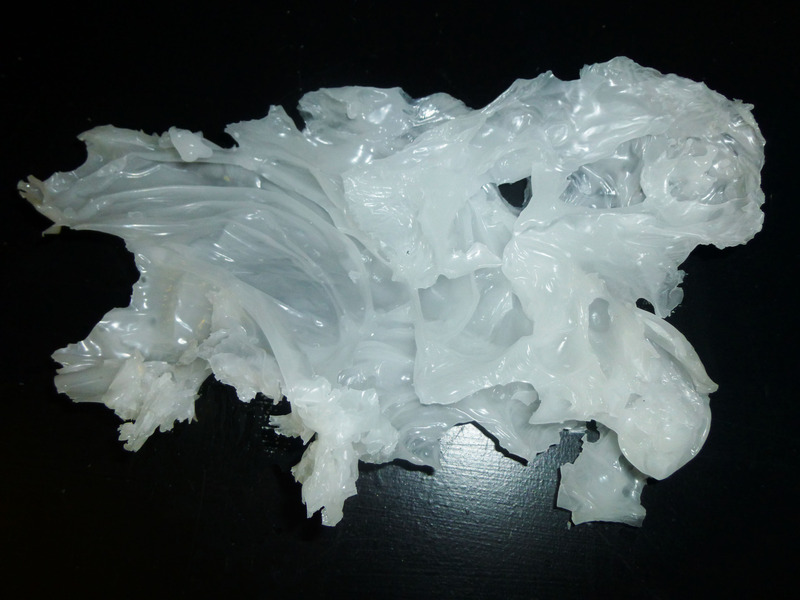
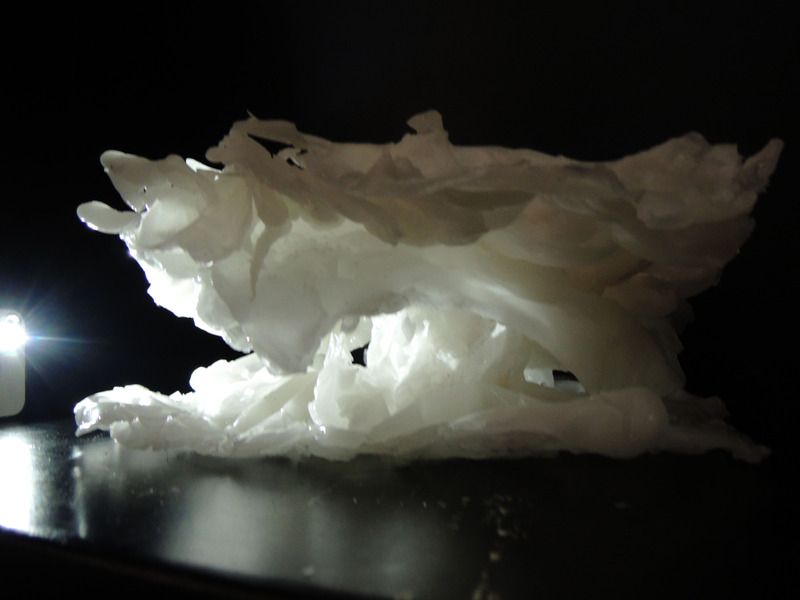
the final piece has a variety of textures
Posted 20 May 2015 16:15
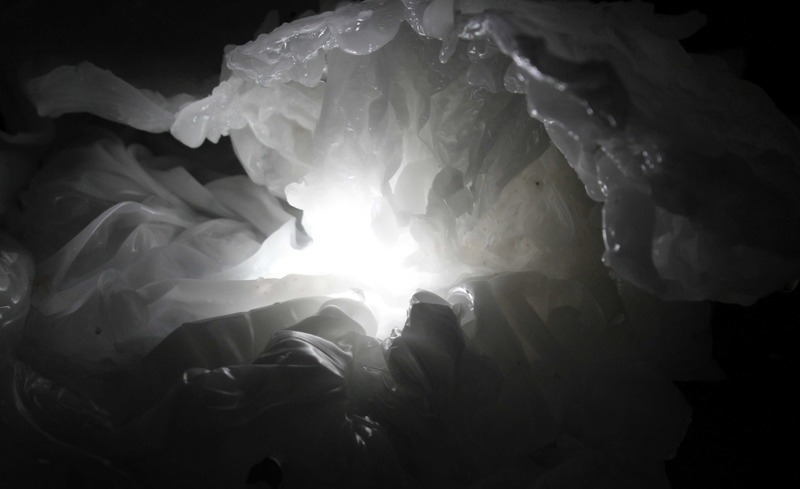
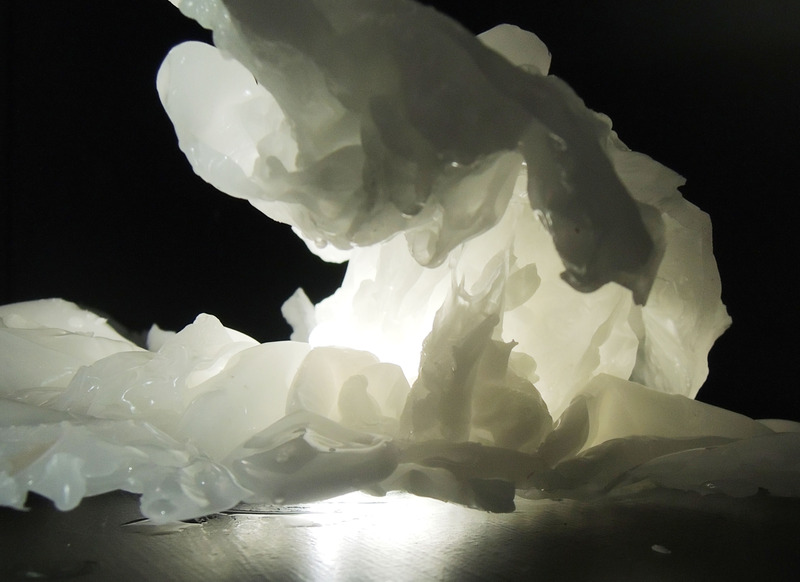
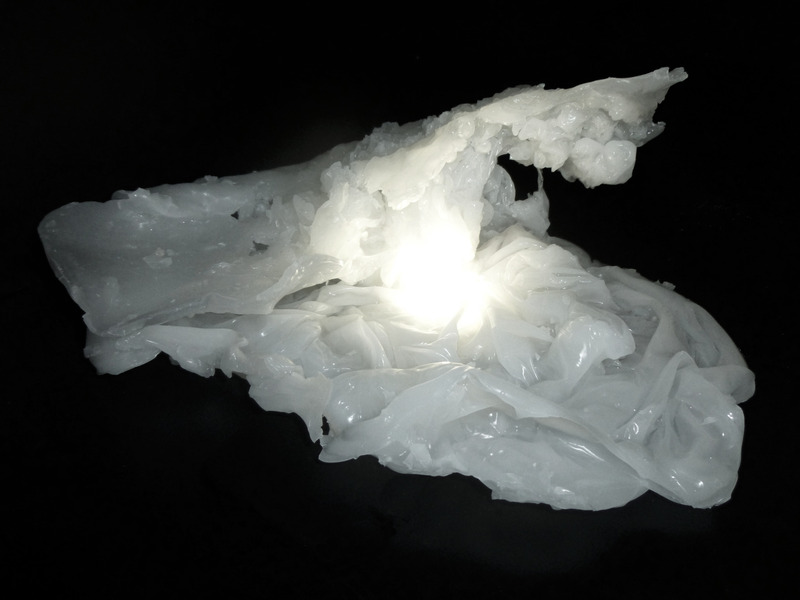
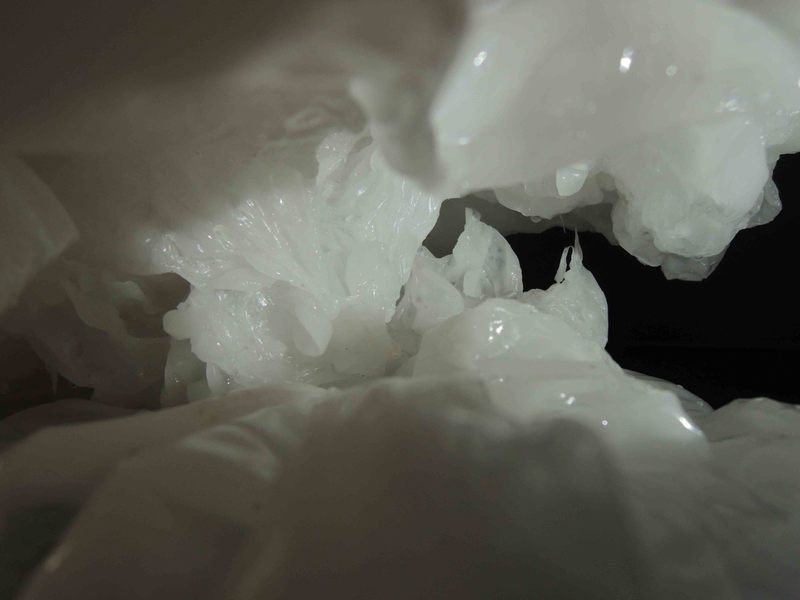
experimenting with different lights on our final product
Posted 20 May 2015 16:11
Our final product was built up in three sections, through using water to cool the wax and create the form. The form was inspired by caves, and reflects the natural form. The space can then be explored with light and shade.
Posted 20 May 2015 13:04
In the second week we had established our concept fully deciding to focus on the interaction with light and how wax can form an enclosure which represents natural forms.
Posted 20 May 2015 12:58
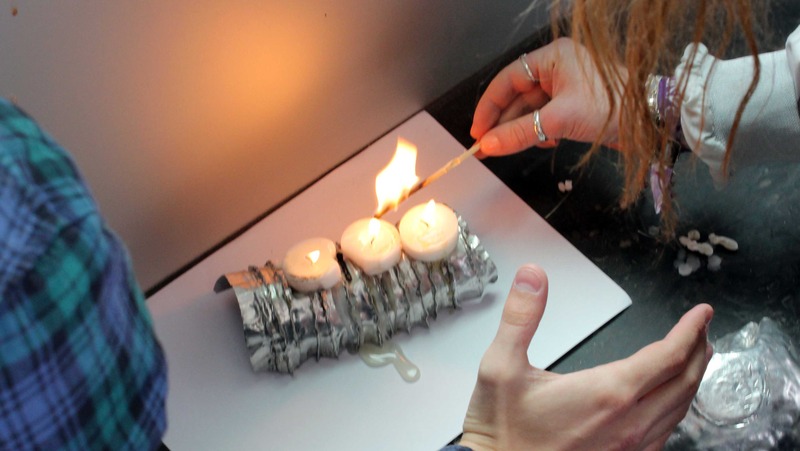
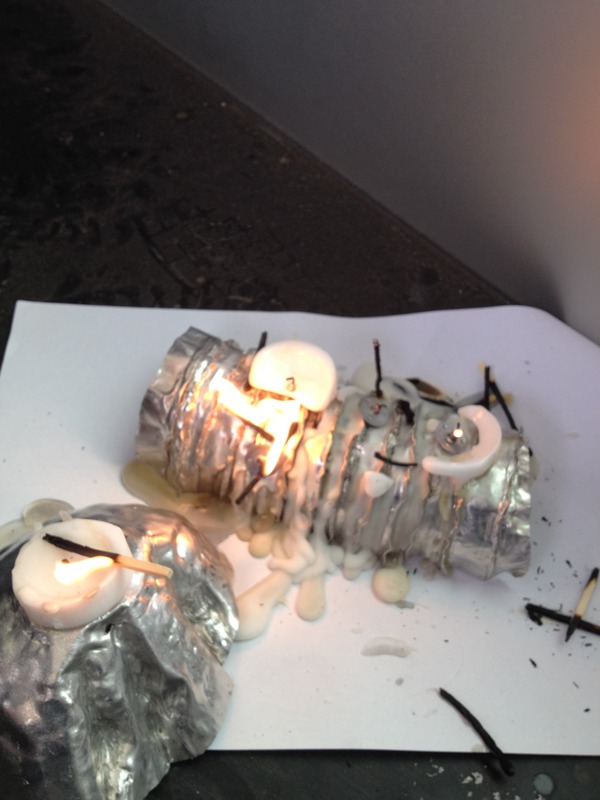
On our second day of experimentation we decided to look at how burning candles and the wax which is melted this way reacts with other objects. It is a slower process, but gets some interesting results.
Posted 20 May 2015 12:56
While waiting for the casting wax to set we prepared wire mesh structures to be painted on with wax later.
Posted 19 May 2015 20:28
Casting wax_2nd trial: result. The wax "skyscrapers" came out well with sharp edges so we continued with this method for another batch.
Posted 19 May 2015 20:22
Casting wax_2nd trial: this time we used Vaseline, applying it to the mould, so the wax wouldn't stick to the sides like last time.
Posted 19 May 2015 20:06
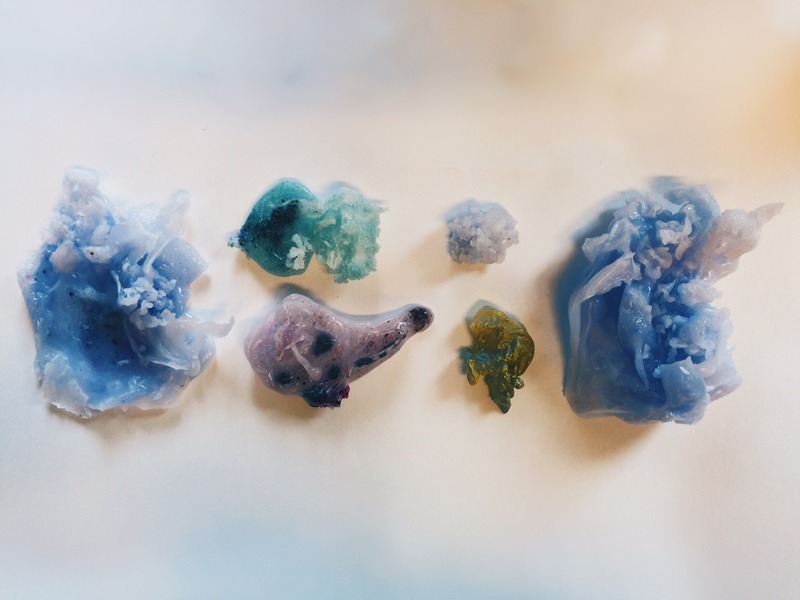
Experiment One, this initial experiment was produced to see how the wax would be sculpted by cold water. Through observation it seemed that the faster the wax is poured the more extruded the shape becomes
Posted 19 May 2015 15:57
We started to pour the wax into the water in stages, allowing the the wax to harden in between. This gave the model different levels, creating different spaces.
Posted 19 May 2015 14:23
On day 2 we used and expanded on one of our experiments from day 1
Posted 18 May 2015 23:35
Day 1: Experiments with lighting on the forms we made
Posted 18 May 2015 23:15
Experimenting with burning tealights over scrap metal
Posted 18 May 2015 23:09
{140515 // we then realize that the shapes created look like corals and somehow this may be our initial idea for the final products}
Posted 16 May 2015 00:07
{140515 // products of day two's experimentations}
Posted 16 May 2015 00:04
{140515 // the organic shape formed through swirling the water, we then also realize altering the temperature of the water allows us to shape the wax before it hardens}
Posted 16 May 2015 00:03
{140515 // on the second day we explore more of the water immersion method by swirling the water- this results in a rather natural looking form}
Posted 16 May 2015 00:00
{130515 // more abstract products from day one}
Posted 15 May 2015 23:56
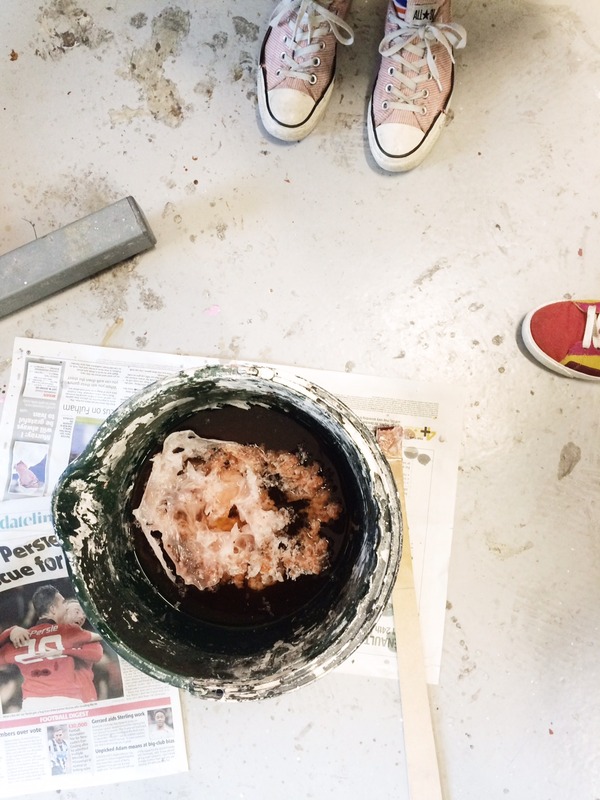
{130515 // first prototype of the project, the initial start up of testing ink on wax}
Posted 15 May 2015 23:51
{130515 // on the first day we started of by using water immersion method to create different shapes}
Posted 15 May 2015 23:49
{130515 // initial starting point: melting wax}
Posted 15 May 2015 23:47
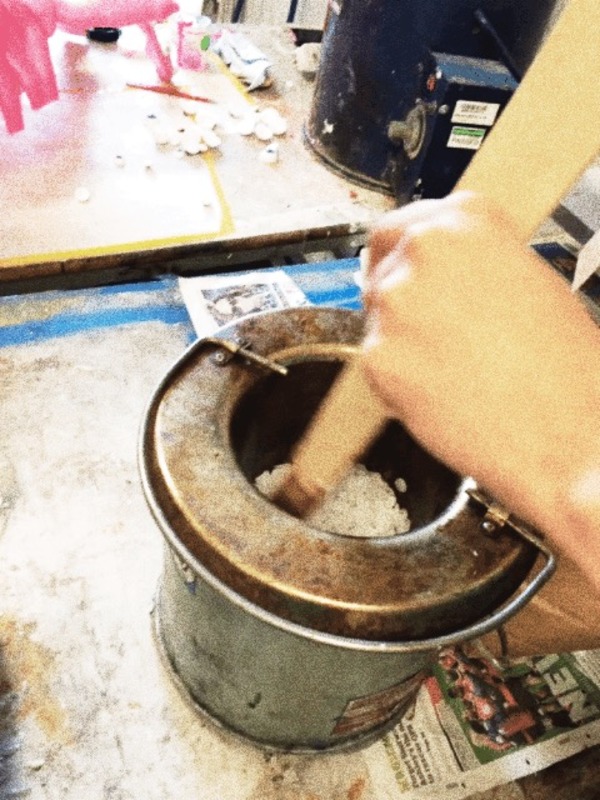
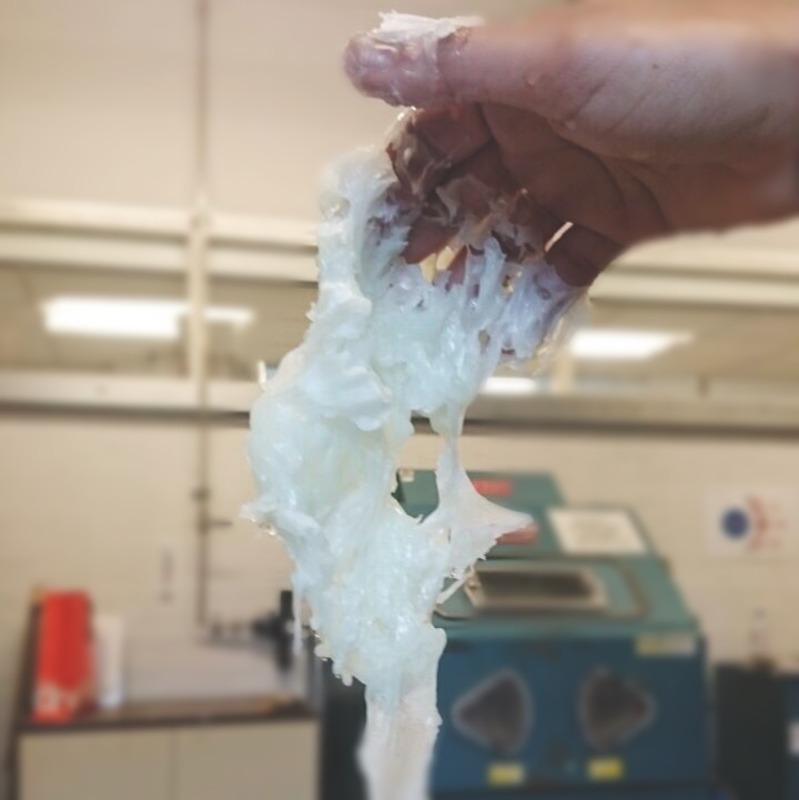
Melting wax using a hair dryer - it was very slow so we might look for other methods applying direct flames for it to melt faster.
Posted 14 May 2015 22:55
Casting wax: wooden mould and wire mesh structure.
Posted 14 May 2015 22:49
Today we tested casting wax and painting wax onto a wire mesh structure. The casting didn't come out as we planned as some part of the wax stuck to the mould. Next time we will give more time for the wax to dry and find methods for it not to stick to the sides of the mould.
Posted 14 May 2015 22:45
We also decided to try a new method and started to experiment with melting the wax. We melted tea lights over a metal tube to see how the wax would flow and move naturally.
Posted 14 May 2015 20:24
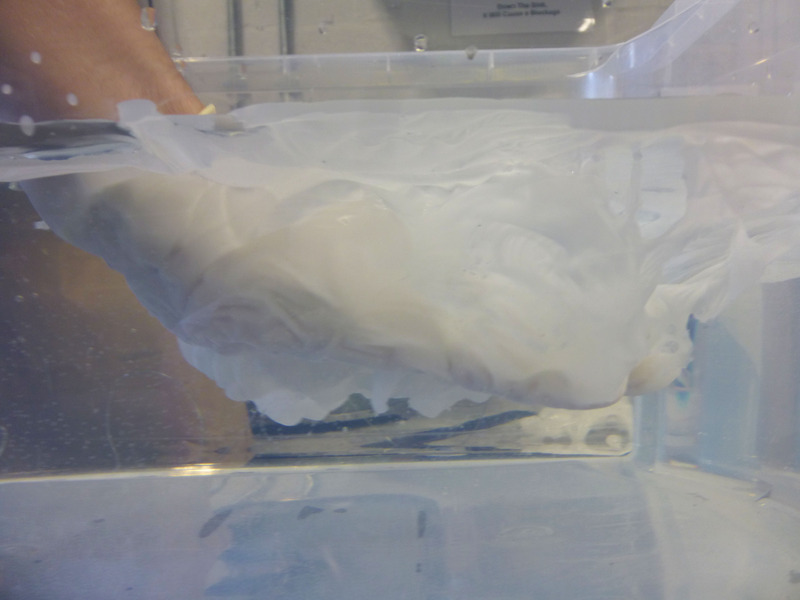
Today we experimented by pouring more wax over an existing model. This created a cave like space. We will try to explore this method more in the next session and include it in our final model.
Posted 14 May 2015 20:04
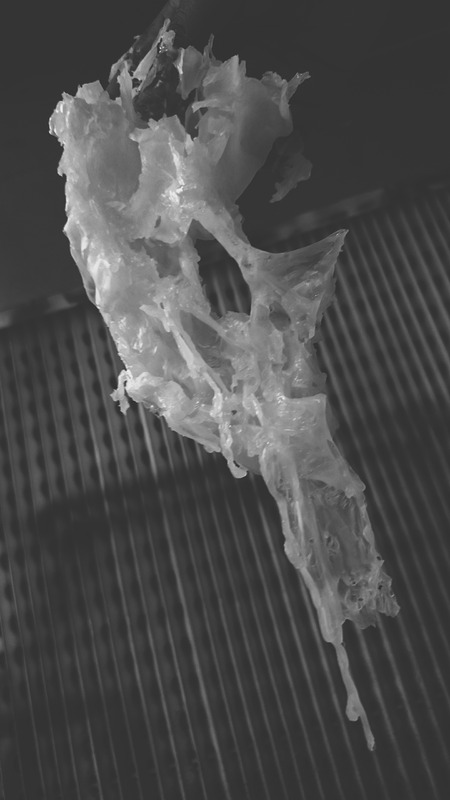
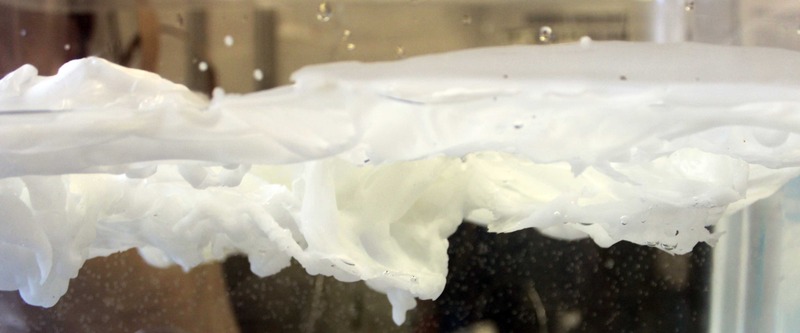
Here is a photograph of one of the wax sculptures made from pouring the wax into the water. Using this method the wax takes a more natural form compared to the other methods.
Posted 13 May 2015 18:18
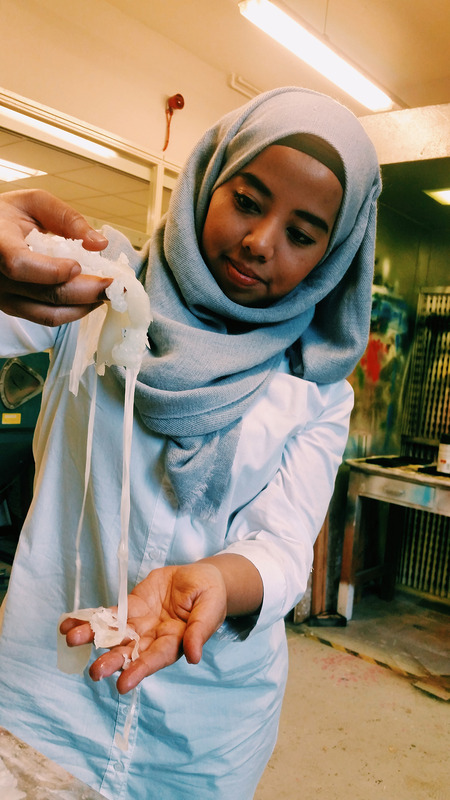
Today we experimented with the method of pouring the wax into water. This gave different end products depending on the temperature, speed, and amount of wax poured into the water.
Posted 13 May 2015 18:16
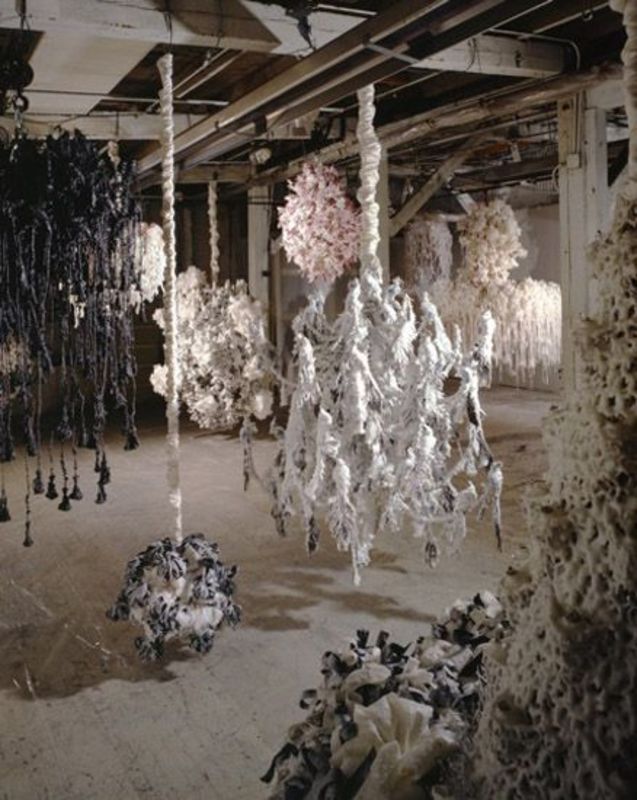
We looked at precedents of existing wax sculptures. More specifically at how sculptures can be hung and lit in different ways to cast shadows.
Posted 13 May 2015 13:51
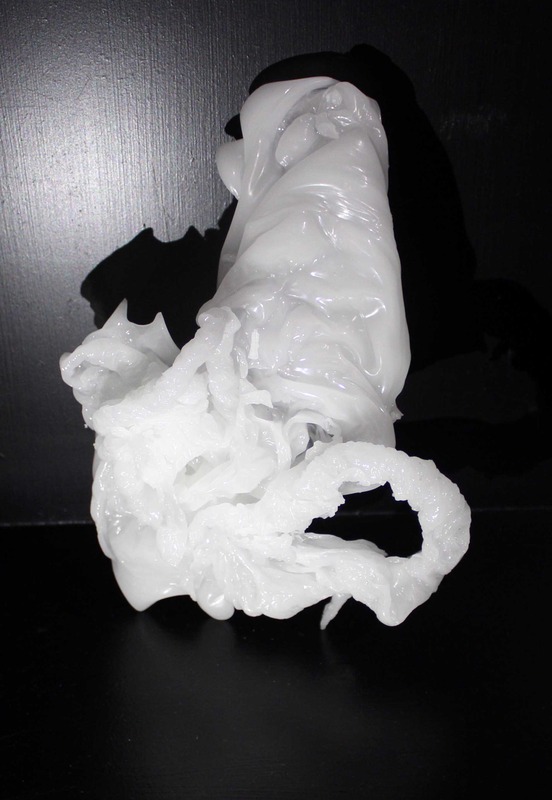
Experimental wax product resulted from immersion of hot wax into cold water using fast controlled pouring method.
Posted 13 May 2015 12:29
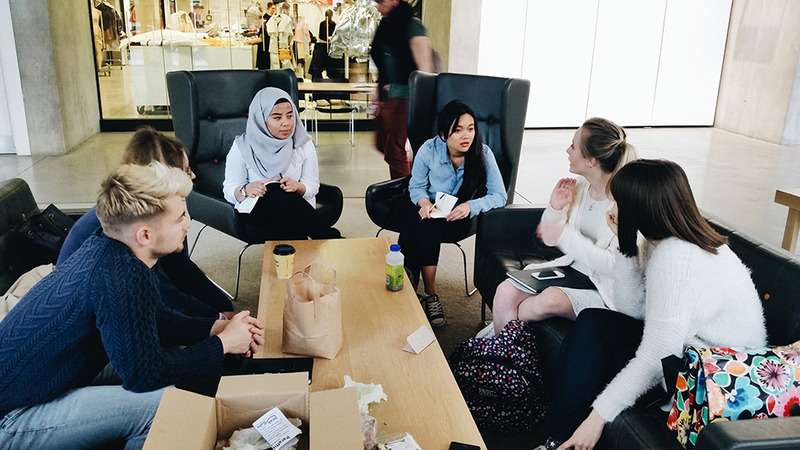
DAY 2
Brainstorming session!
Posted 13 May 2015 12:16
Form flexibility | experiment through different methods to test out the material behaviour
Posted 13 May 2015 12:14
hand immersion in warm-wax
Posted 13 May 2015 11:54
DAY 2
Some of the model that we've produce during the induction! Can't wait to see the final outcome for review!
Posted 13 May 2015 11:52
wax-selfie
Posted 13 May 2015 11:50
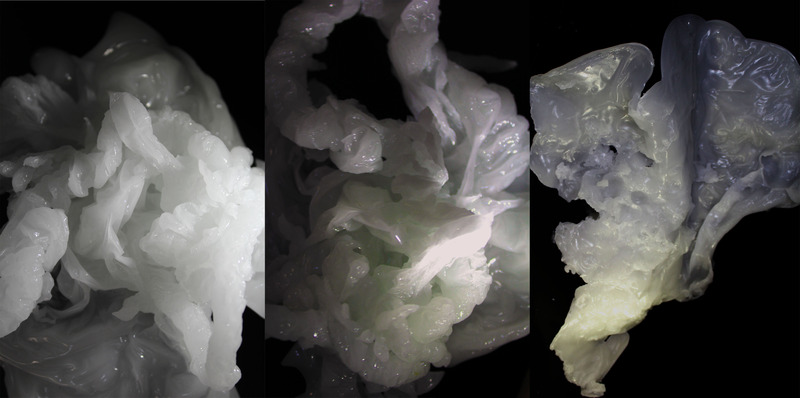
Following our experiments we decided we should photograph our end results with different light intensities and at different angles. In some cases the wax sculptures represented inhabitable spaces. From this we will continue to develop our concept by using wire which will hang the wax in an installation.
Posted 13 May 2015 11:45
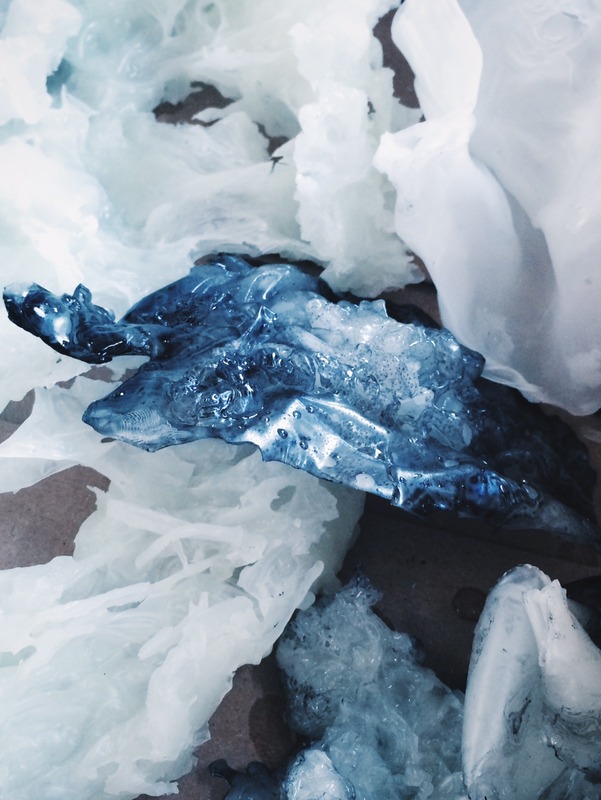
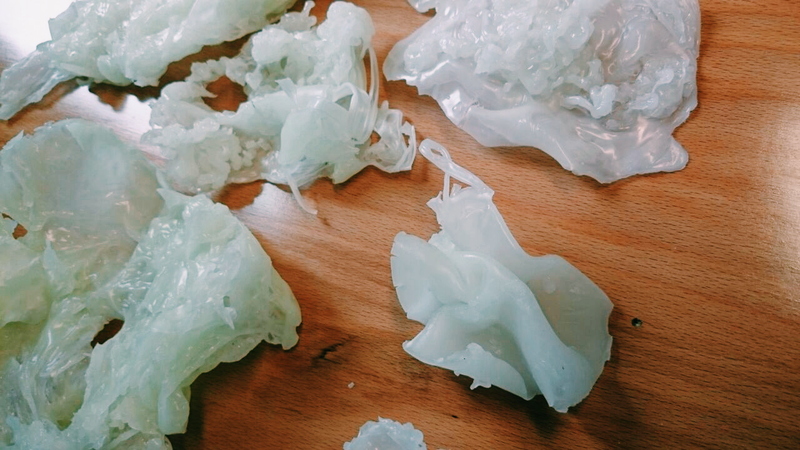
The result from pouring the wax into the water is different every time and depends on the amount of wax, the temperature and the materials which are used to manipulate the wax when in the water. The wax remains translucent at different levels depending on its thickness.
Posted 13 May 2015 11:41
We began events by experimenting with the equipment and developing a concept in groups of four. Using wax and water we decided to make abstract natural forms and experiment with their interaction with light.
Posted 13 May 2015 11:38
Day 2: introduction of how to handle wax in our very own chem workshop!
Posted 13 May 2015 11:34
Today we started to think about the designs of our wax sculptures. We have decided to hang our different wax forms using wire.
Posted 12 May 2015 18:13